If you find yourself asking, "Which MIDI controller suits me best?" or if you're in search of a new addition to your existing controller lineup, you're in the right place. In this article, we'll explore various MIDI controller options, weigh their pros and cons, and provide insights to help you make an informed decision on the perfect MIDI controller for your visual performances.
Read MoreHercules P32 DJ VDMX Template

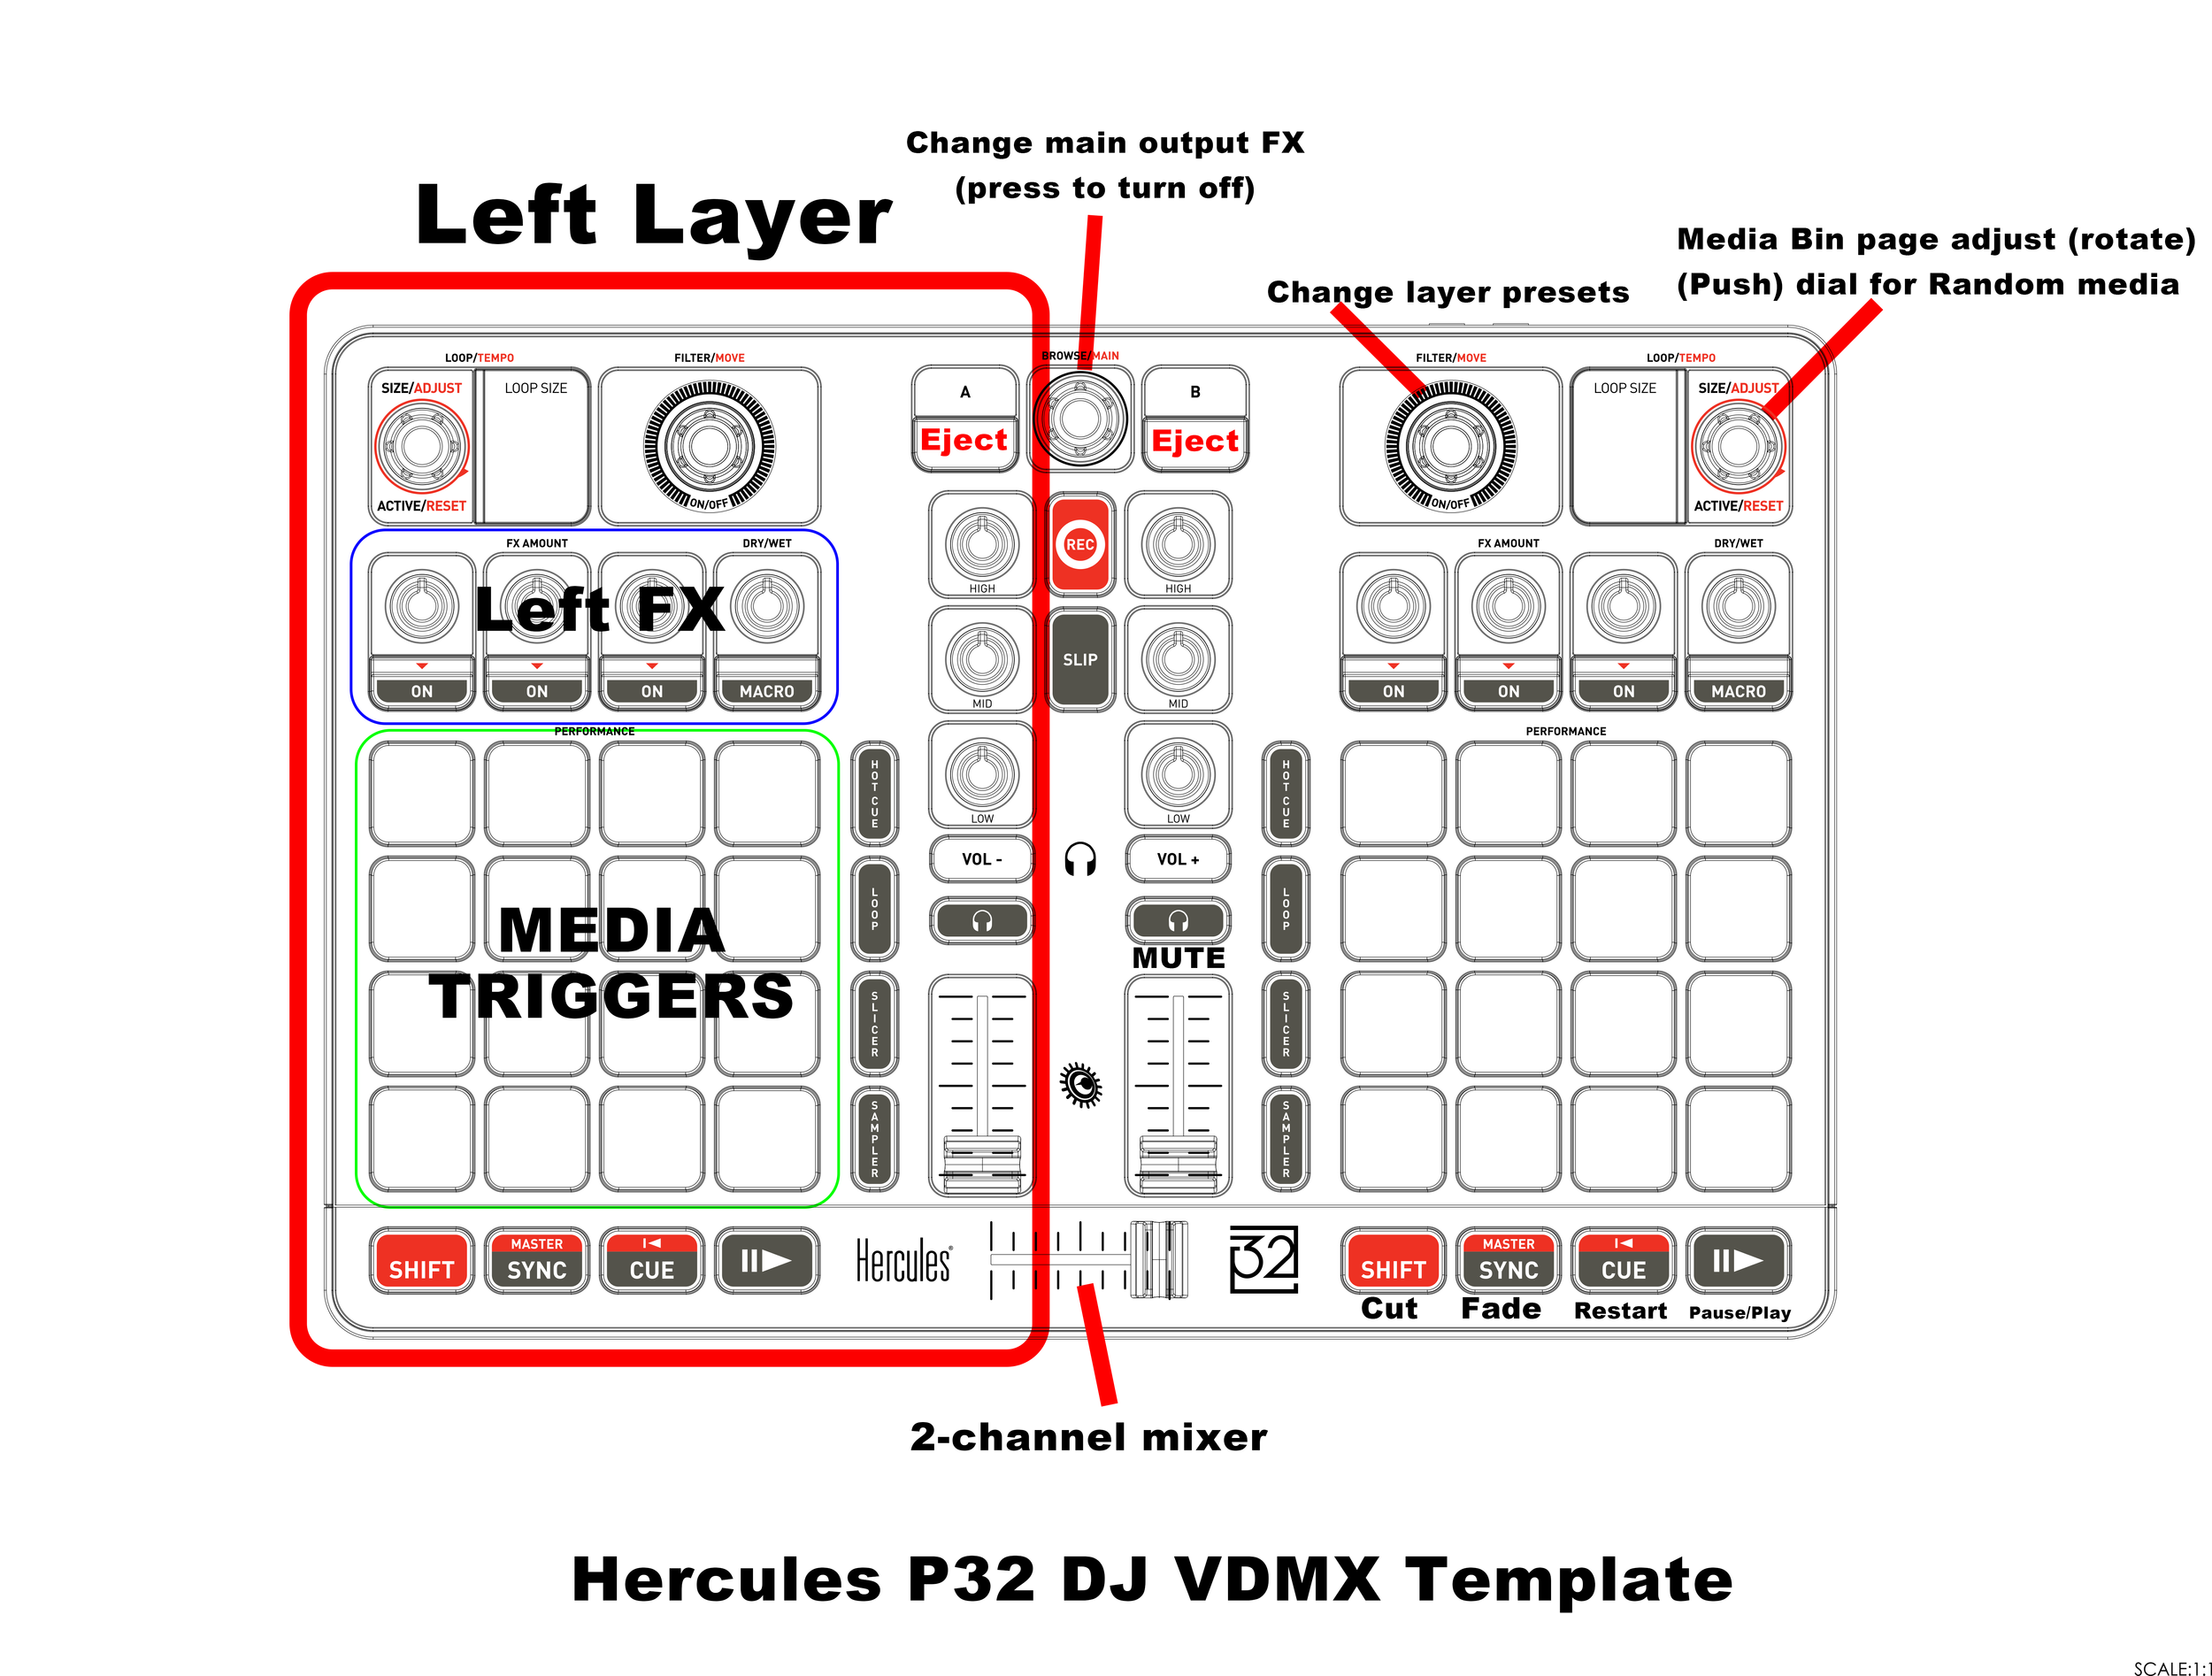
To keep up with the times, we are releasing another VDMX template for the Hercules P32 DJ MIDI controller.
With it’s 32 pads, 19 knobs and three sliders, the P32 DJ is a jam packed MIDI controller for its size. A littler smaller than a 16” MacBook Pro, the P32 has soft pads with a higher quality feel than some entry level MIDI controllers.
For this template, the native 2 channel DJ style layout, is perfect for a VDMX 2-channel video mixer layout.
Additionally, the P32 DJ has a built in audio interface that supports stereo RCA out, and 1/4” TRS port for headphone monitoring, allowing you to DJ and VJ from the same device.

To install templates in VDMX go to: ‘Your Drive’ > Users > ‘username’ > Library > Application Support > VDMX > templates
Download here: Template File
We’ve included templates, project files, and reference images. You will need an active VDMX license to open the project files.
More about the template:
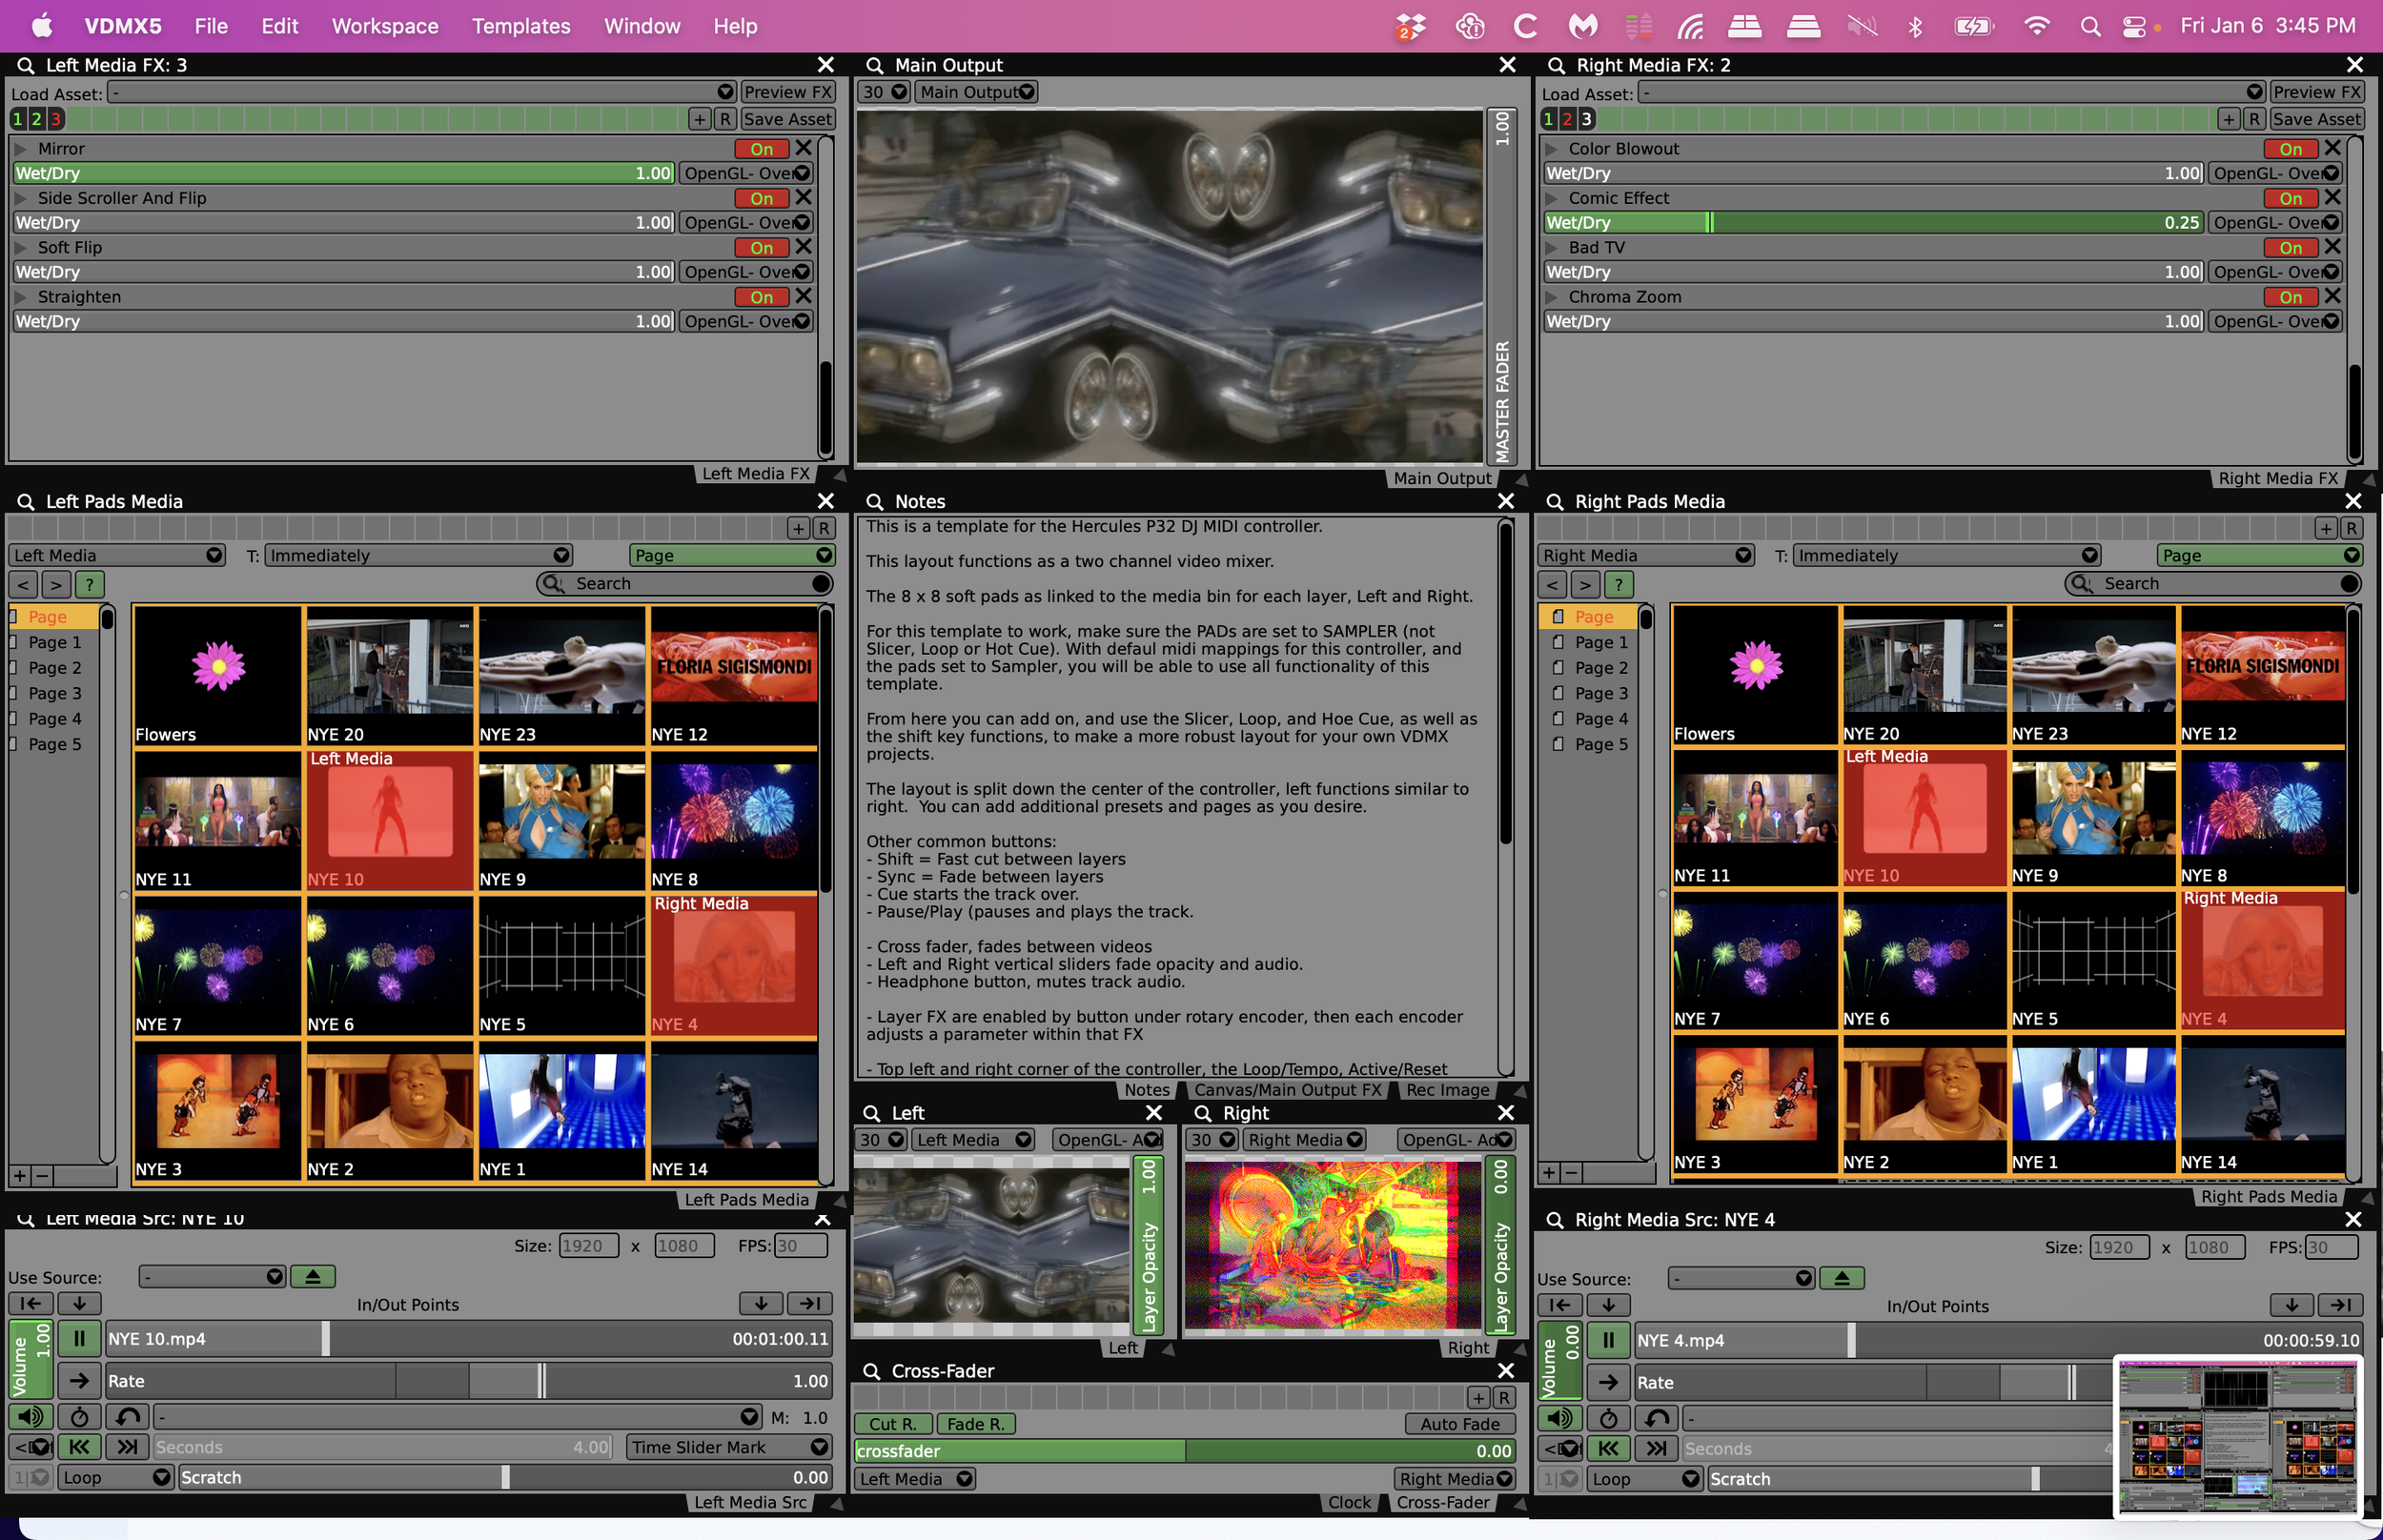
This is a template for the Hercules P32 DJ MIDI controller.
This layout functions as a two channel video mixer.
The 8 x 8 soft pads as linked to the media bin for each layer, Left and Right.
For this template to work, make sure the PADs are set to SAMPLER (not Slicer, Loop or Hot Cue). With defaul midi mappings for this controller, and the pads set to Sampler, you will be able to use all functionality of this template.
From here you can add on, and use the Slicer, Loop, and Hoe Cue, as well as the shift key functions, to make a more robust layout for your own VDMX projects.
The layout is split down the center of the controller, left functions similar to right. You can add additional presets and pages as you desire.
Other common buttons:
- Shift = Fast cut between layers
- Sync = Fade between layers
- Cue starts the track over.
- Pause/Play (pauses and plays the track.
- Cross fader, fades between videos
- Left and Right vertical sliders fade opacity and audio.
- Headphone button, mutes track audio.
- Layer FX are enabled by button under rotary encoder, then each encoder adjusts a parameter within that FX
- Top left and right corner of the controller, the Loop/Tempo, Active/Reset buttons scroll through the media bin pages. Pressing down on this endless rotary encoder will trigger a random video from the media bin.
- To the left and right, the Filter/Move endless rotary encoder will scroll through FX presets for each layer. Be aware, that this will reset the FX each time you move to the next preset. Pressing down on this knob will jump to an empty FX off preset.
- Record button starts recording a video of the master output.
- Slip button captures an image of the master output.
-Load A and B eject the media on each side.
- Browse/Main endless rotary encoder switches between main output FX presets. Pressing down resets to an empty preset.
-High, Mid, Low rotary encoders are currently not mapped to any MIDI controls, but could be mapped to main output FX or an action of your choice.

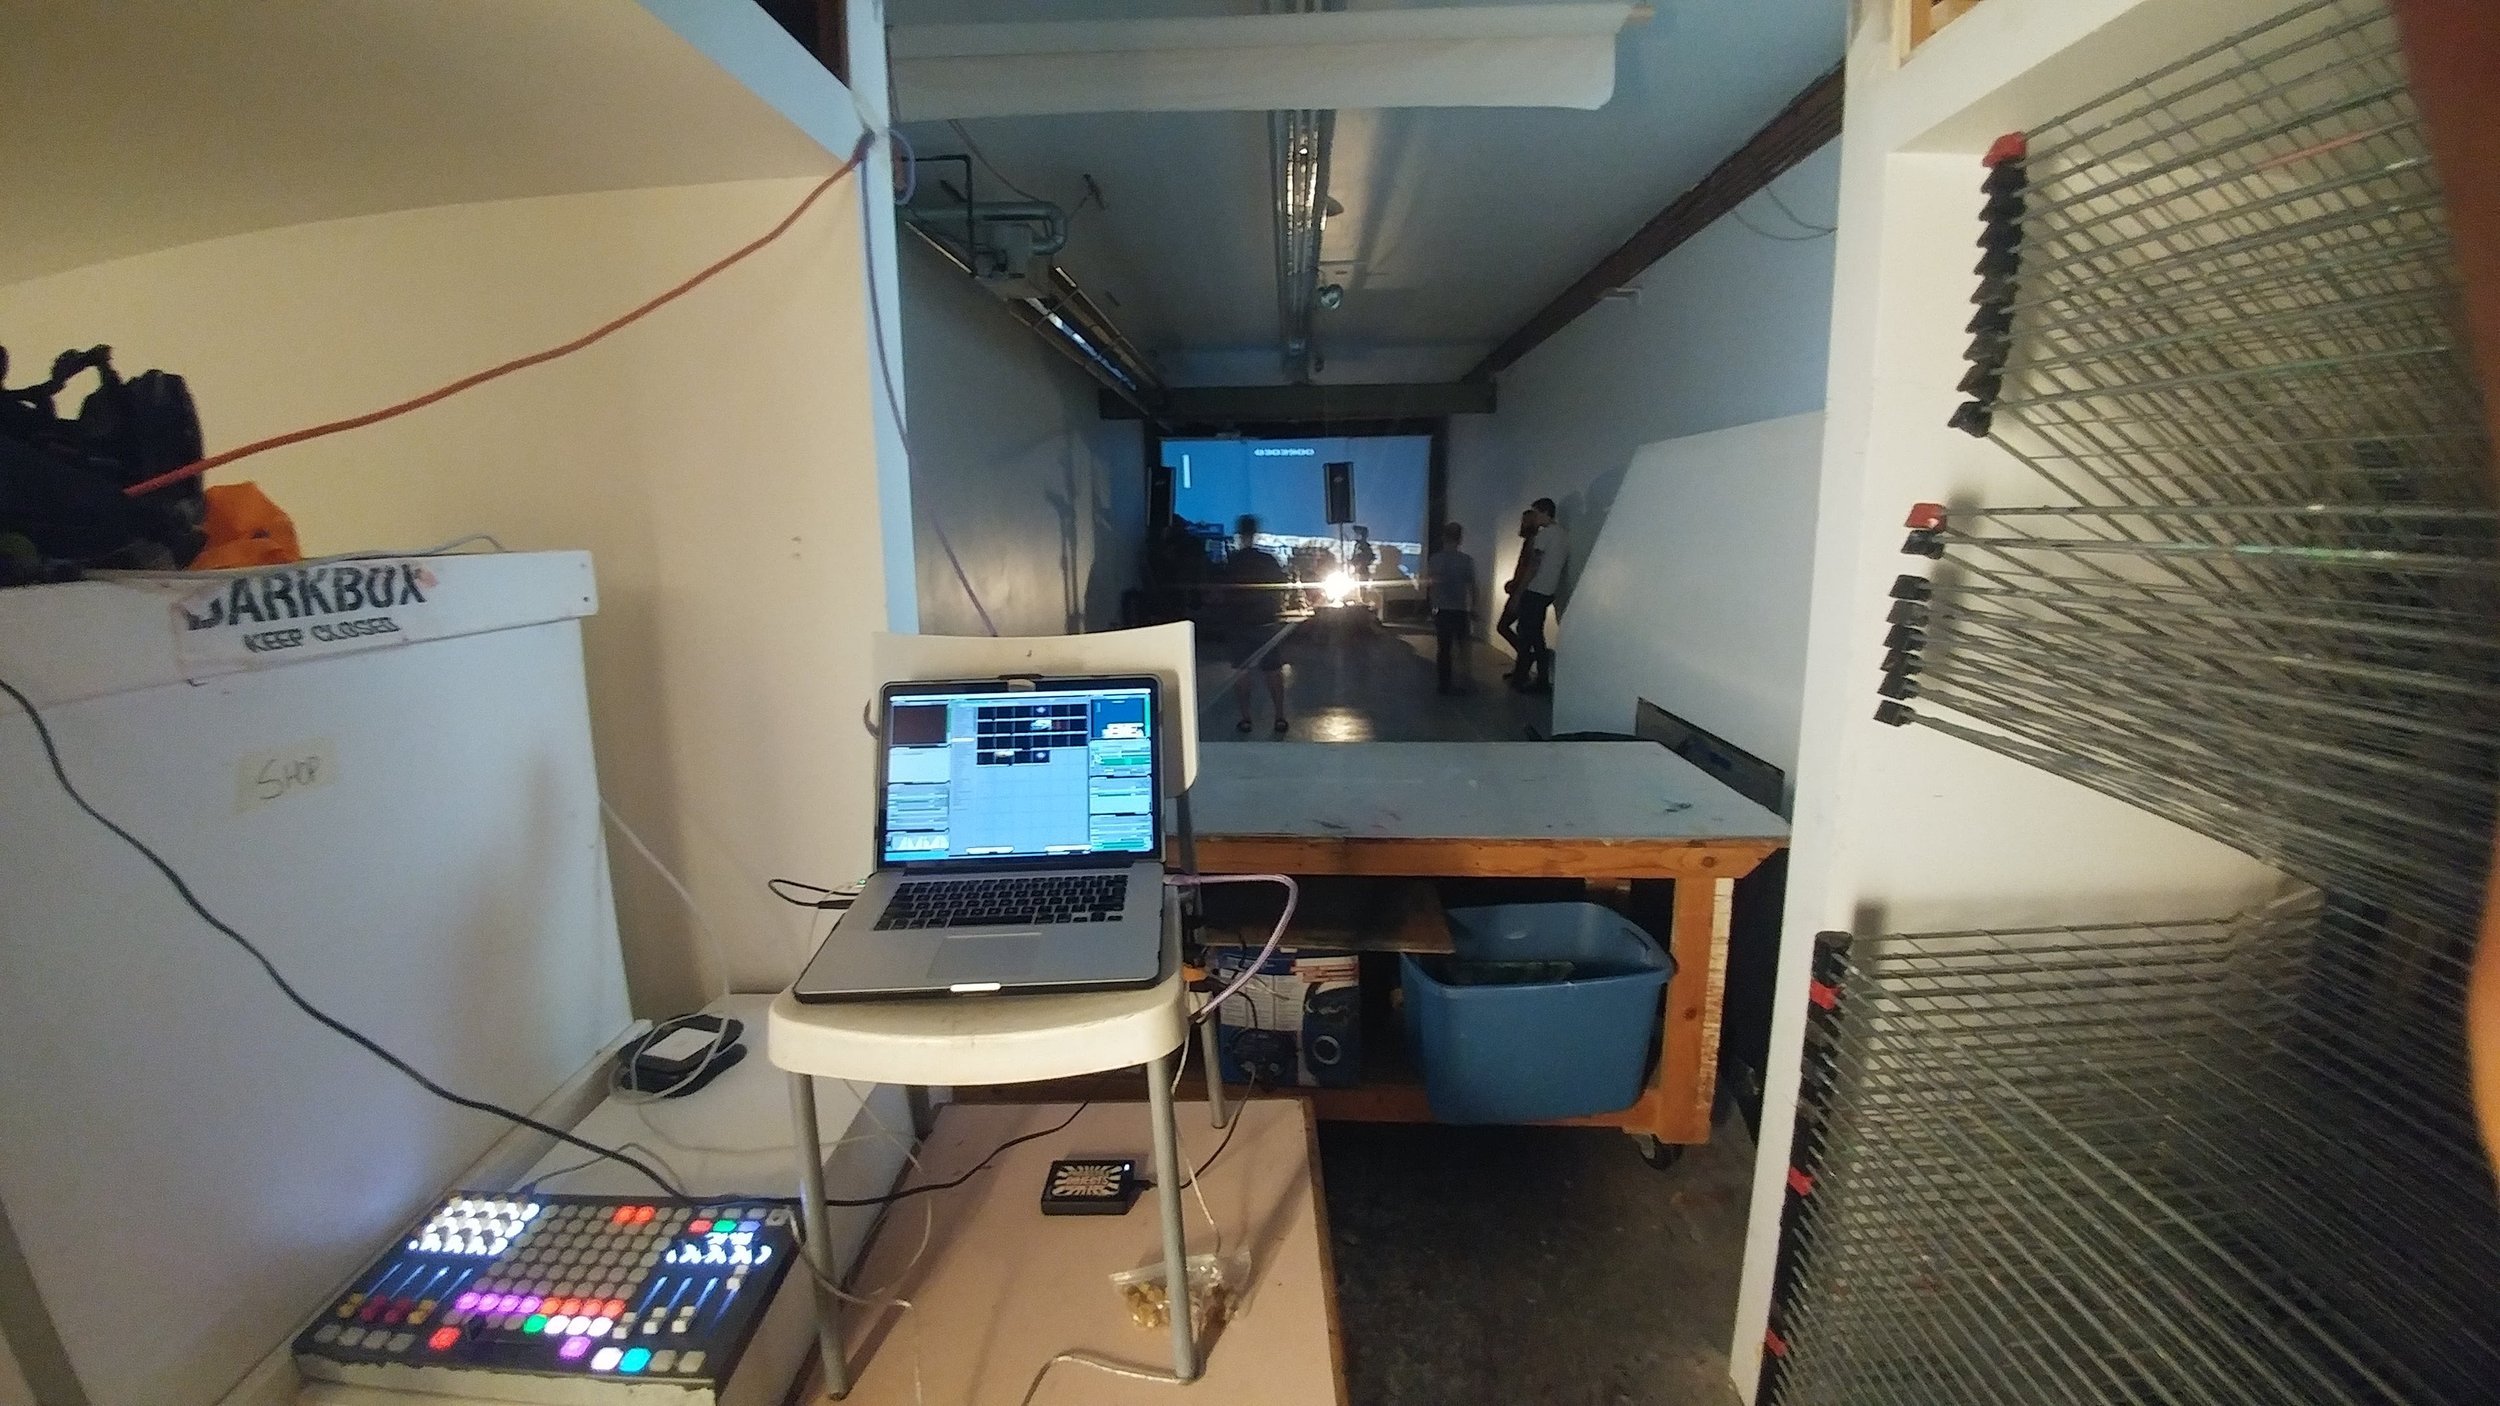
Mine S running VDMX at the Guggenheim Theater, NYC (photo @ProjectileObjects)
Getting modular with the Special Waves Mine S. VDMX custom UI tutorial
Normally when we write about a new controller, we offer up a template to get you started, but with the Special Waves Mine S controller series, we'll have to take a different approach.
For years now, users have chosen VDMX for it's modular workflow. Build out a project the way you'd like it, so when a modular MIDI controller comes along, we had to try it.
The Special Waves Mine S controller is the most budget friendly if you're out there looking for an inexpensive controller, but it does pack a range of features, quality buttons and faders, and is compact enough to fit inside any bag. Oh, and it's modular! (had to say it again).
Yes, you can build out your VDMX project, map the midi sliders, knobs, and buttons to your VDMX workspace, and then pop them out and move them around as desired without having to reconfigure the MIDI settings inside of VDMX. How cool!
Maybe you've built out a horizontal layout at your desk, but when you get to the show there's only enough space for your laptop and a vertical layout of your controller -- well, just move the buttons around!

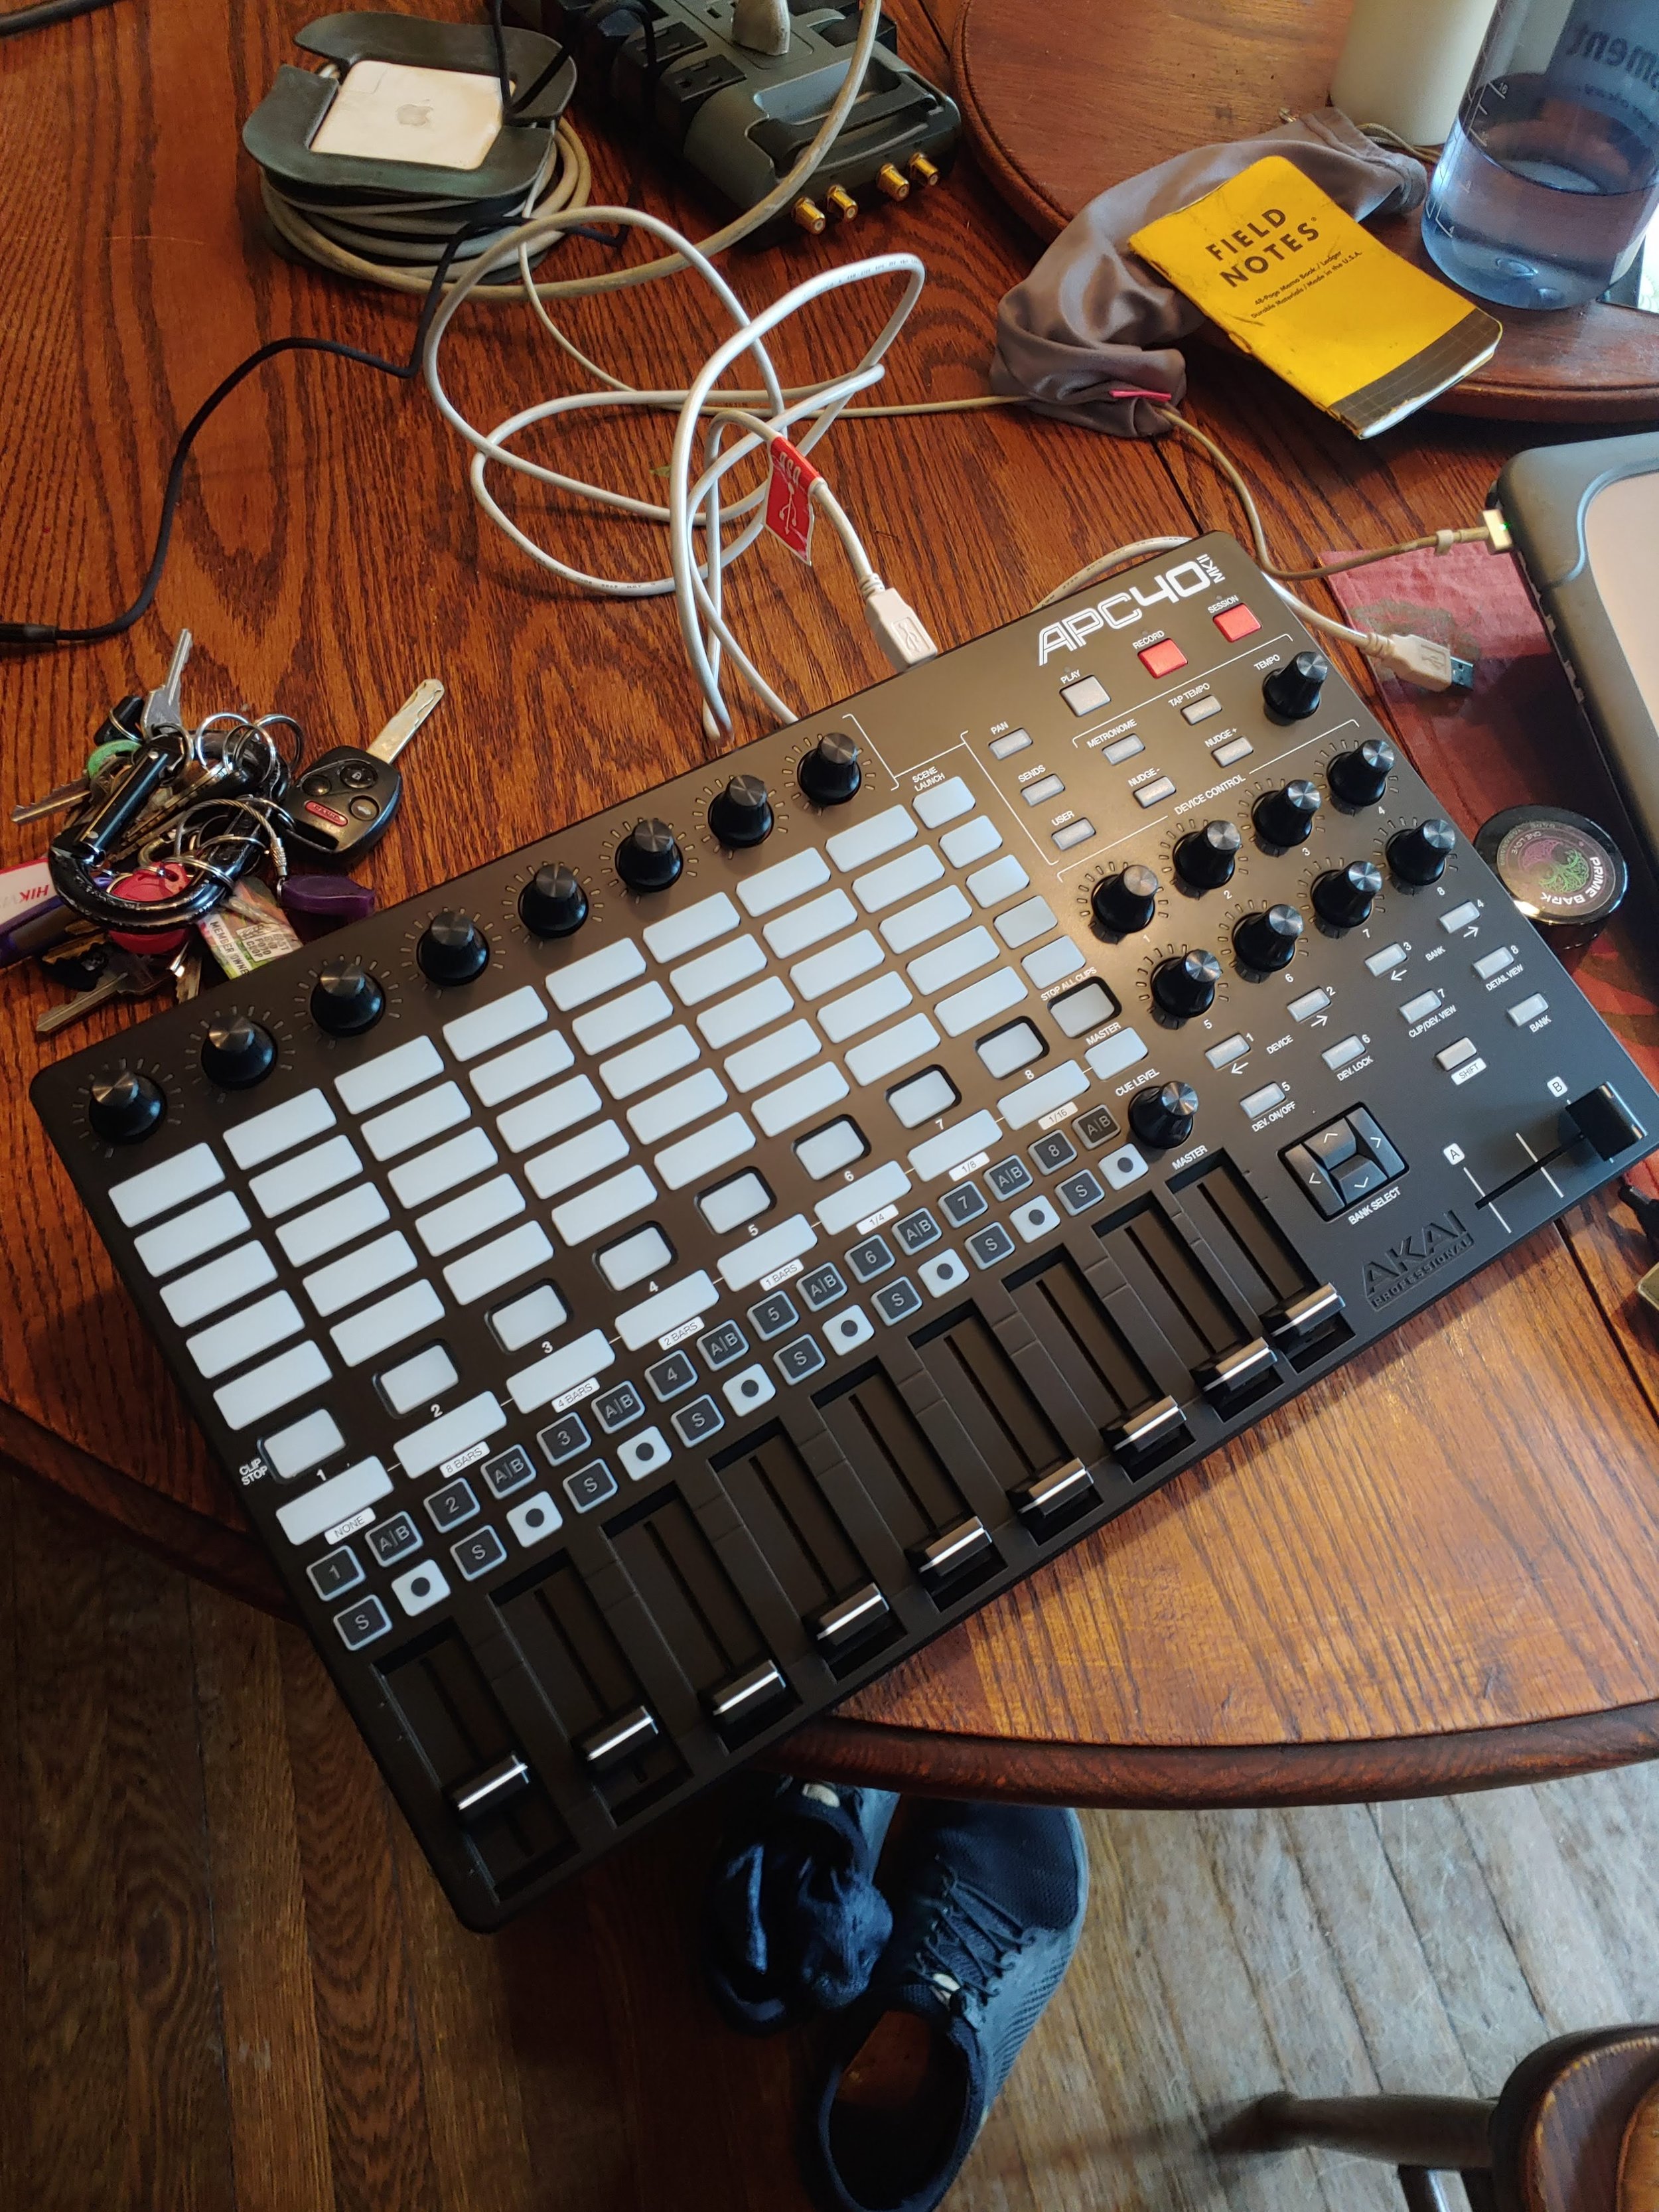
Top down: Livid Ohm RGB slip, APC 40 MKII, Mine S, DJ2GO Touch.
The original Livid OHM 64 went for $699 (from from a mass produced APC40MKII at $299), and a Mine S will cost you anywhere from $399-? (There are 32 slots on the controller, a slider takes up 4, and a button or knob takes up one. The Mine S Pro Bundle sitting in front of me with an extra slider will set you back around $516+ ~$30 shipping (I wish I would have purchased an additional 2 Button Module ($14 more) to balance out this setup).
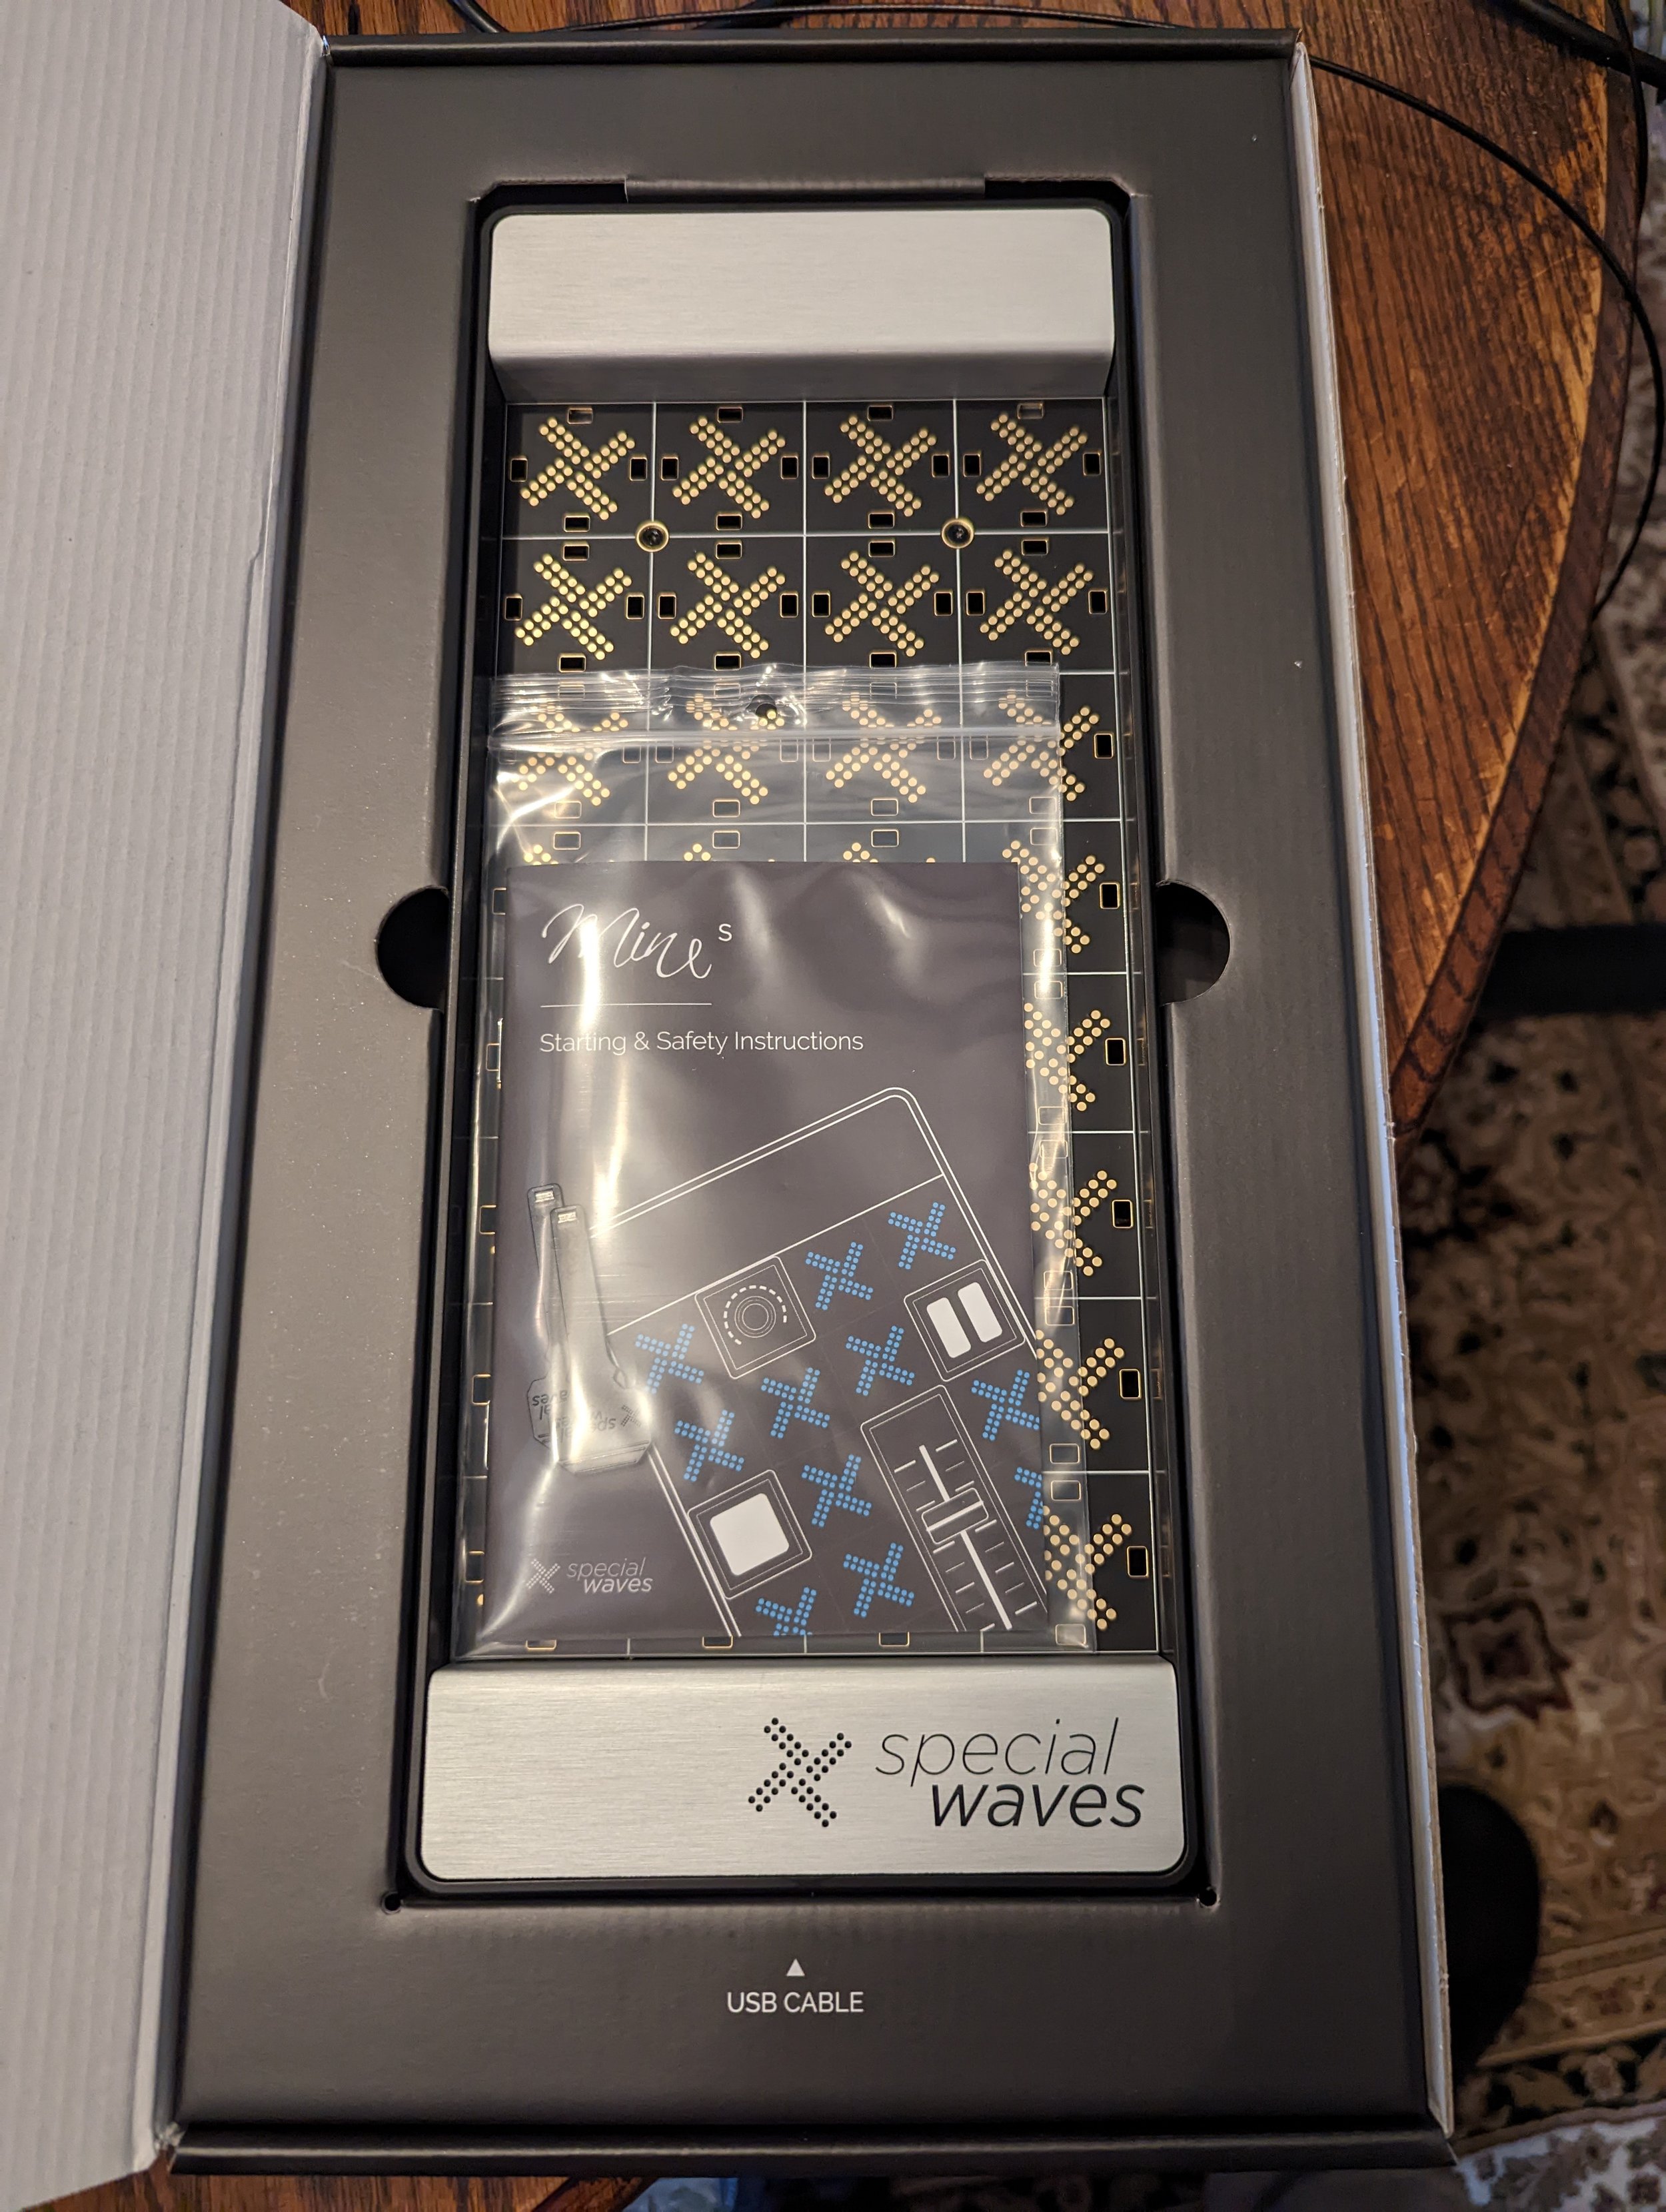
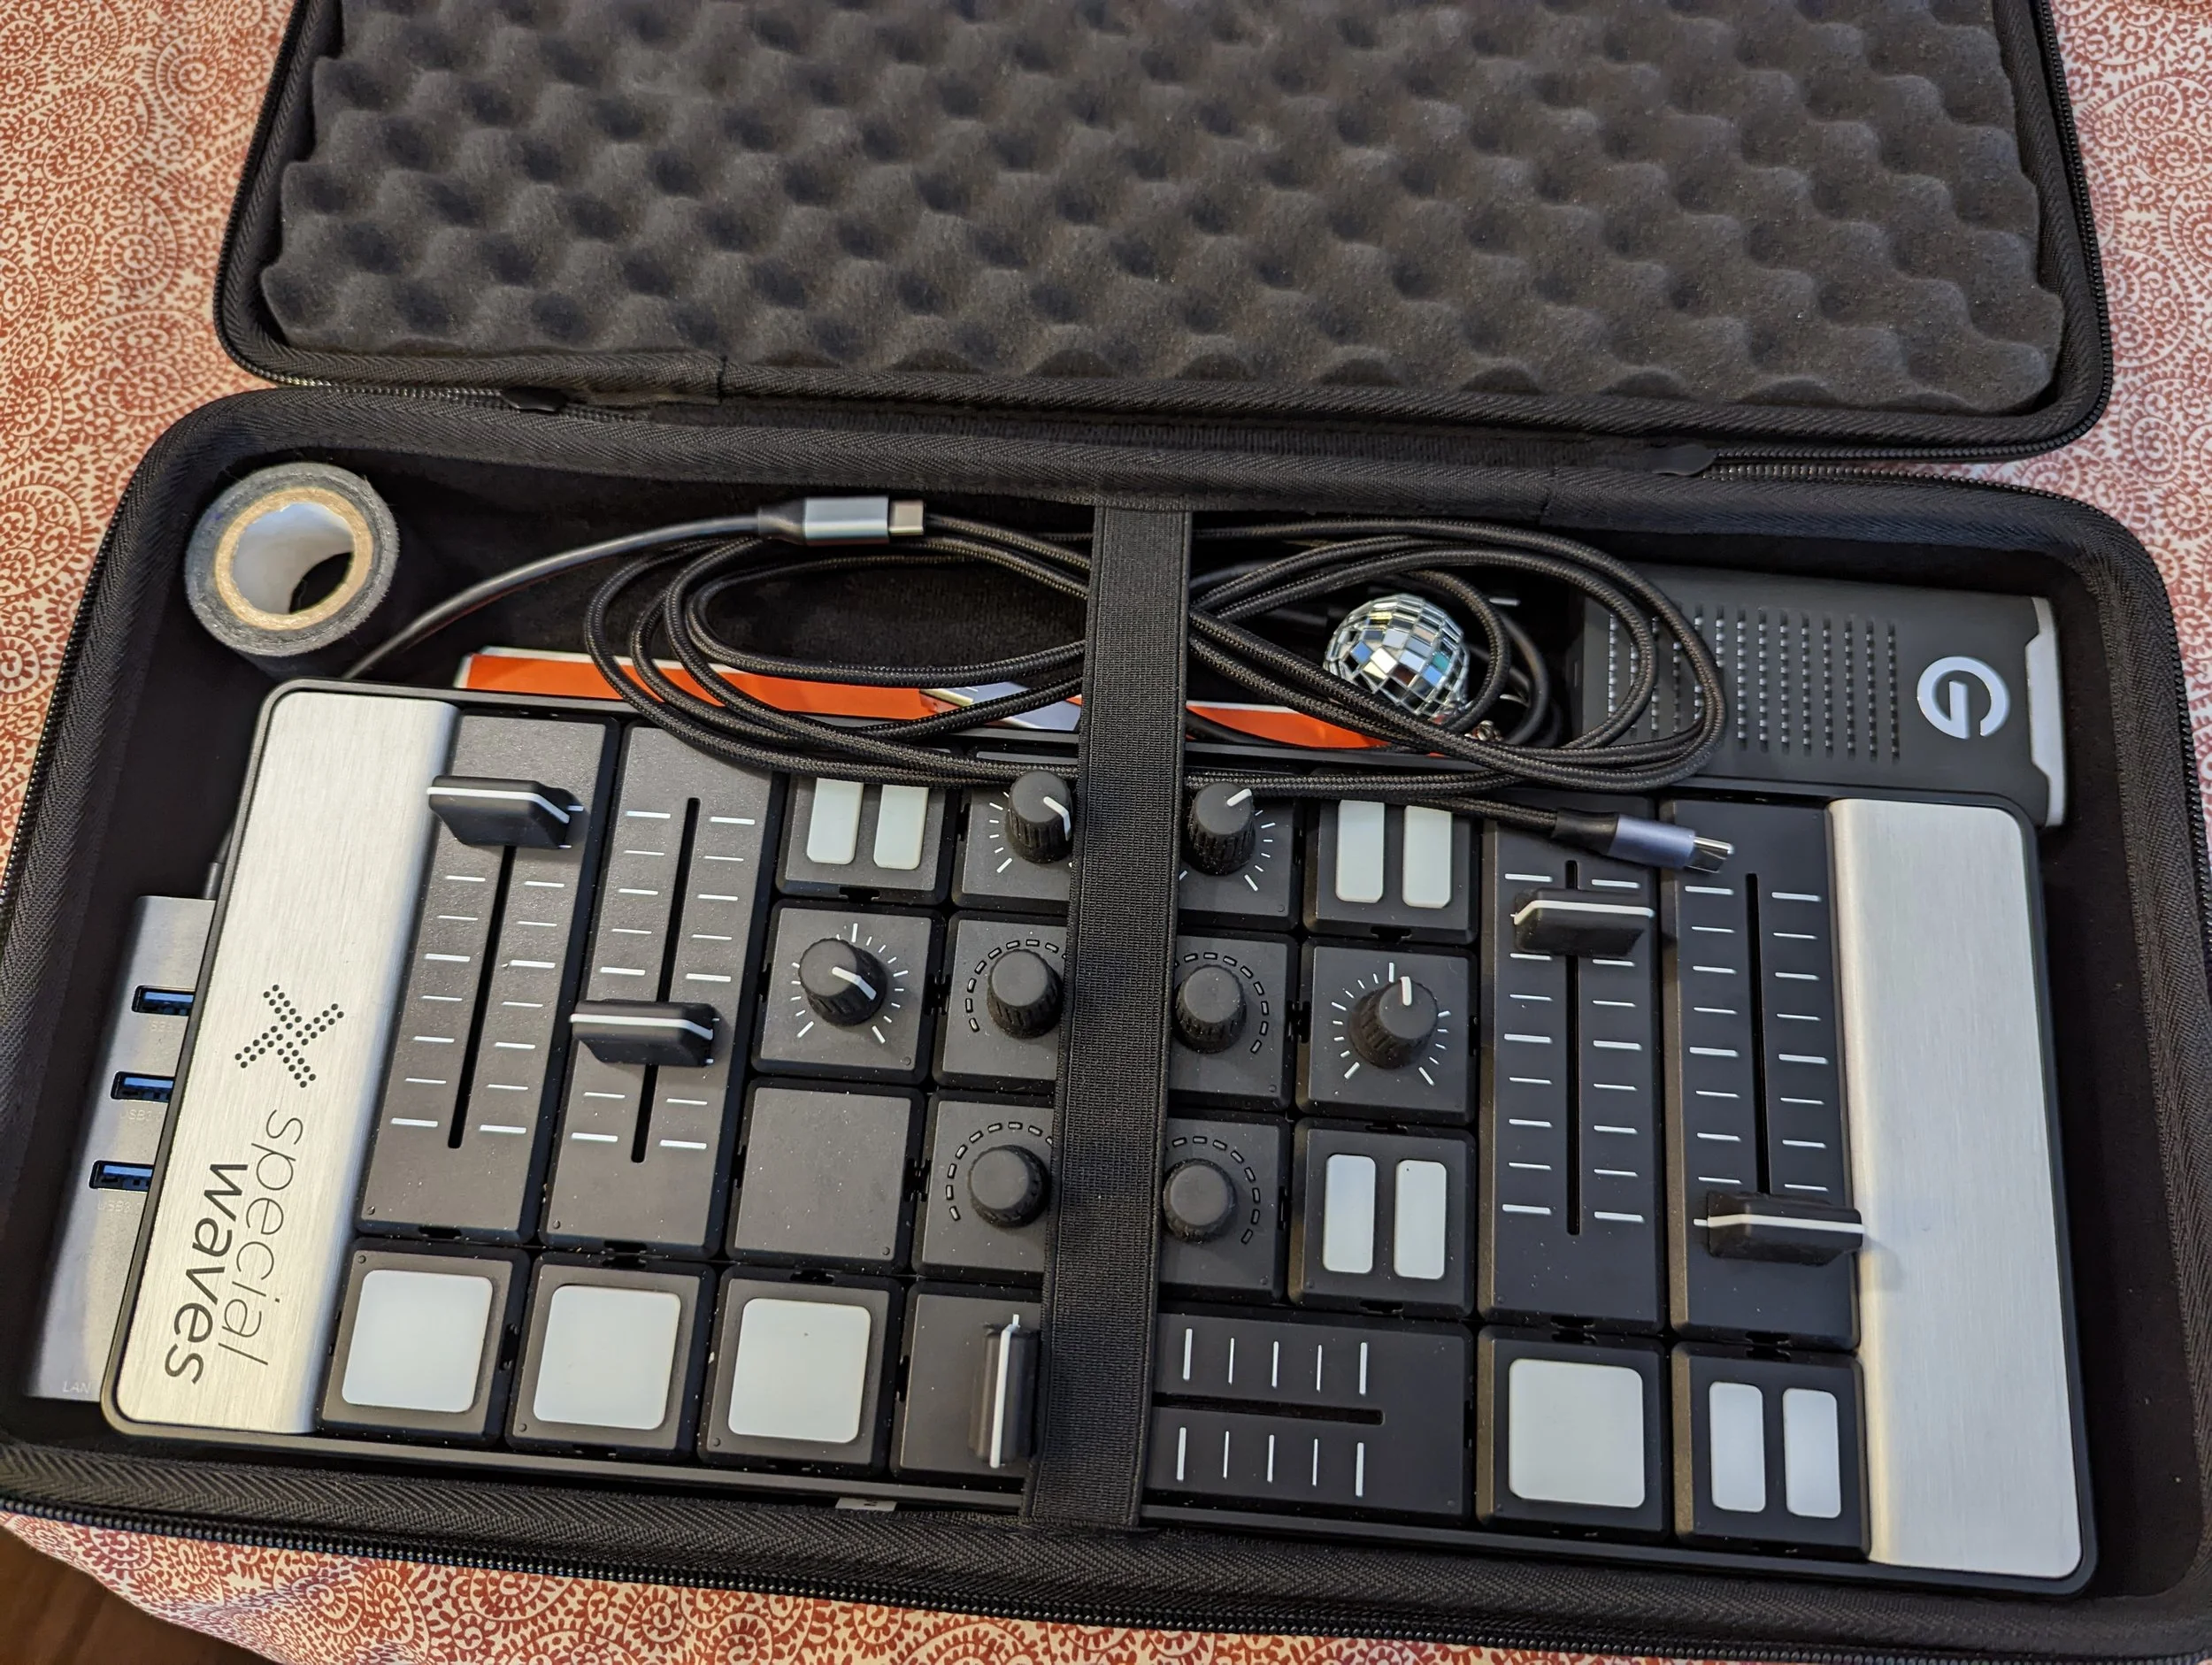
The build design, and packaging are exceptional, but one thing was missing. A case! Luckily, we found this padded case on Amazon for $21.99 USD. Designed for the Donner DMK 25 MIDI Keyboard, this fits the Mine S with some room to spare -- all while fitting in a backpack.
With all that being said, we wanted this tutorial to be informational. Since every setup with the Mine S is different, we can’t give you a preconfigured template with MIDI mappings, but we can show you how to make your own custom UI with the TouchOSC editor and import into VDMX
Tutorial

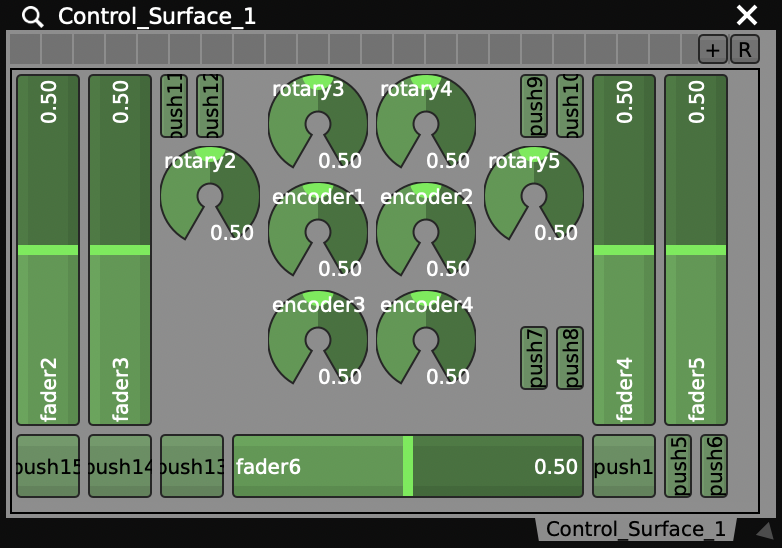
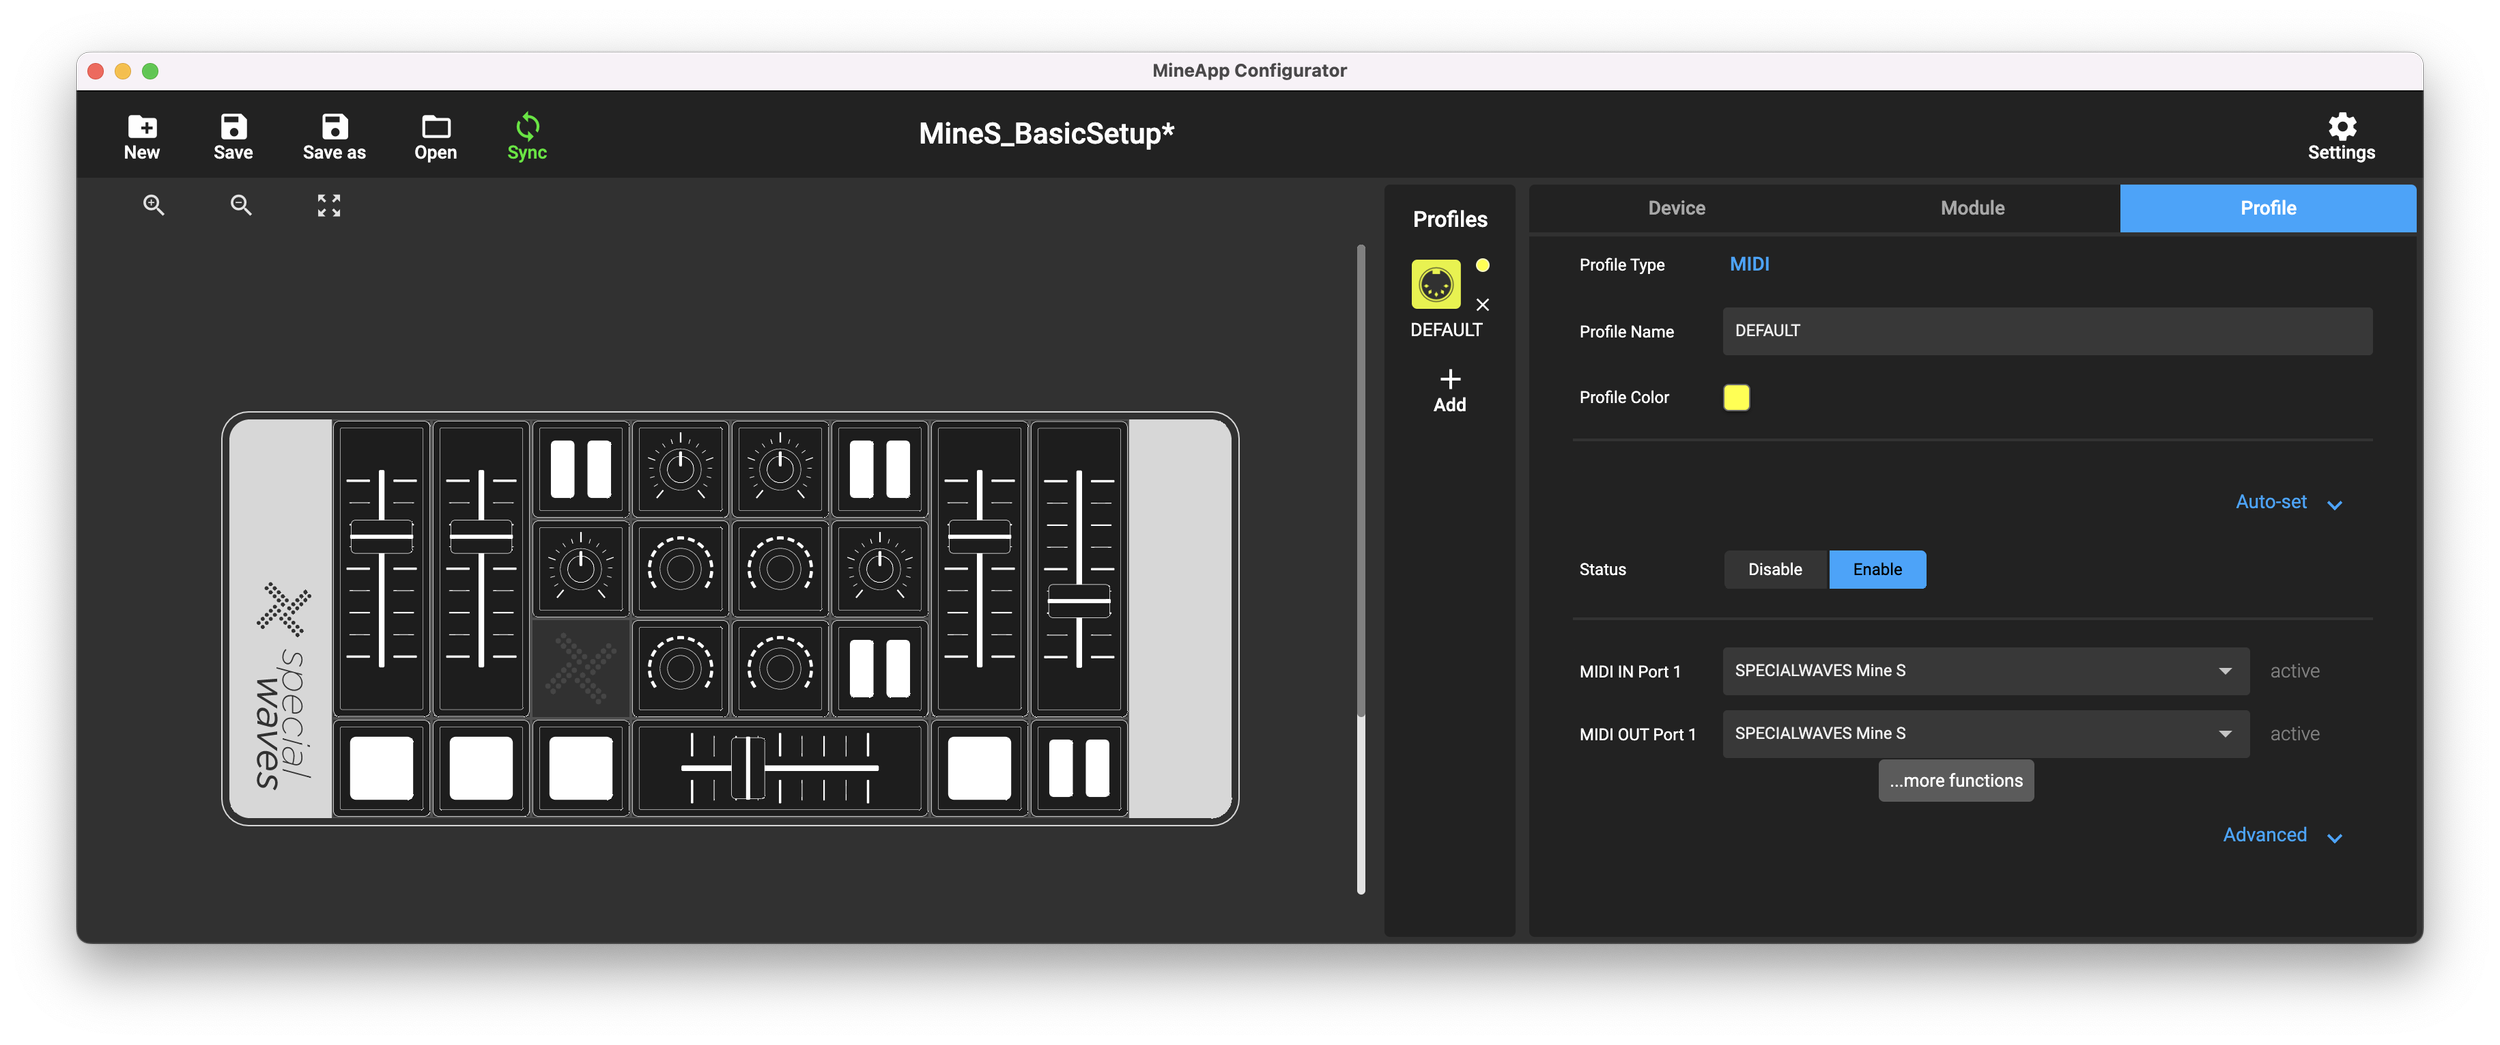
I’ve made a template for the Mine S controller the way I have it configured, running their default MIDI profile (in the Mine App). You can download that here and install in your VDMX template folder. The Mine supports MIDI or OSC, either can be used for this example.
To install templates in VDMX go to: ‘Your Drive’ > Users > ‘username’ > Library > Application Support > VDMX > templates
The VDMX custom control surface plugin has a great import feature that allows you to import a TouchOSC template. The trick is you have to use the TouchOSC MK1 editor to create a compatible file.
That editor can be downloaded from Hexler’s website here.
From here you can build out your Mine S controller layout using simple vertical and horizontal sliders and faders. Simply right click on the blank interface, select the button, slider, or fader you want, and piece your layout together. Don’t worry about the alignment right now. We’ll reconfigure that in VDMX after import.

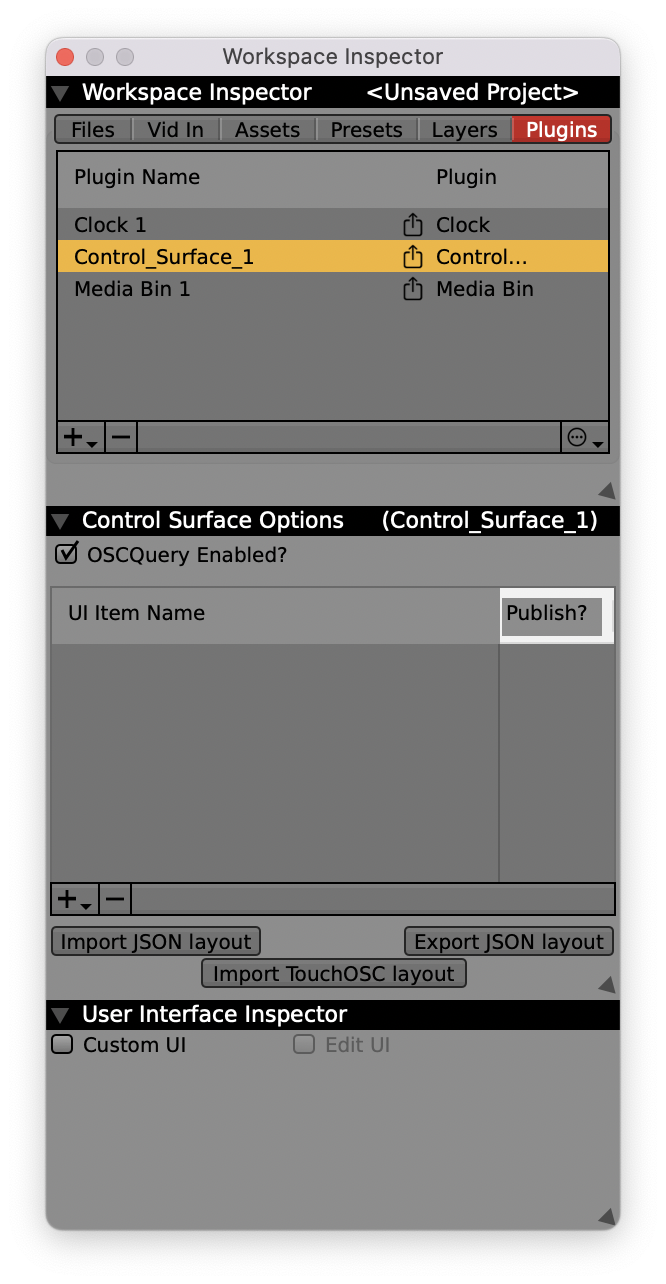
Add a new Control Surface using the + icon in the Workspace Inspector
Next, click Import TouchOSC Layout and select the TouchOSC template you saved.

Click IMPORT, the default settings are fine.

When I import my template, the layout has the wrong orientation.
No worries, we’ll fix that in a second.

Return to the Workspace Inspector, select the control surface, and at the bottom of the User Interface Inspector, select the Edit UI box.
Now you can see options to change the sizing and Rotate the UI. Click Rotate, to get the correct orientation for your controller layout.

That’s much better. From here, I can resize, adjust, the buttons, sliders, and layout. I made my UI more compact, but you don’t have to.


Before finishing up. I’ll click Minimize under the control surface User Interface Inspector.
This will cleanup my interface.
When finished make sure you uncheck the Edit UI checkbox to return the control surface back to a locked setup. The UI grid will disappear, and now you’re interface is ready for mapping.
Mapping a custom UI is completely optional. You could skip this step by mapping other aspects of VDMX directly, but from time to time, it’s helpful to map out control surfaces such as this, so you can have a visual representation of what settings your current controller is outputting.
Pros and Cons of the Mine S MIDI controller
Pros
Modular, but remembers midi settings. Buy more buttons, configure to your hearts desire.
Kensington Lockable
MIDI IN and MIDI OUT
Optional 5V DC power supply (for USB ports that can't handle the setup). I haven't had to use this.
Power on/off button.
Quality buttons, knobs, and sliders.
MIDI Notes, CC, or OSC -- all custom configurable.
Custom colors, and great range of dimmable LEDs
Cons
Only one type of medium resistance slider available, no low resistence option available for a cross-fader. (You'll have to develop stronger fingers)
No USB C port.
Not fully standalone (currently requires the Mine S software to be installed on your machine). Their website says they will release and update to fix this, but right now, you'll have to run another app.
MineApp application required for Mine S run.
If you do end up purchasing a Special Waves Mine S. We recommend buying a case, and a USB B to USB C cable to directly connect.
Isolating notes with Vochela Dubler 2 and VDMX
Here’s a simple tutorial showing how to use Vochela Dubler 2 to trigger note specific clips inside VDMX.
Read MoreNumark DJ2Go2, Hercules DJ Control Starlight, and DJ Control Mix MIDI controller template for VDMX
Whether you are a beginner or a seasoned pro. Both the Numark DJ2Go2 and Hercules DJ Control Starlight MIDI controllers offer compact features at a great price under $100 USD. Here’s a new template to use in VDMX to get started with!
Read MoreSnapChat filters with VDMX
Using SnapChat lenses for video playback and live performance tutorial by ProjectileObjects.
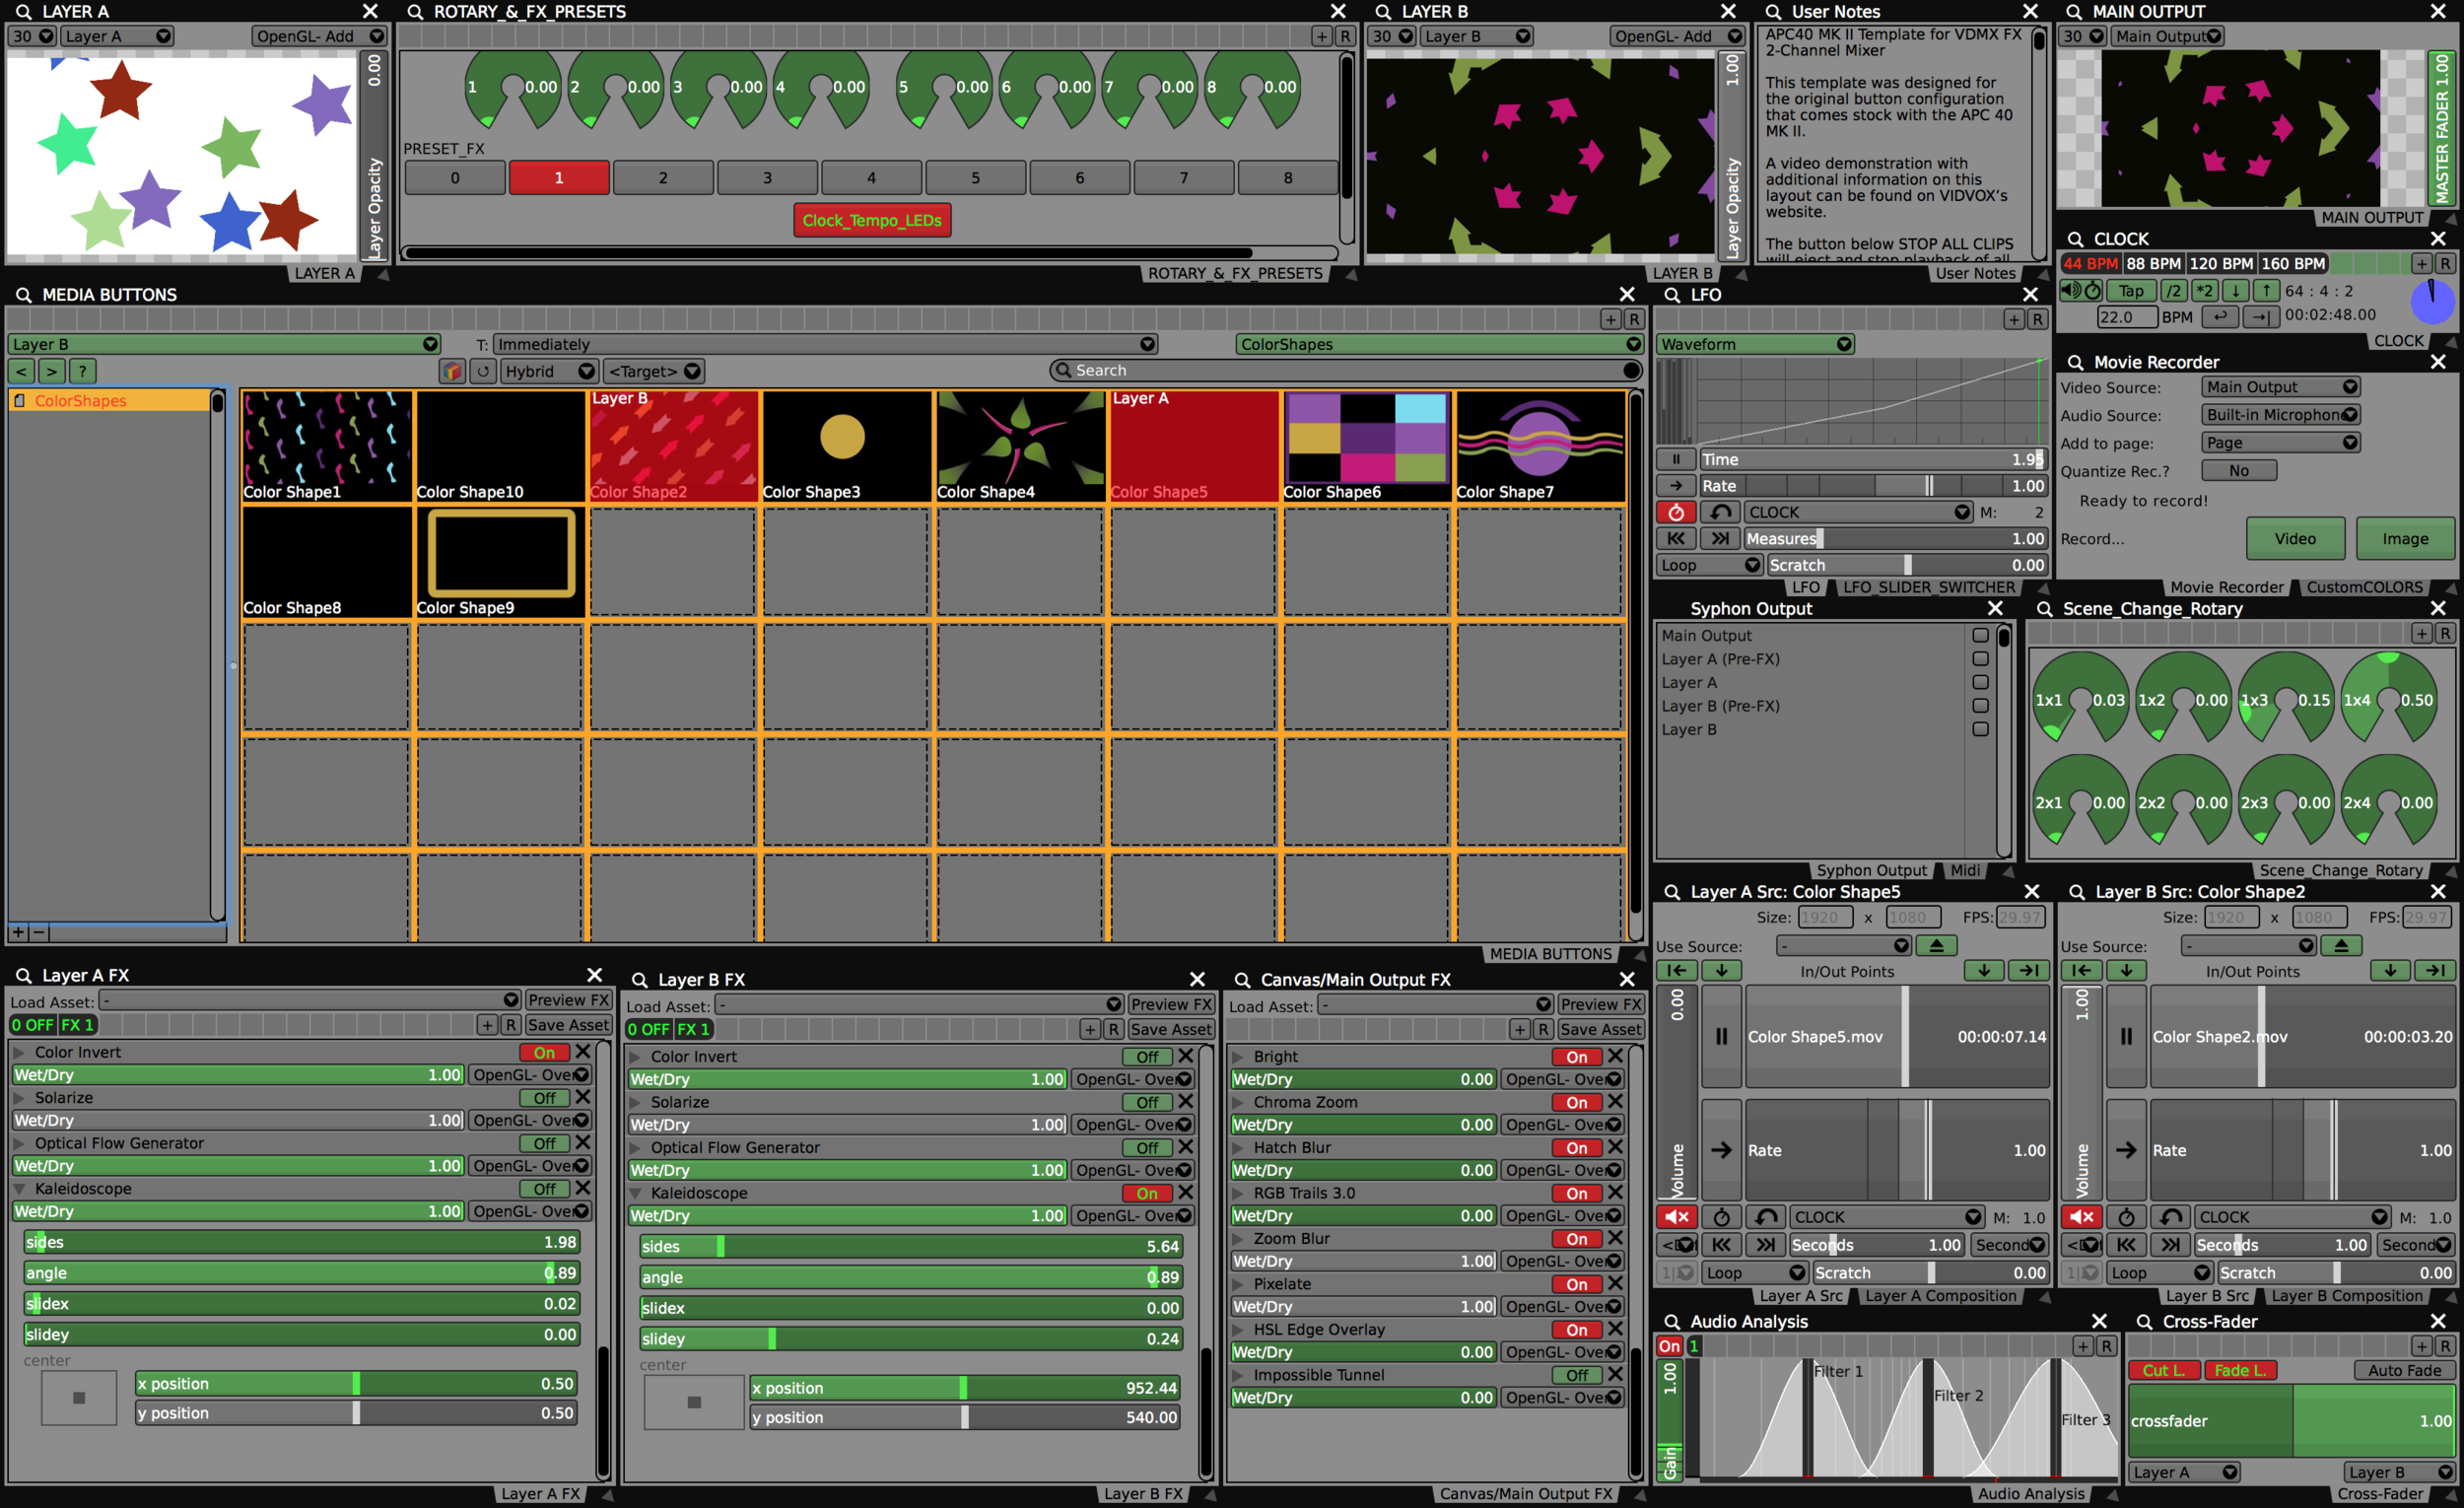
Read MoreAkai APC40 MK II 2-Channel VJ Mixer template for VDMX
Templates are a great way to get started with VDMX and with this template you can take an out of the box APC40 MKII and jump right in!
A few things to note about the APC40 MK II before we get started.
The APC40 MK II has three internal MIDI mapping modes.
Generic Mode (Default)
Ableton Live Mode
Alternate Ableton Live Mode
To use this template correctly, you’ll need your APC40 MK II to be set to the default “stock” Generic Mode. More information about these modes can be found here (PDF) Bottom of Page 10.

When you first turn on the controller, it will default to the correct button mapping. To reset the template to all defaults, it is recommended that you hit this button when you start the template to eject all clips and set everything to its default.

This button ejects all media, clears all the FX and syncs the LFO view to the LFO slider. (Warning: You’ll lose FX in Layer A and B if you don’t save them as a new FX chain).
Not all buttons are RGB. When clips are ready to be triggered in your media bin, the 40 RGB button grid will light up blue, then yellow when the clip is selected. You can customize these colors yourself in the media bin options:

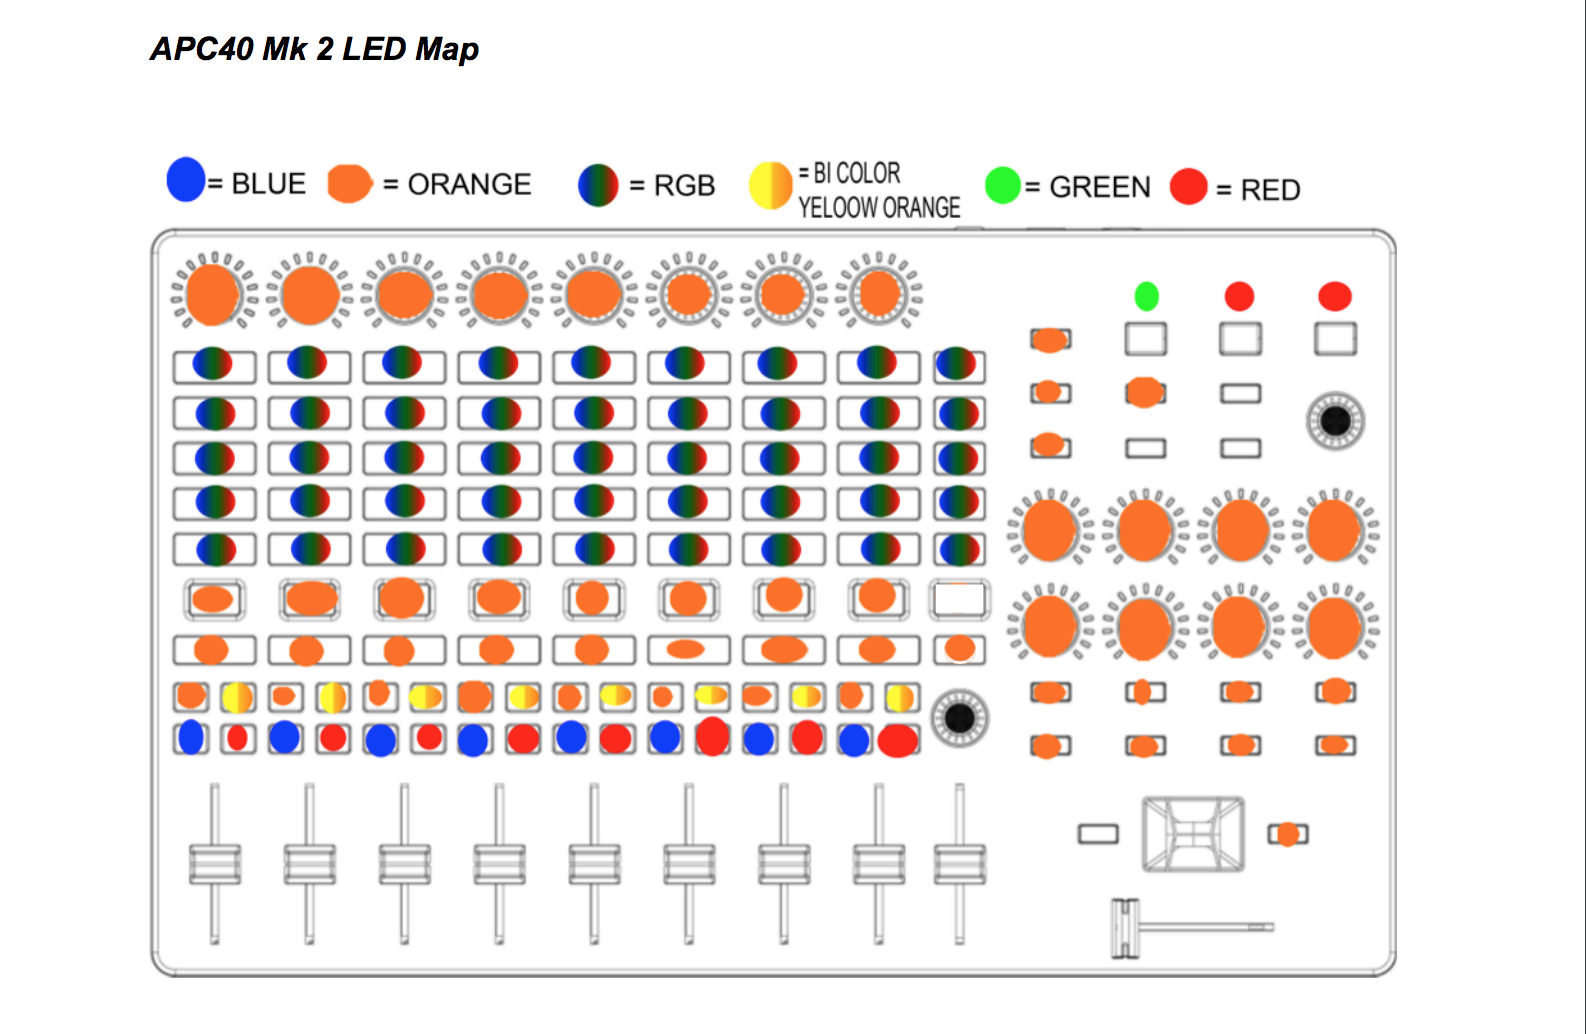
Image found on page 10, Akai communication protocol manual.
There are two versions of this template. A blank version without FX and a starter version with one layer of FX presets.
This template is structured to be a 2-channel video mixer. Both video layer A and B flow to a Master output (Projector, TV, etc.) The cross fader blends between both layers and each layer has its own FX chain presets.
The Master output FX are turned on and off by the top 8 rotary knobs. The first vertical slider on the right side of the controller labeled “MASTER” controls the master opacity. If it is all the way down, your screen output will be black. You can change this later to preference or disable it entirely.
Selecting clips for both layers A and B:
Both layers use the same 40 RGB button grid to trigger clips. To switch between Layer A and B, when selecting clips — use the first two buttons on the top right side of the grid under the label “SCENE LAUNCH” They will light up when they are selected. Top goes sets destination for Layer A, bottom for Layer B. The two buttons beneath that (Green) are page up / page down buttons for moving through your media bin. They are also linked to your Audio Analysis Filter 3 and will flicker based on your computers mic peaking. Beneath that (Yellow) is a random clip trigger.
To trigger to the next clip in the media or move up and down the media bin, redirect your eyes to the “BANK SELECT” 4 button arrow keys.
The rest of the buttons should be self explanatory based on the image above, or you can read through the “User Notes” built into the template which explains all of this and more.
Template Tip!
If you’re adding new FX to your A and B layer FX chains, make sure to save them as a preset by clicking the + in the top of the FX window. This will save your FX chain and you can assign it to a new FX preset button. You can always disable the FX layers MIDI triggers in your project until you build out the template more to your liking!
Here’s a brief overview video of this template:
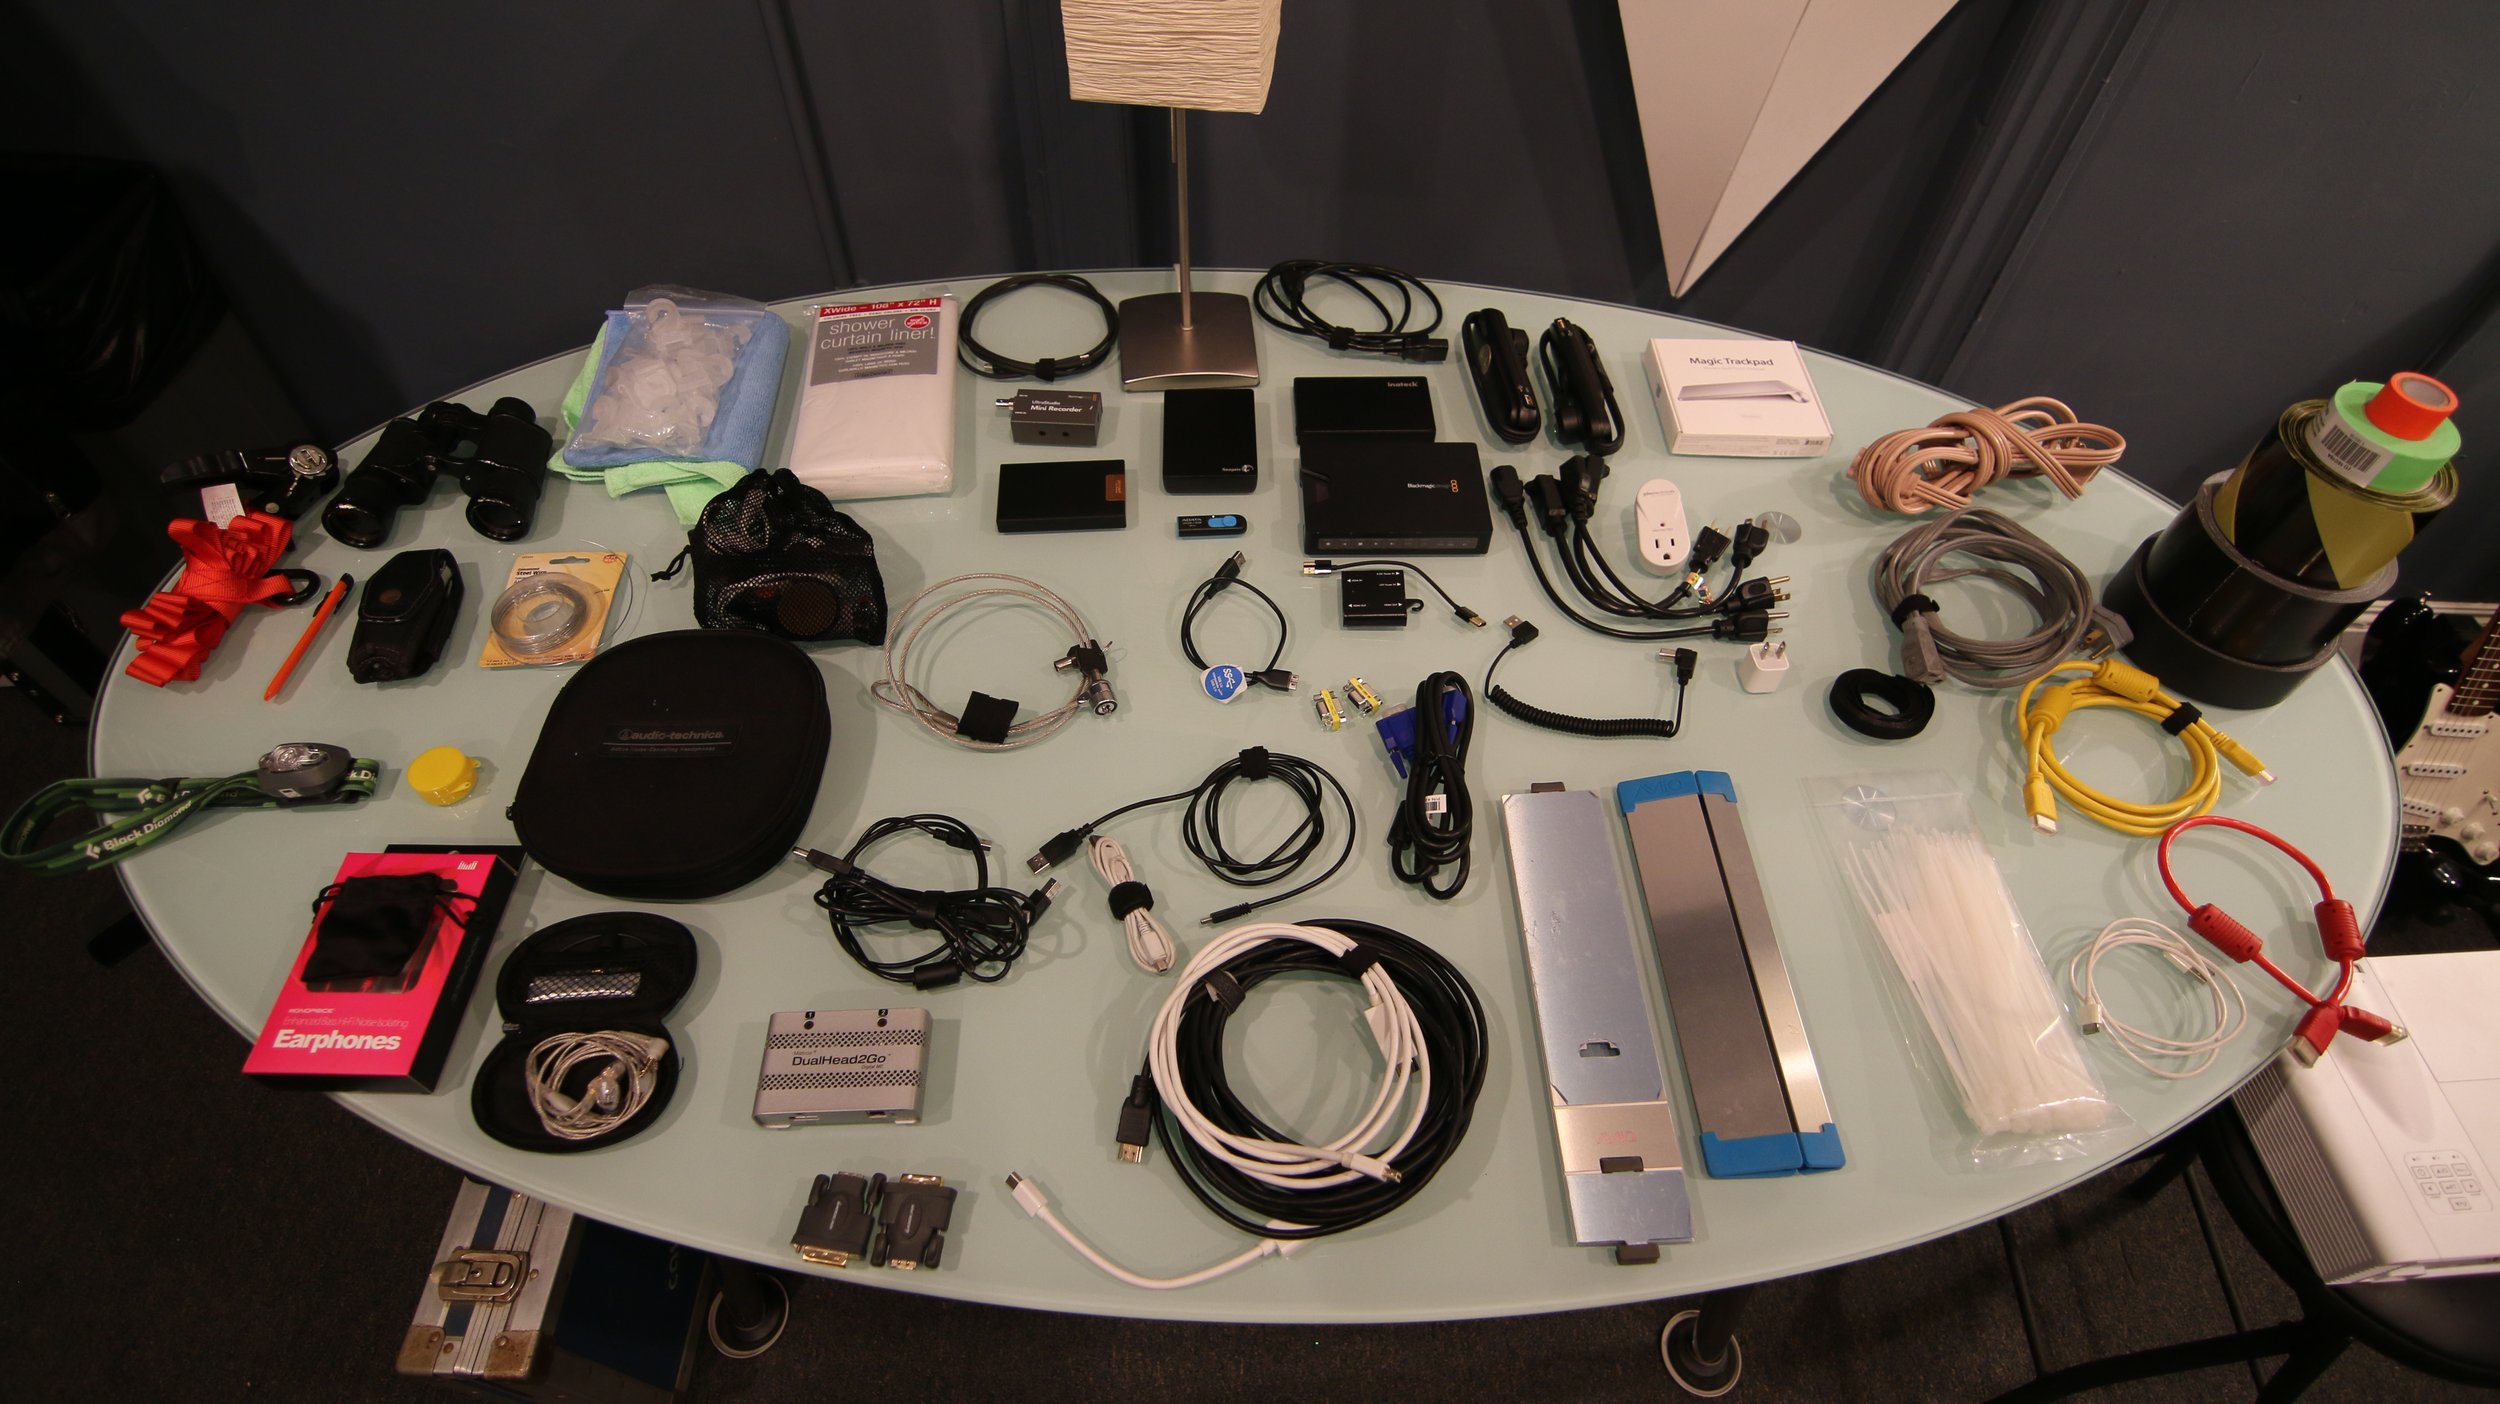
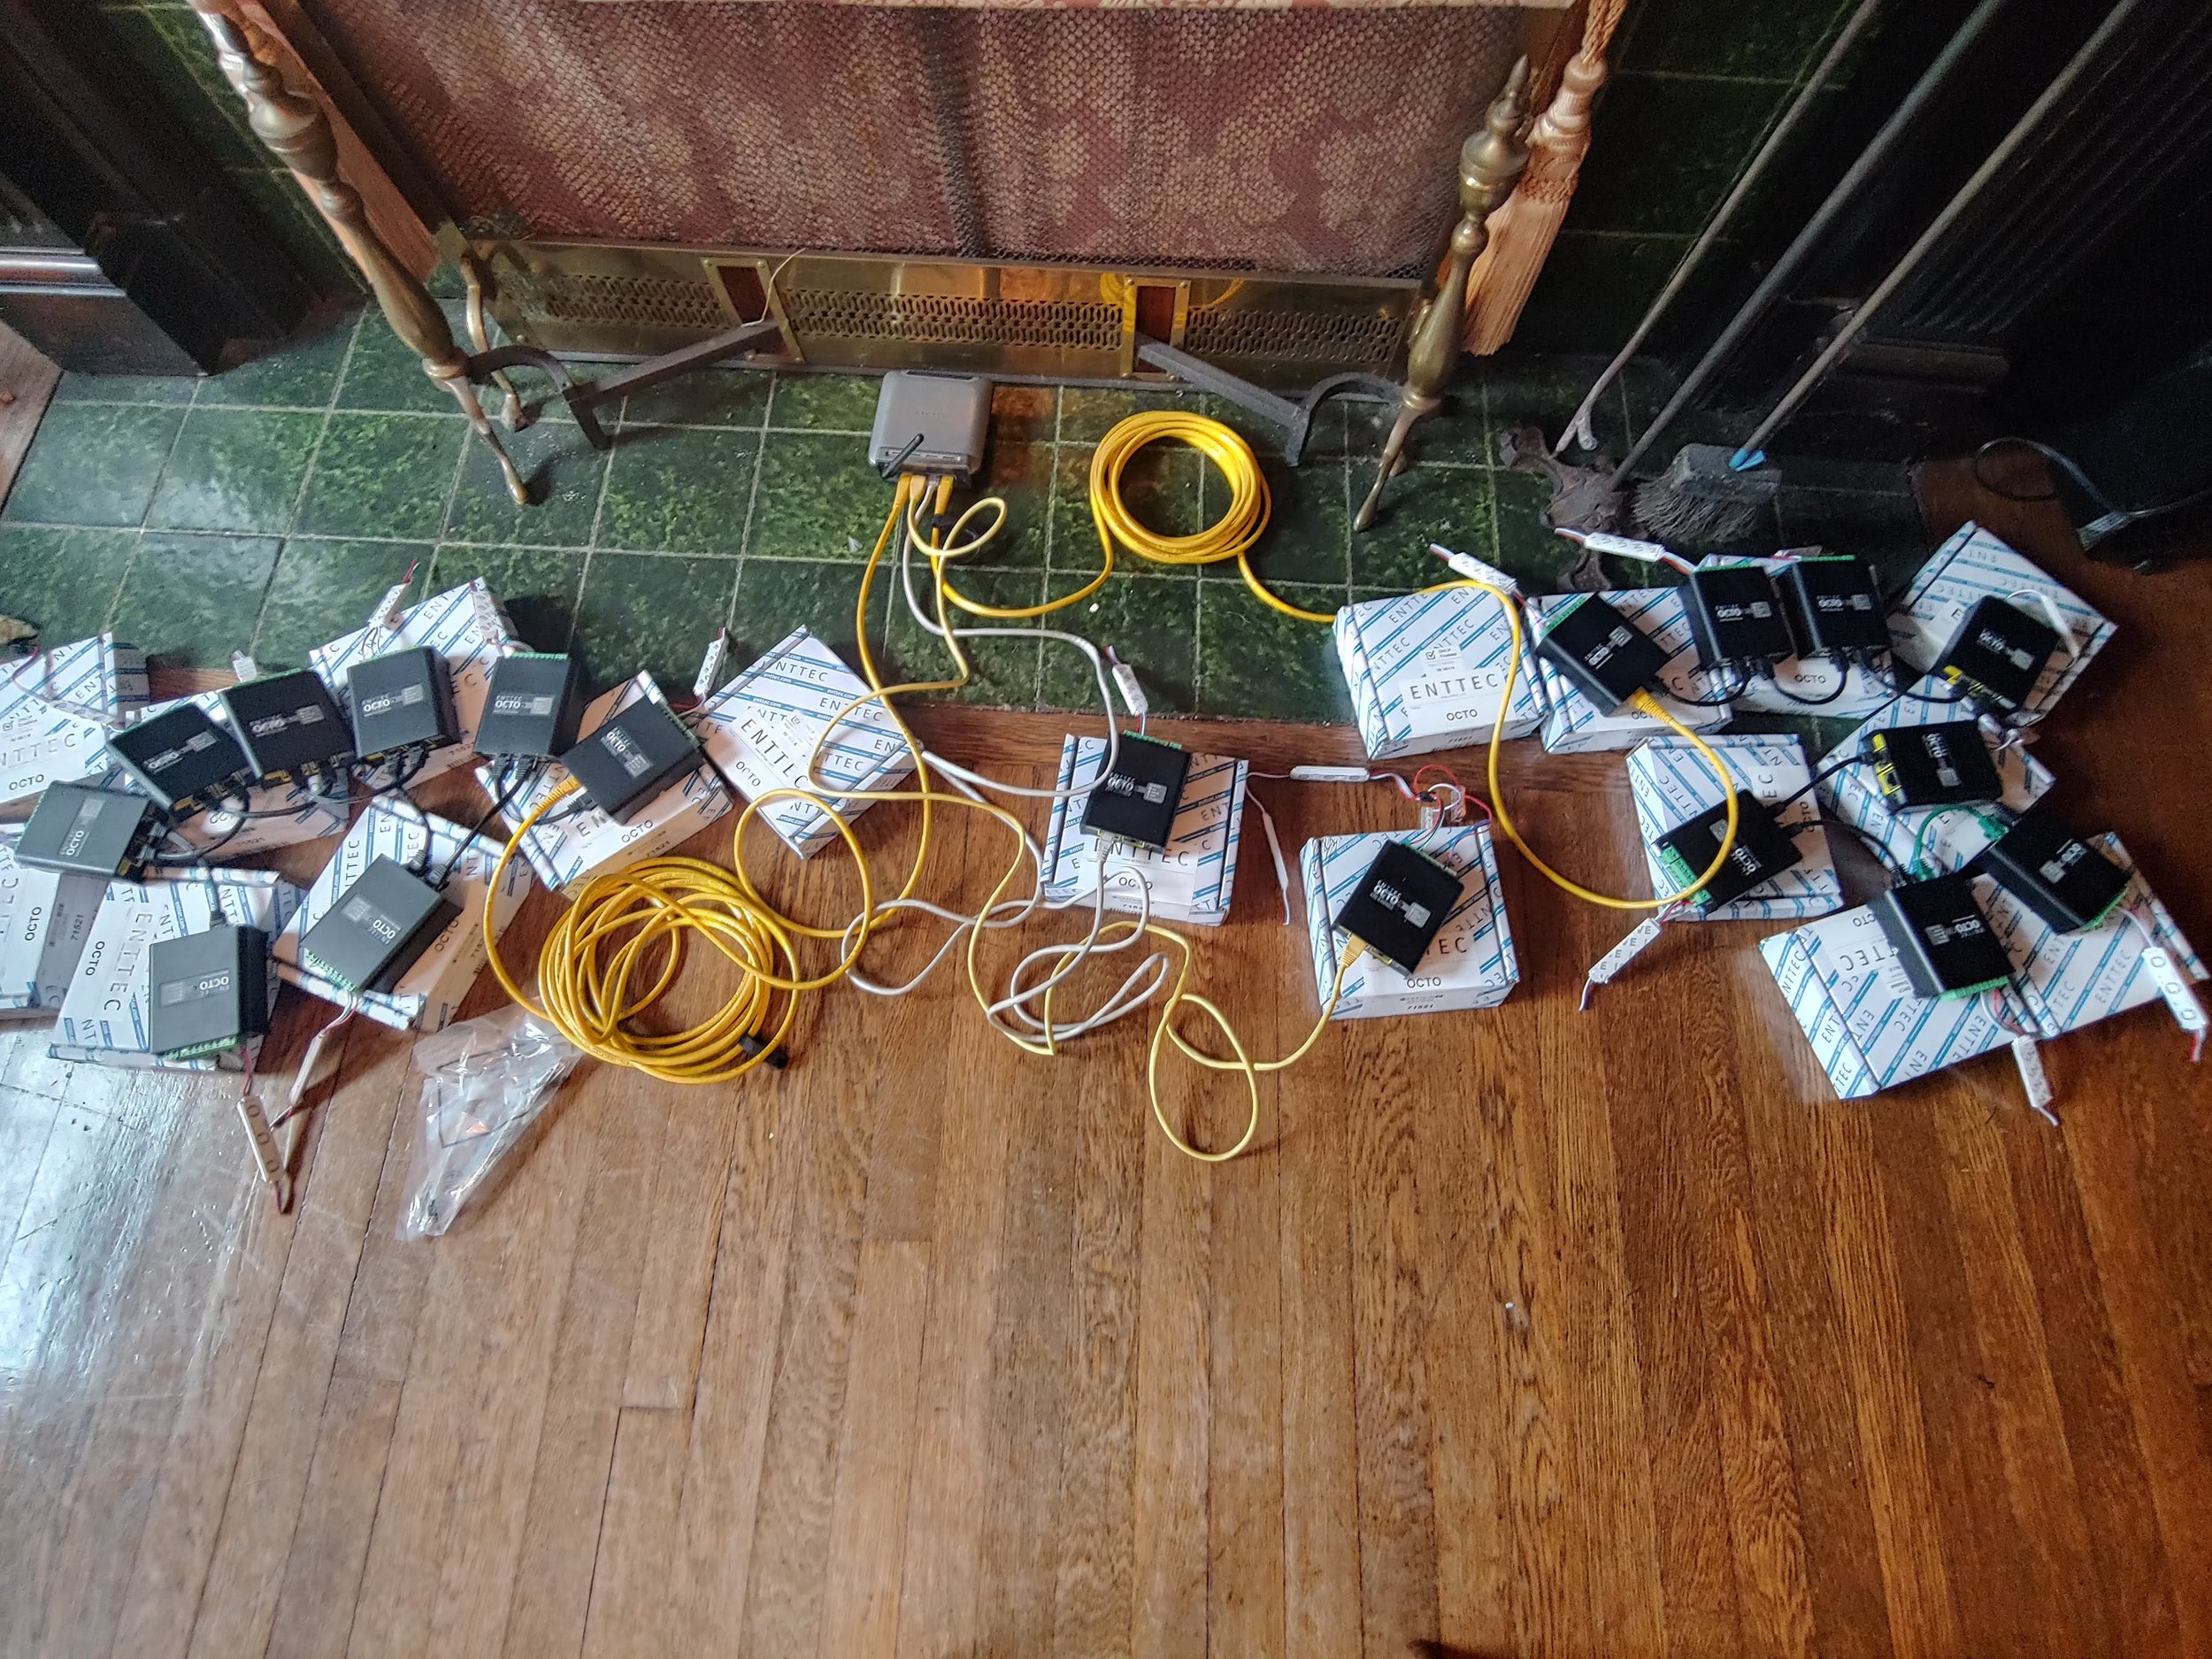
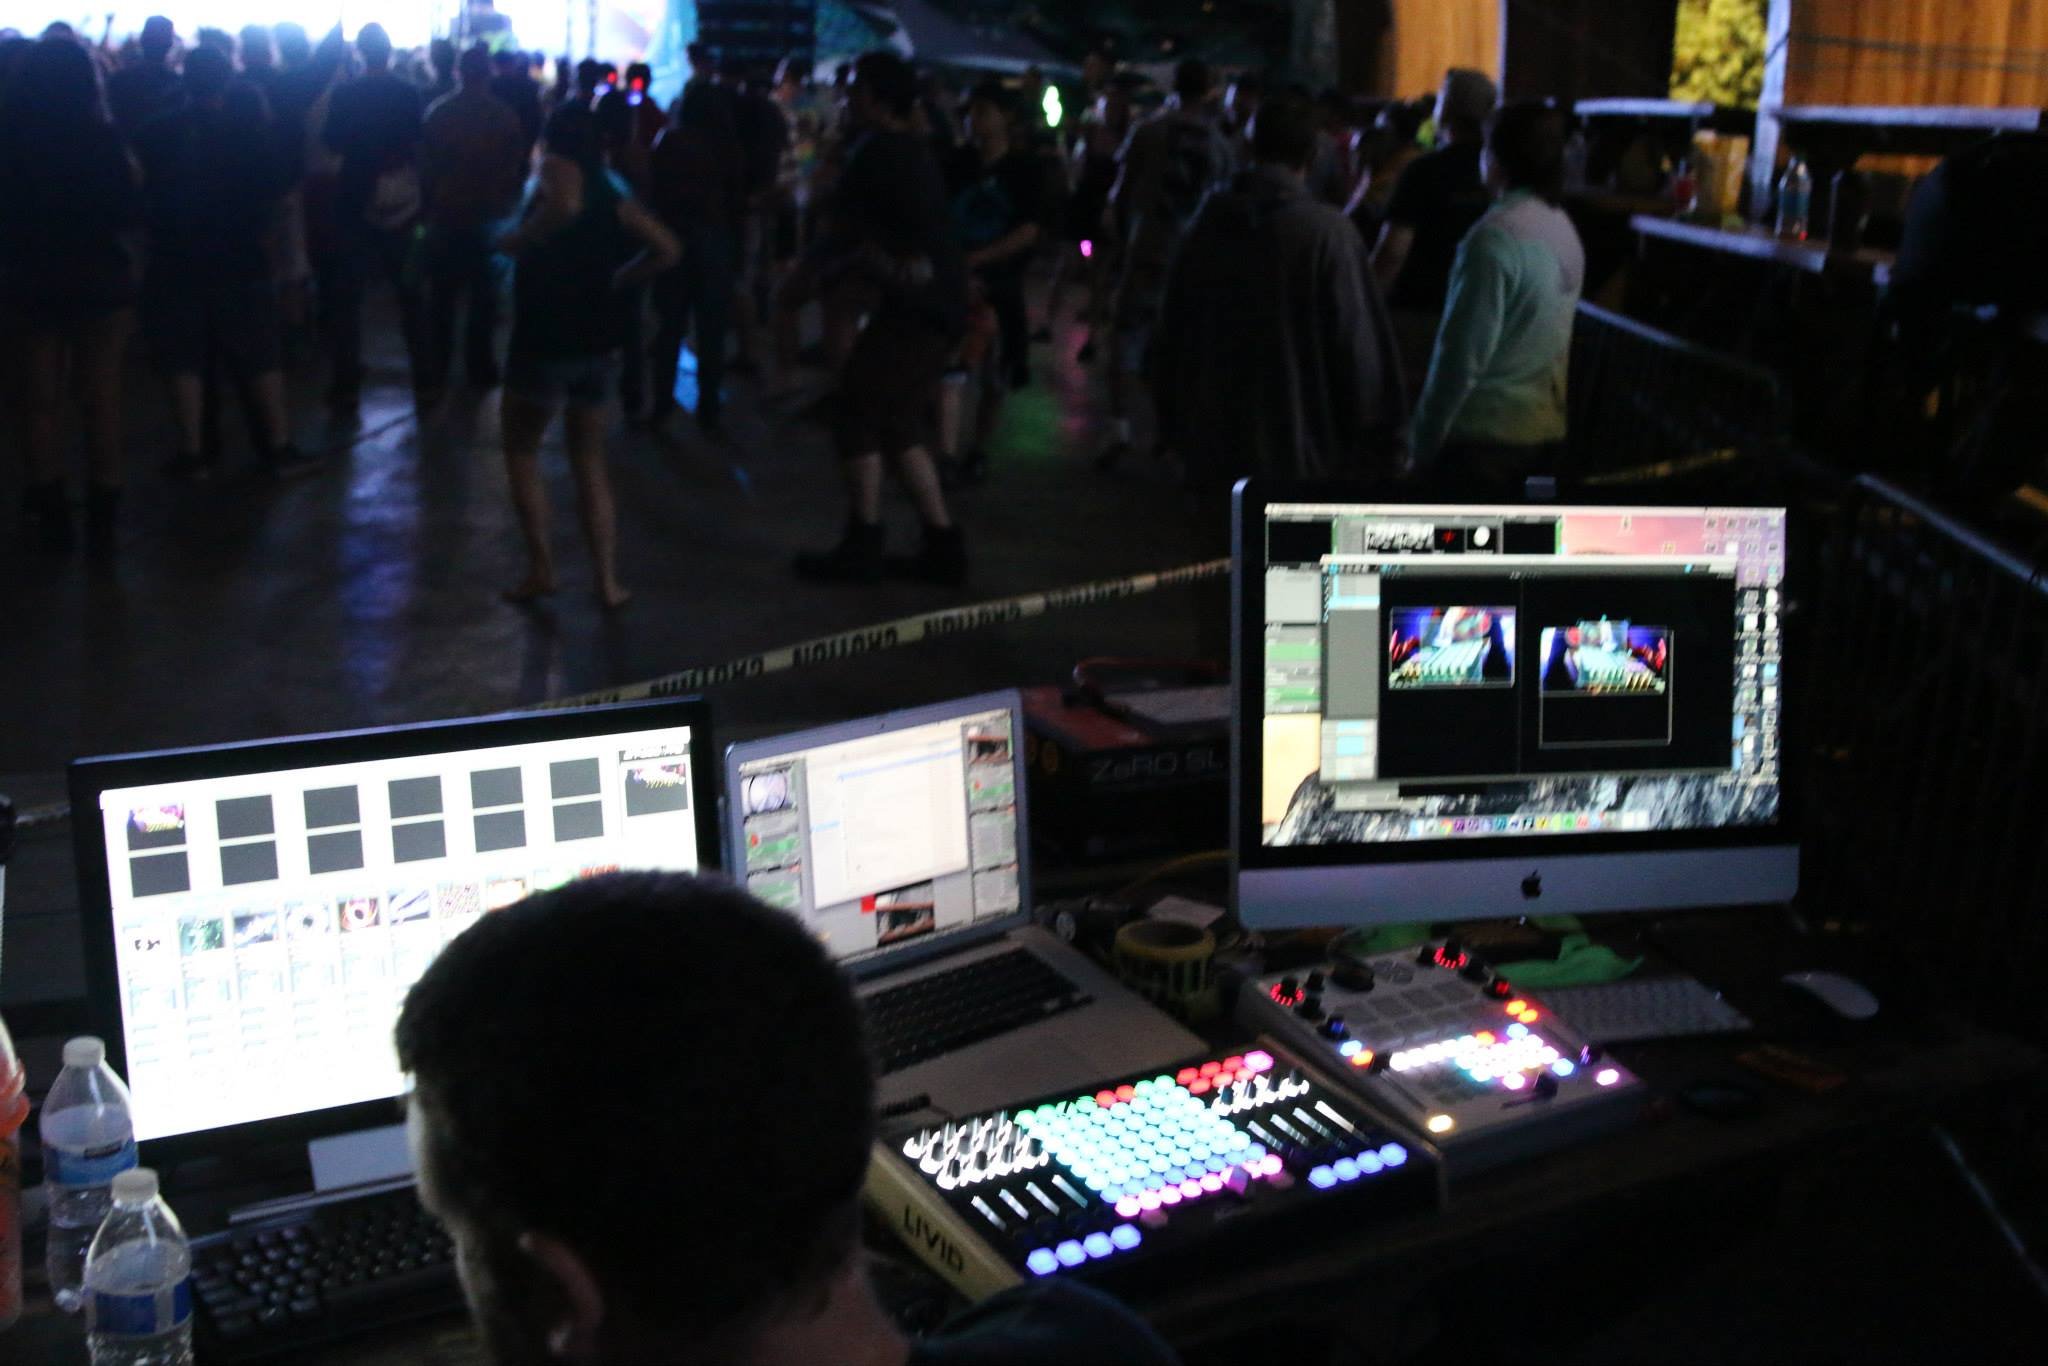
VJ Travel Kit: What's in your bag?
Must haves, lifesavers, and everything in between. What’s in your VJ road kit? Chime in and comment below.
Also see the newly updated VDMX6 recommended gear guide: https://vdmx.vidvox.net/blog/recommended-gear-guide-for-vdmx-2025
There’s never a one size fits all, but hopefully this article will introduce you to a few things to keep in your bag for your next VJ gig. This article comes as a contribution from ProjectileObjects. You can learn more about them at ProjectileObjects.com. This is their opinion and none of the links or tools in this article are sponsored. We’ll also try to keep some of these links up to date, but as technology changes, many of these devices will sell out, discontinue, or newer versions will arrive. Use this article as a guide when piecing together your own VJ road kit and if you have any suggestions, please comment below or share your thoughts in our forum: https://discourse.vidvox.net/
Thanks! and Enjoy!

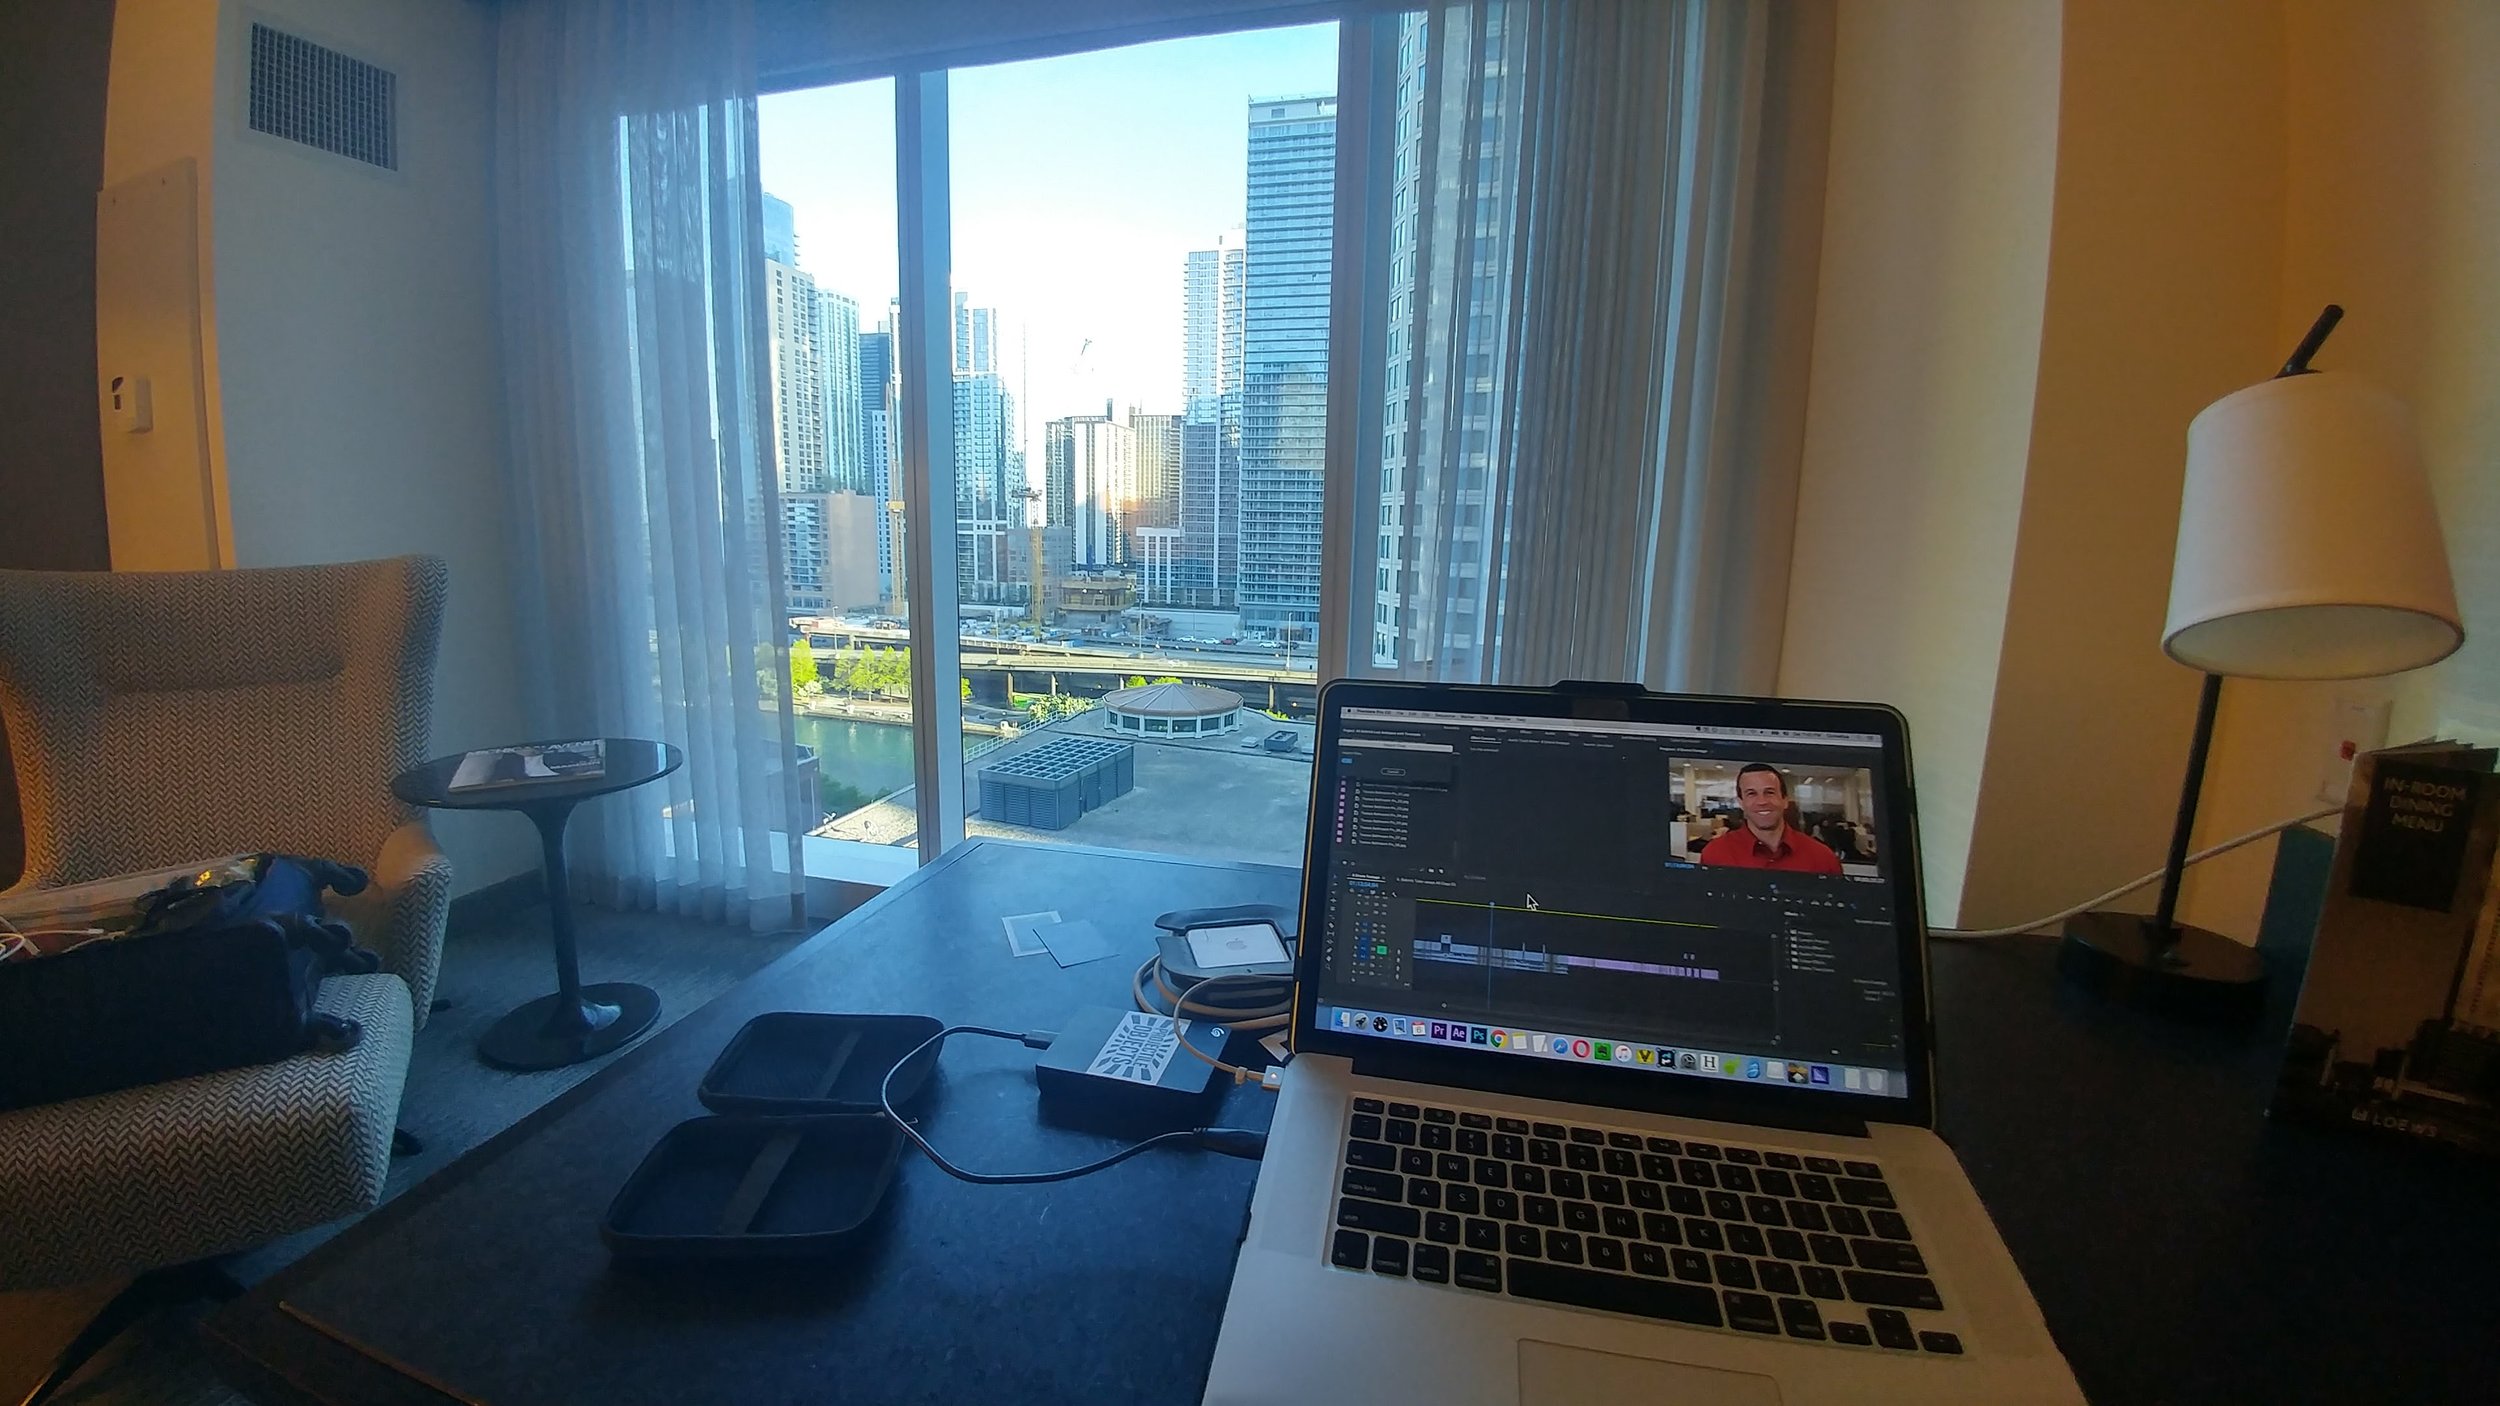
Over the last decade, I’ve taken my VJ gigs on the road. From local shows, tours, and various installations, you never know what you’re going to walk into until you get there, and so I recommend you prepare for the worst and hope for the best.
I’ll dedicate a separate blog post to my “Projector Road Kit” and try to keep this one shorter. A few of the things I carry have been discontinued over the years, but a few google searches should land you on new (hopefully better) versions of what I carry with me.
Here are the categories:
Hardware
Software
Misc
I primarily use Macs and VDMX, but regardless of what software or hardware you run on, you are likely to find some useful new items for your toolkit.
Hardware:
1. Computer Protection! - A bumper case and a clear garbage bag. (Example 1, Example 2)
Okay, so you’ll need your computer. And if it’s a laptop (MacBook Pro, PC, whatever) I definitely recommend some sort of case with protection. If you’re working on a crazy punk show with drinks flying all over, a silicone keyboard cover might save your life. That being said, always carry a clear garbage bag with you! Whether you have to wear it as a poncho, pop it over your suitcase when running through a storm, or cover your laptop, a clear plastic bag will allow you to see your laptop screen even if all hell breaks loose.
2. Bootable OSX Drive or Recovery drive.
If you can, I recommend picking up a few USB thumb drives with decent read/write speeds, and then loading bootable versions of Mac OSX onto them as recovery drives. The ones I carry with me are (10.12,10.13,10.14). If not for you, then for others. I was once in Boston and an hour before a show, the DJ’s computer crashed, and one of my bootable thumb drives saved the day. We fixed a few disk utility settings, and they were back up and running with their show computer. On another occasion, I needed to roll forward my OS version to interface with some recent software updates. I had a USB SSD that I could boot from without upgrading my MacBook Pro or partitioning my internal boot drive.
Hardware Tip: No new gear for a new show.
Take this with a gain of salt, but this pre-caution comes from my experience in film and video production. You need time to learn and troubleshoot your hardware. Sometimes adding gear might seem like a dream come true, but I’ve seen it turn into a living nightmare for other VJs and video professionals. Whether it’s learning a new midi controller, or breaking in a new hard drive with thorough testing. If you don’t have time to test it fully, don’t add it to your setup. A few examples of this: I’ve seen external SSDs overheat and fail (I’m not saying which brand, but they weren’t cheap). I had a Samson Conspiracy midi controller go to sleep on me during a performance, which had me scrambling through their awful user manual PDF on my phone trying to figure out how to “wake it up” without ruining the performance mid-way through. I’ve watched multiple VJs introduce a new HDMI dongle, HDMI mixer, or HDMI preview monitor to their setup days before a show only to watch them drop signal throughout their show and lose connection with the projector (which would then reconnect, but the screen would turn “No Signal” blue or black for a few seconds every couple of minutes). Test your gear and push it to the extreme! That and always have a backup.
3. Backup Hardware! Media Players, Raspberry Pis, Recorders.

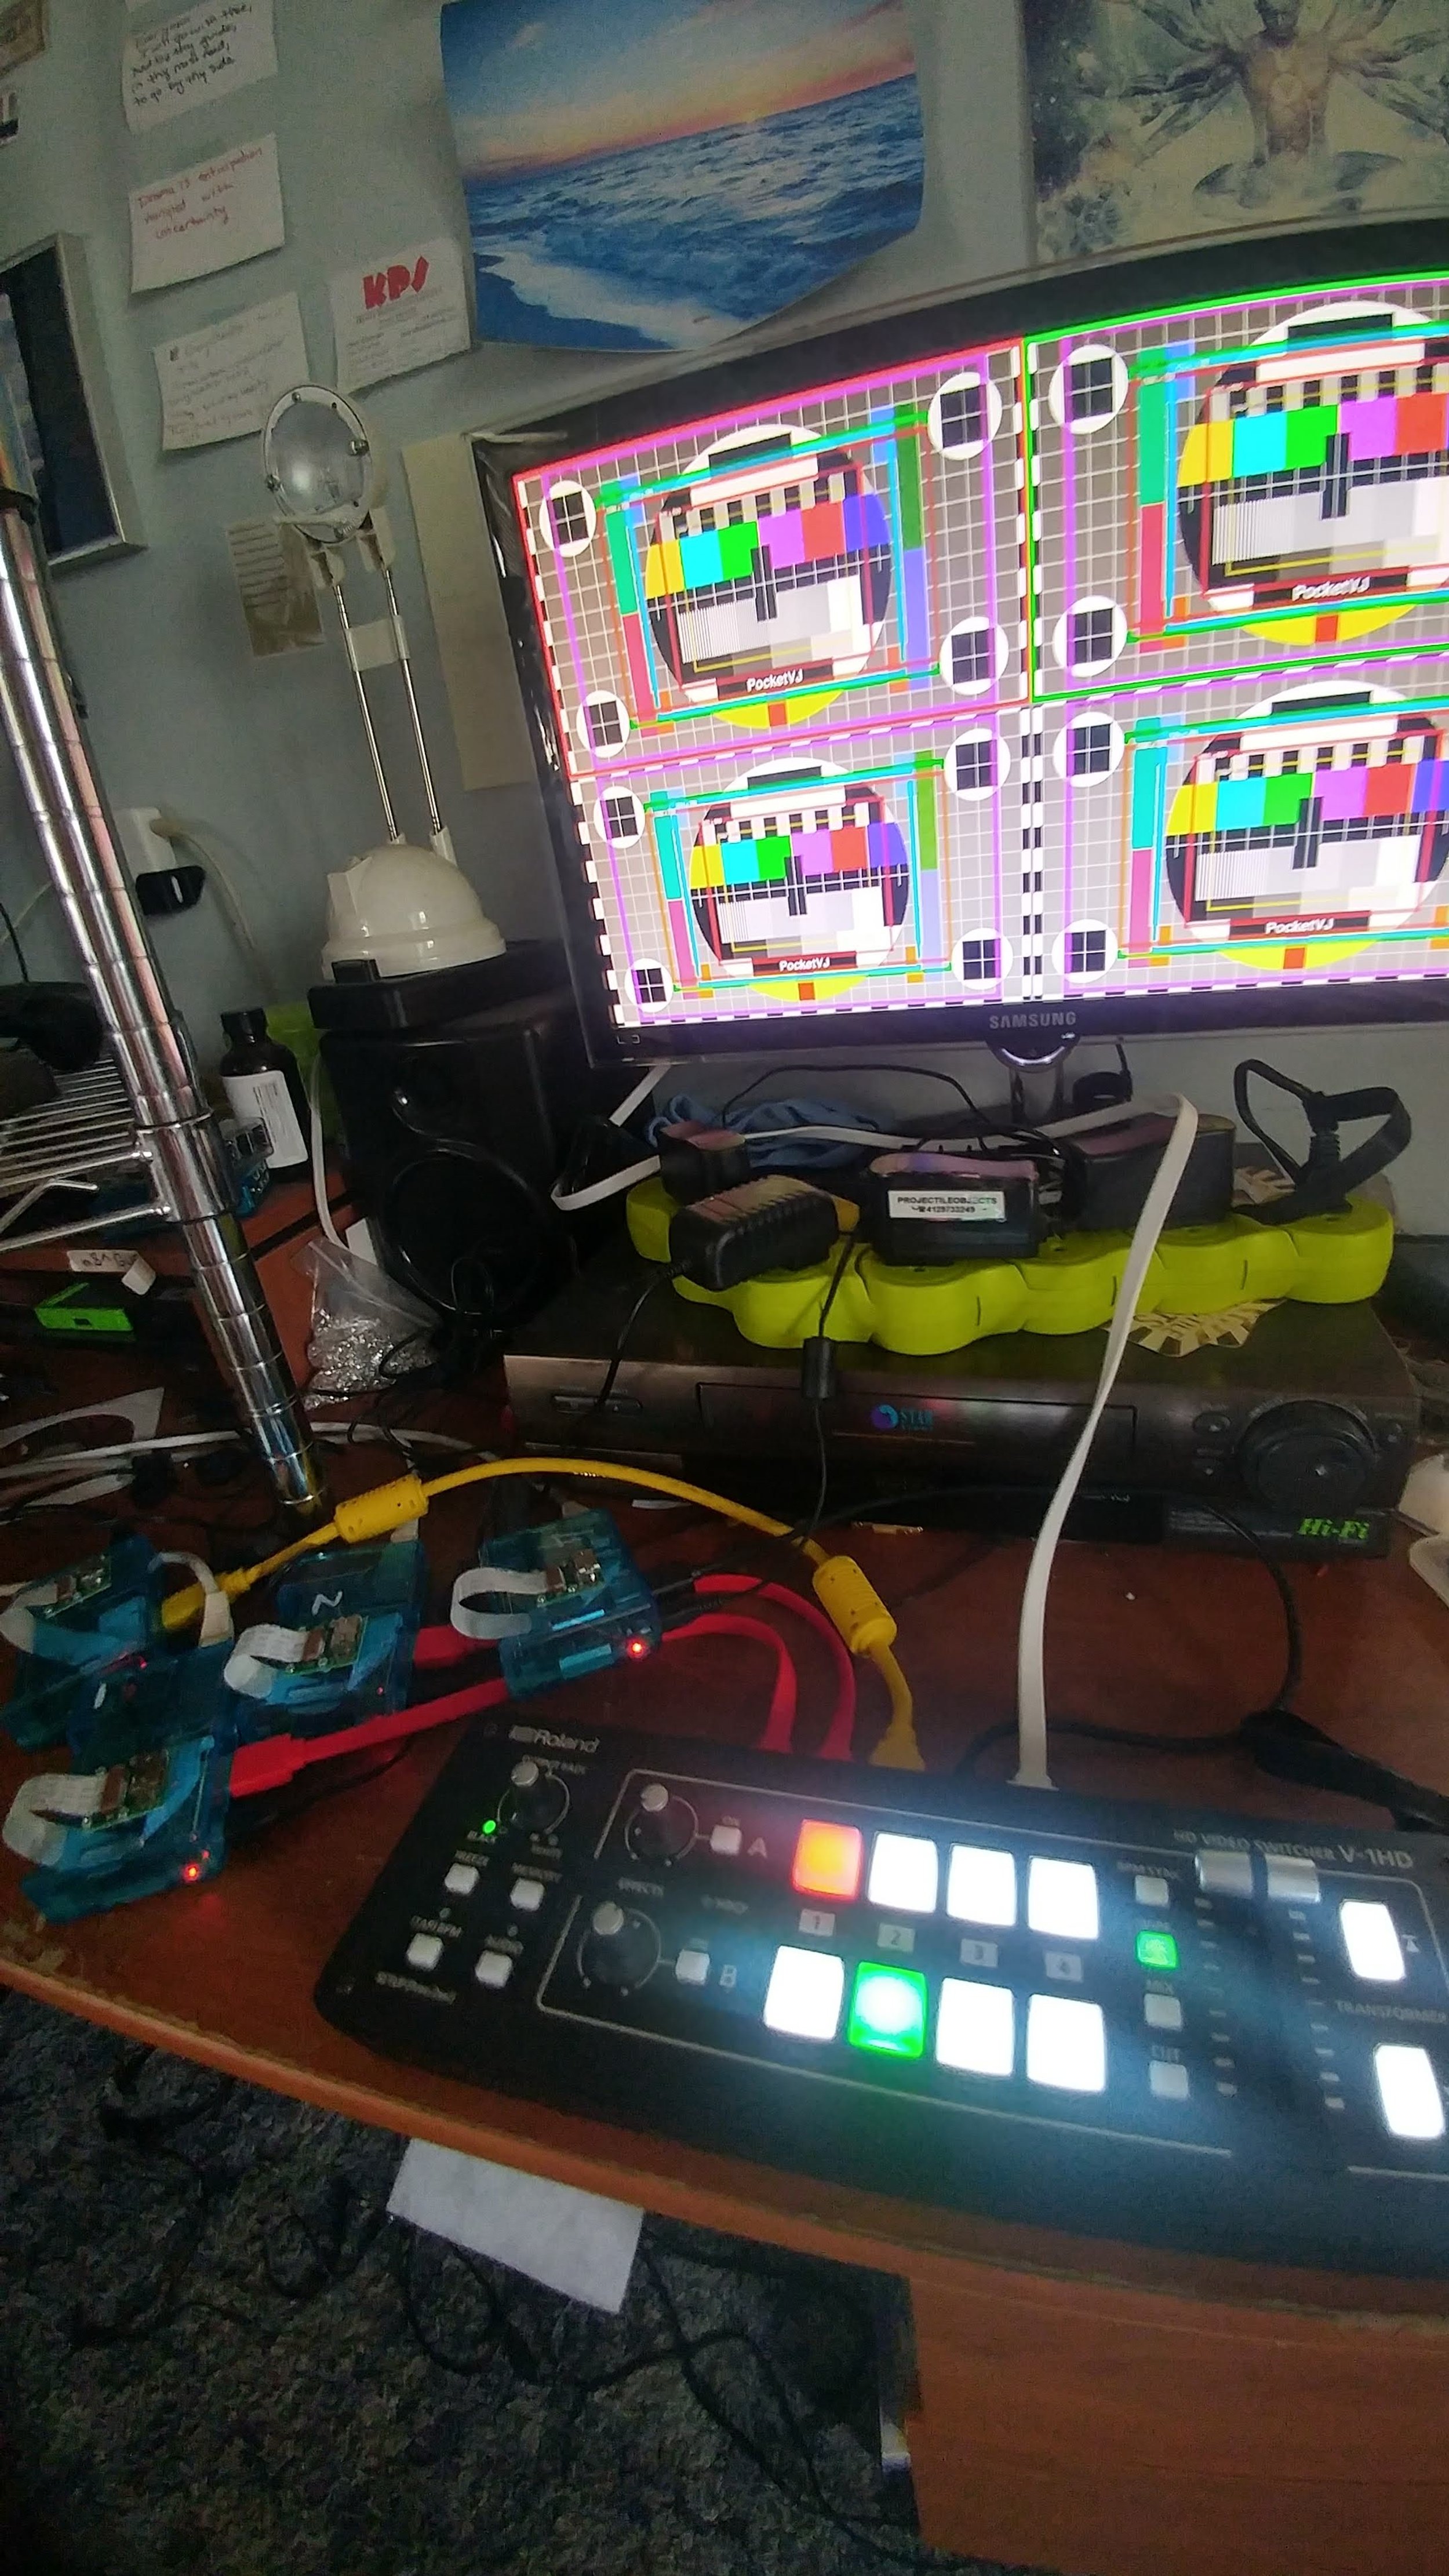
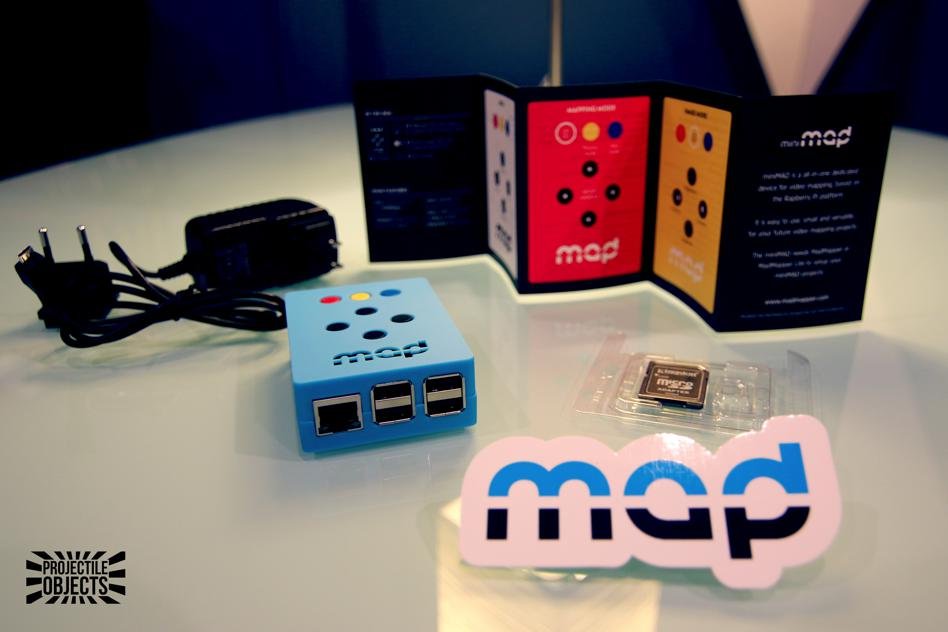
We can’t all afford (or want) to haul a backup laptop with us for every show, but you can carry my favorite backup VJ tool ever! — A Raspberry Pi (v2, or 3; sorry I don’t have any experience with the RPI 4’s). A Raspberry Pi, HDMI cable, and a USB power supply, plus a few different Micro SD cards and you have a swiss army knife for visuals. You can learn more about some of these tools from this article here: Projection Mapping with the Raspberry Pi. And if you connect a camera to the Pi, you can always use it as a network camera with a little configuration!
If you’re a Madmapper user, I recommend you look into the MiniMad. If you have a MiniMad, you can always swap out the Micro SD card for another one. The MiniMad uses an RPI 2 which does not have built in Wi-Fi like the 3 and 4, but you can hook it up to a wireless device to change that. Even if you’re just using the MiniMad as a looping 1080p video player, you can pre-load some clips onto your pi’s memory card, and make a quick HDMI swap out if your main machine takes a dive during a show — better to have something up on the screen(s) than nothing.
The PocketVJ is another RPI swiss army knife, you can run things on schedule, sync over Wi-Fi or network, projection map, control DMX and more.
I like to keep a micro SD card with a version of Raspbian / or other Linux, pre-loaded with some hardware diagnostic tools: GParted, DD disk rescue, Angry Ip, or other network diagnostic / Wi-Fi tools. (Maybe even a Kali Linux build if you need to “dive deeper” into the surrounding networks). From time to time, Mac’s disk utility craps out on restoring external hard drives and partitions. If you don’t know the difference between APFS, NTFS, HFS+, FAT32, ExFAT, etc. Just know that not all drives are formatted the same — and not all read and writeable by other operating systems without a little extra help. I’ll mention a few more Mac softwares to help with this, but sometimes it just takes a Linux device to see things for what they really are and fix them. You can also take a crack at some Homebrew tools or Terminal command lines to do what the Disk Utilities can’t, but the cost and space of an extra 16GB Micro SD is worth it.
HDMI Recorder / Player. You can buy a BlackMagic or Atomos monitor with built-in recording and playback capabilities (which are super cool, but also relatively expensive and record in large file sizes), but I recommend a less expensive standalone H.264 or H.265 recorder player. You can buy these for under $100 if you shop around. Cloner Alliance makes a model that is regularly available on Amazon. The reason I recommend these over the fancier options is that many of these will break HDCP. I’m not recommending you record copy-written content, but Mac’s have been known from time to time to get finicky with projectors and media servers with HDCP. Last thing you want to do is plug your setup into a house system and end up with a blank screen because HDCP isn’t working correctly. A recorder/player like this kills a few birds with one stone — It lets you record your mixes, and then play them back. A good habit when you first setup, is to play some music, record some visuals, and keep that on one of these devices in case you need to push play later.
Video player. I see the Micca Spec media player everywhere when I travel. It’s affordable and will loop video content easily from a thumb drive or SD card. If you go this route, I recommend having BlueHarvest (or alternative). The Micca will see hidden files that your mac stores on the thumb drive. Hidden Cleaner or BlueHarvest clear these hidden files when you eject your drive. Doing this extra step will make sure the Micca Spec doesn’t stop playback when playing through a folder of media content. Likewise, if you use a PC or Linux Raspberry Pi to load your media, you won’t encounter this problem.
Here’s another tool with multiple uses. Find one that you like and test it. Some powered HDMI splitters can act as an HDMI extender, allowing for longer HDMI runs. Obviously, you can split your HDMI signal and send out to two sources at the same time (Into another projector, capture device, or external preview monitor?) A third use is some HDMI splitters also break HDCP, which can get you around some issues I mentioned above. Oh, and they’re only about $20. Just test them and your HDMI cables to make sure you don’t have a defective unit with a weak signal.
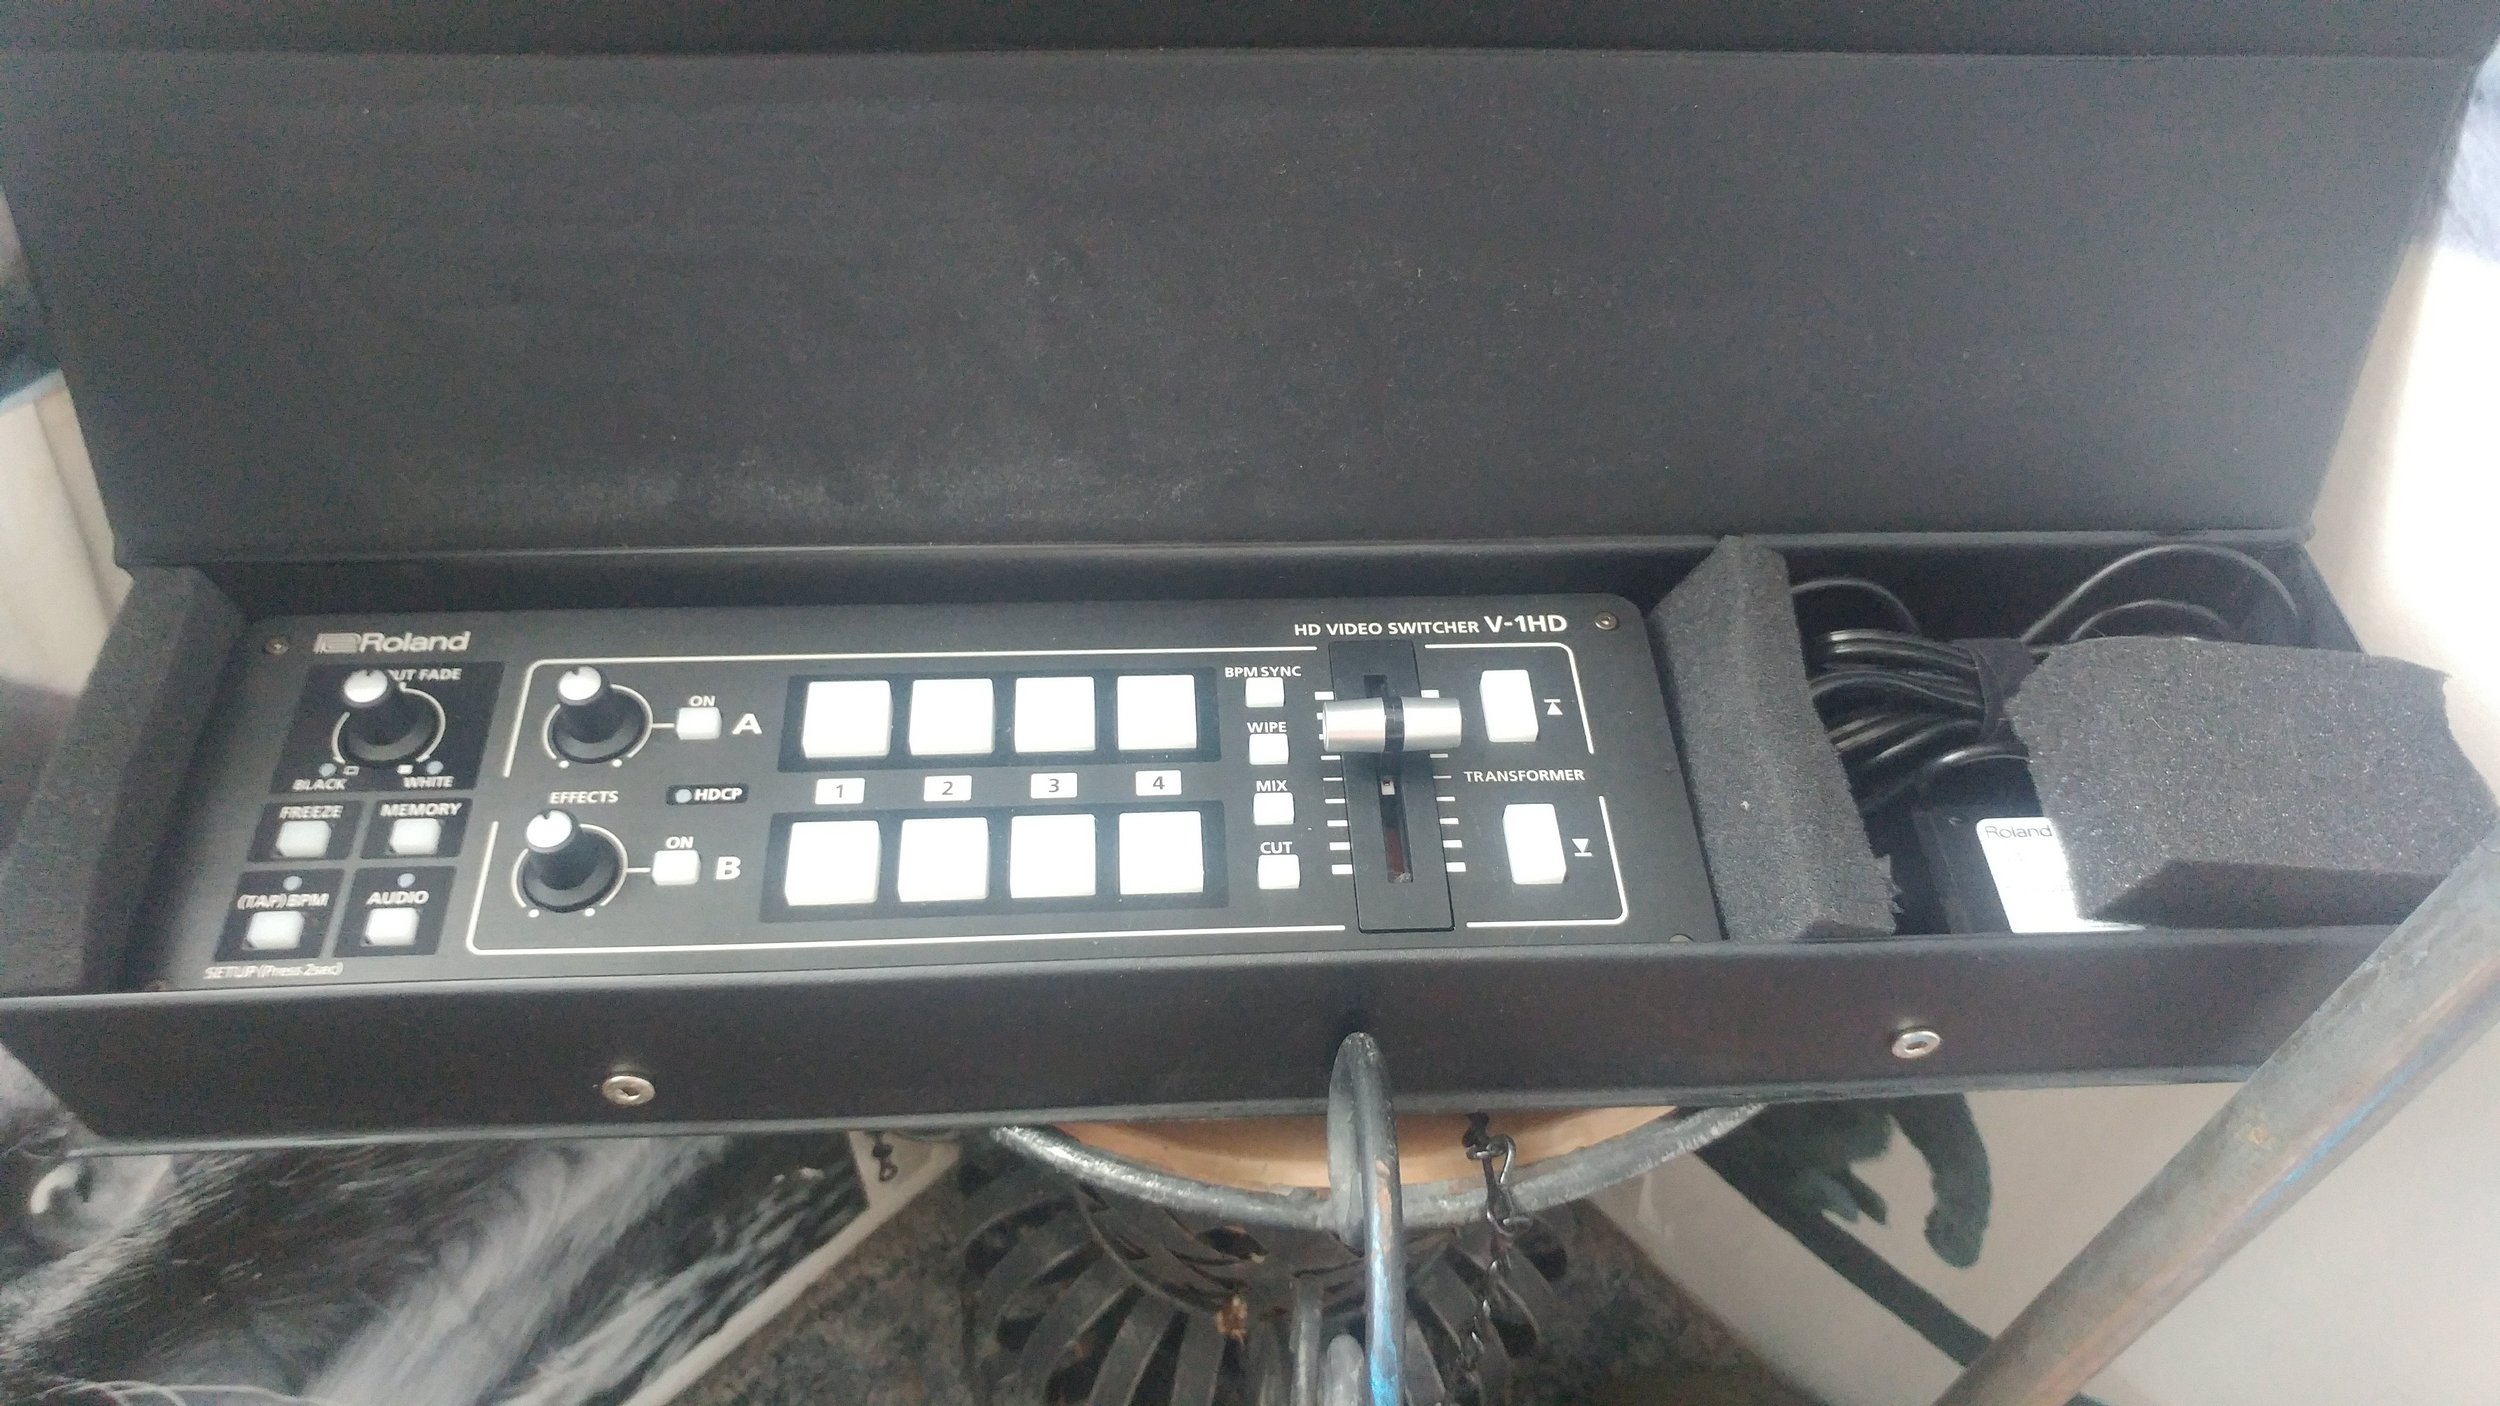
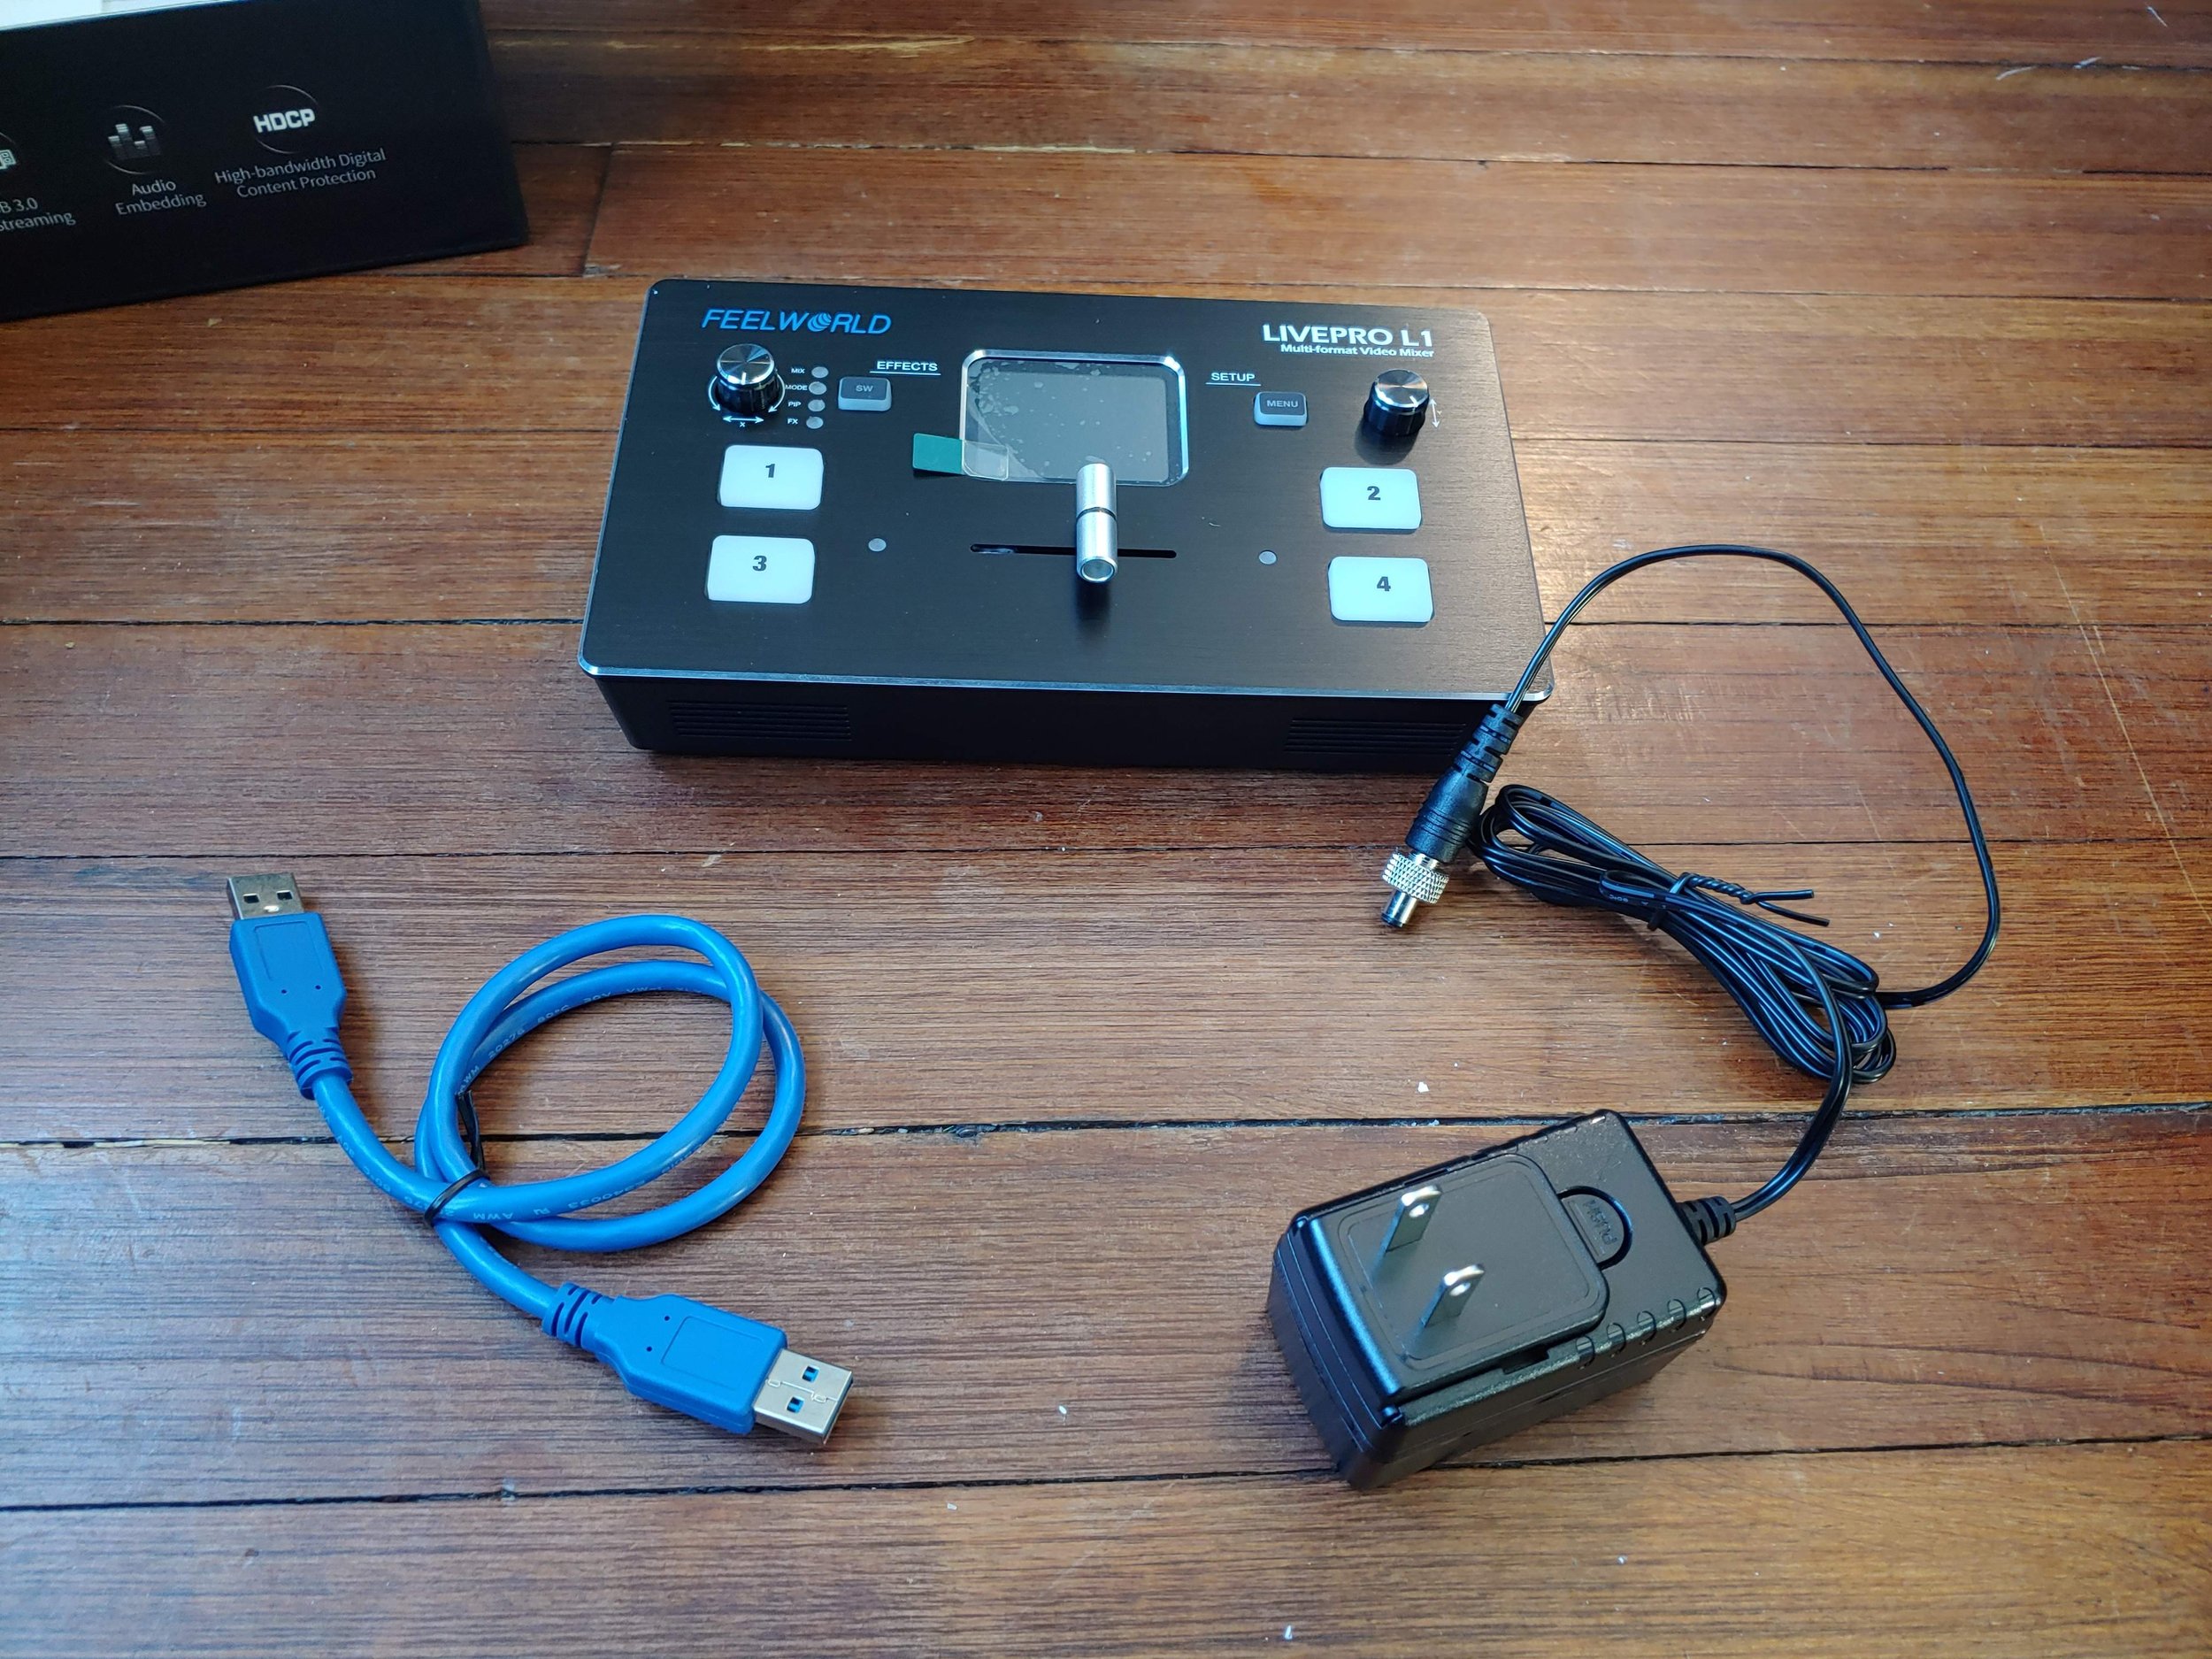
5. HDMI Mixers - (Optional)
I have one, but I don’t always take it with me. What’s great is they have become very affordable over the last few years. The Blackmagic Design ATEM Mini is only $295, the Pro version has built in recording capabilities and the Roland Mixers (4 channel, 2 channel) are smooth and packed with great features (such as FX, various fades, blackouts, freezes). There’s even the super-budget Feelworld LIVEPRO L1, which I have mixed feelings about, but ultimately better than nothing. Plus, this allows for multi-machine collaborations, redundancies, and with the Roland with dual outputs, can also work as an HDMI splitter (FYI, The Roland and BlackMagic can still have issues with HDCP), but they offer professional solutions for a wide range of uses. (I’m praying for the HDMI mixer that lets you load and create custom FX for it!) (Osee GoStream)
6. HDMI Cables
I’ve been talking about HDMI a lot in the last few, so I thought I would say, buy QUALITY HDMI cables. You don’t have to spend a fortune on Gold plating, but one simple test to see if an HDMI cable was manufactured properly is to take a conductivity check multi-meter to the outside shielding of the HDMI cable and see if they are connected end to end — this is the ground connection for the HDMI cable and many times in cheaper cables is not wired correctly. Ferrite cores on each end are great for interference, but do yourself a favor and get some good cables. The cheap ones can fail or in some severe cases actually fry HDMI ports on various devices. (In my kit I carry 2x 50’ HDMI cables, 4x 6’ cables, 3x 2’ cables)
7. HDMI to SDI, SDI to HDMI, VGA to SDI, etc. (optional) (BlackMagic Cross 12G (4K))
This is optional, but can pay off big for longer video runs, or many times a lot of large venue projectors are wired up with SDI. They should have their own HDMI to SDI converter, but it’s good to have one of your own and test it! One thing to look out for is some broadcast HDMI to SDI converters work only in broadcast resolution and frame rate standards. (Like 1280x720 or 1920x1080) and some projectors support different aspect ratios and resolutions (Like 1280x800 or 1920x1200). This usually comes into play when setting up a projector for projection mapping, but it’s something to be aware of. You might have to lose some resolution height from the image coming out of the projector by forcing a 1920x1080 (1080p) out of your laptop, but knowing this might save some time troubleshooting your setup and configuration. (Bi-direction converters are cool! BMD has the Micro Bi-Directional converter for $65)
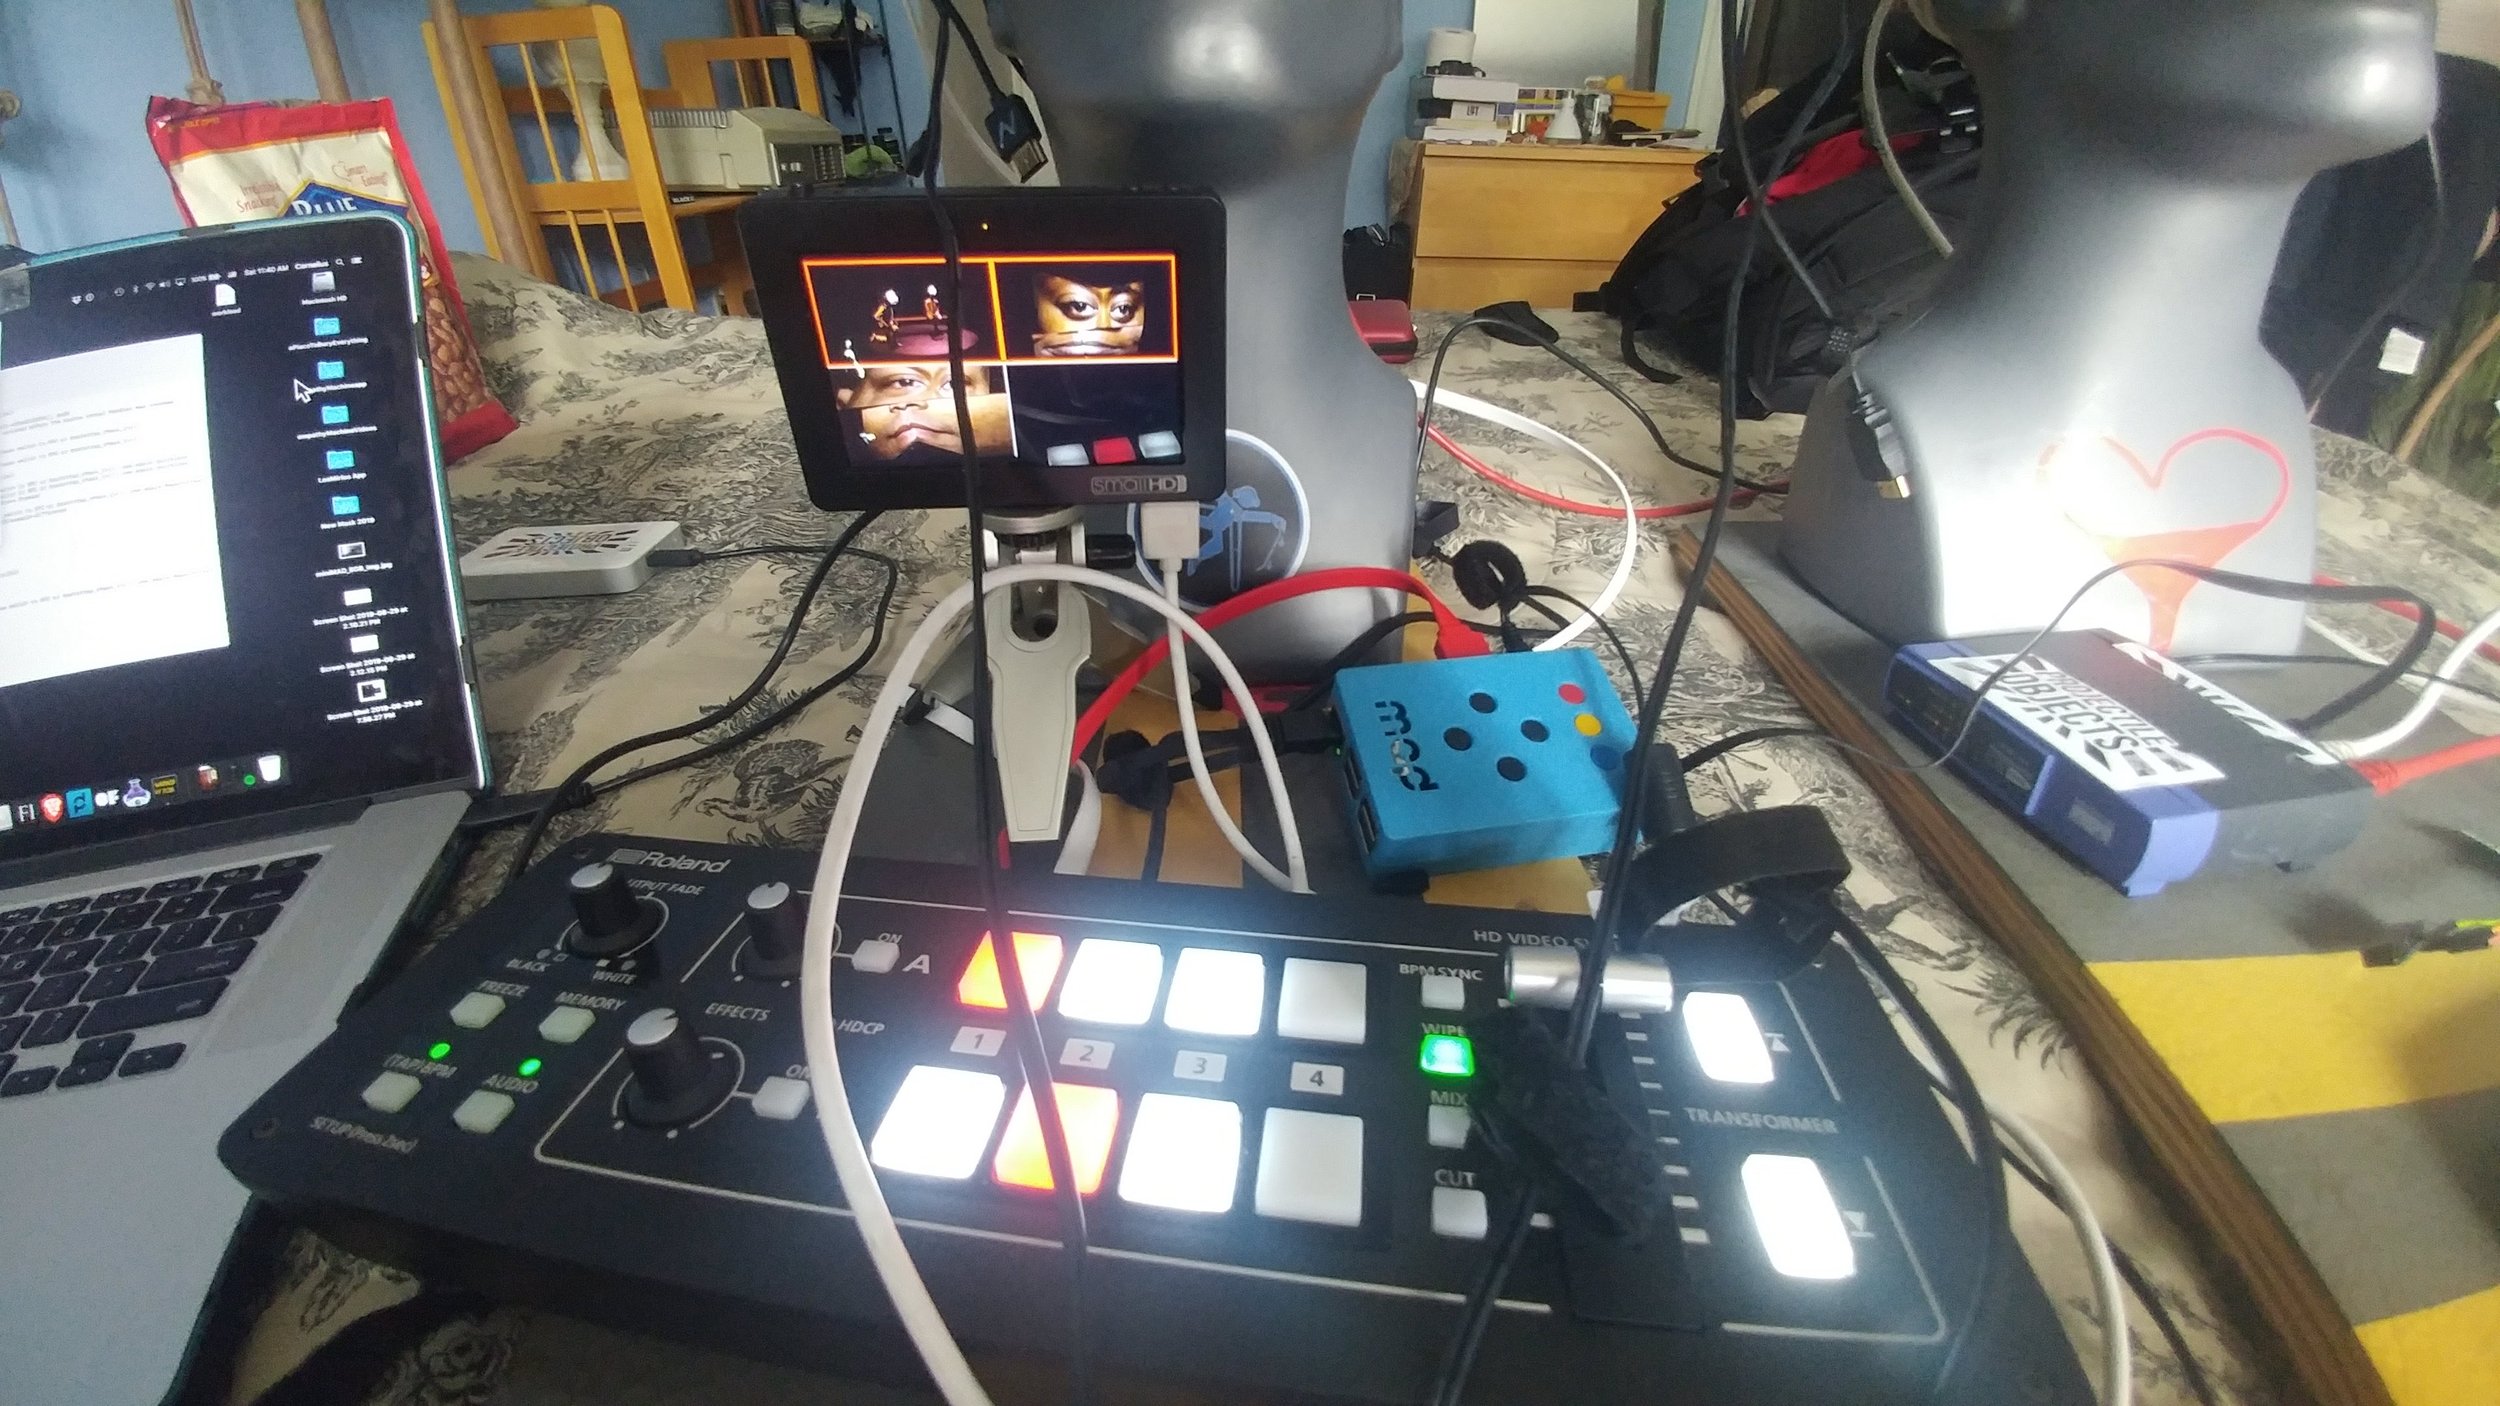
8. External Monitors / Screens (FeelWorld 5” Field Monitor) (Asus 16” Screen)
This has changed a lot over the years. You can buy a portable 15” screen that’s battery powered and as thick as a tablet for about $200, but they are usually mini-HDMI and do not have HDMI thru options. I prefer screens that have an HDMI loop out, so you can monitor the feed that you’re sending out of your device and into the projector. I carry an older SmallHD 4” screen for this very reason. It’s also great for troubleshooting image connections. Once again, a lot of these “on camera” monitors work within the limitations of broadcast resolutions and frame rates, but some of the newer ones have built in HDMI to SDI conversions, record functions, and various levels and adjustments. The larger BlackMagic Video assist is packed with features, but will also set you back $1,000. Pick the screen that works for you, and if you can’t get one with loop thru HDMI, well that’s when the HDMI splitter comes in handy again!
9. Dongles, Converters, Adapters! (USB-C, HDMI, VGA, USB) (Example: Anker USB C Dongle)
This was the first section I wrote when creating this document. It came out to an entire page about dongles. I really don’t want to bore you to death, but let’s face it. Dongles are a mess when it comes to performance and quality. Once again, buy what you need and test! If you’ve found a thunderbolt or USB-C hub that you love that has everything and is inexpensive, great! Test it and if you really love it, then buy two to have as a backup. Last thing you need is your one-of-a-kind hub failing you when you need it most. As for HDMI dongles specifically, buy ACTIVE adapters if you can. Barco (the projector people) has a great article about active vs passive HDMI conversion. Basically, if it doesn’t say Active, it’s probably not. Not that you will need it for everything, but look at the Barco link so you have a better understanding of passive vs. active adapters.
Outside of what your hub has, bring a converter for as many analog or digital video connections that you think you might come in contact with. (They can be small. I have a small pouch dedicated to carrying these when I travel). Here’s a few: HDMI (mini, micro, adjustable angle, short HDMI extension, passive extender (for smaller cable runs). DVI to HDMI, HDMI to DVI (buy good quality versions of these $7 a piece). VGA: M-to-M extension, F-to-F extension, M-to-F extension, Thunderbolt or USB-C to VGA, VGA to DVI-I.
VGA is odd, but still in use. I own a VGA to SDI converter and an HDMI to VGA converter, but I’ve used them twice in my life. A thunderbolt to VGA adapter plus a decent VGA cable can usually carry a decent signal about 75’ before it needs help. I don’t normally buy HDMI cables over 50’, for that I’ll used SDI (or even ethernet and NDI for longer distances), beyond that there is fiber, but that goes into a whole other ballpark and if you’re at a venue using fibre, they’ll most likely have a rack mount converter / scaler for you to plug directly into. I’ve had success with Active HDMI adapters and a high end 100’ HDMI cables (with signal boosters inside), but they cost enough to make the benefits from converting HDMI to SDI more appealing.
USB’s “oh baby!” Once again, try to carry every kind, and I’d recommend carrying two or three of each kind. A to B cable, 2.0, 3.0, USB-C, etc. And if you’re an iOS user, don’t forget the USB to Lightning cable. I like to keep a few 2 or 3 amp USB wall taps hanging around to make use of these cables. I have some HDMI splitters that use Micro USB cables, others that use Mini. A few HDMI capture devices that use a 3.0 A to A cable (which is just weird and kind of annoying). The 2.0 A-B cable is common for a lot of Midi controllers (and home printers :). I’ve seen some cheap multi-converters that break, and some more expensive ones that also break. Just buy a few of every type, test them, and keep them in an easy to sort through zipper pouch.
Powered USB 3.0 hub, always good to have more ports than you need.
10. A mini wireless USB keyboard!
Yes! Despite the obvious benefits of using it as a remote “projection mapping” controller, or changing things up while you’re out on the dance floor, a mini wireless keyboard has saved my butt! In the middle of a show with my ancient 2012 MacBook Pro (which was new at the time), my keyboard stopped working entirely. It would later fix itself after a restart and never happen again, but it happened once, and during a show (of course it would!). Randomly, I had one of these keyboards in my bag, plugged it in, and used it for the rest of the show. Plus, you can also use it with your raspberry pi setup. I recommend the kind that us RF (works much longer range) and take AA or AAA batteries. You can put reusable batteries inside, but built-in rechargeable batteries can leave you stranded if they die.

11. A headlamp (with red LED) (Wuben H4, Black Diamond Storm 500-R)
Now we’re getting somewhere. You need this. We work in dark environments, we climb around and install things in crazy places. Having a light on your head (not just a phone light in your hands) is a lifesaver. I recommend one with a red light (to save your night vision and not blind others). Rechargable is great, and some of the newer headlamps (like the Wuben H4 $29), have rechargable batteries that fit in the AAA slot.
12. Batteries
I use rechargeable batteries in just about everything unless it is audio related. I also keep enough AA, AAA, 9V batteries to go inside everything I might need. They usually end up helping someone else who forgot their batteries, but always good to have.
13. Cellphone and external charger / power bank
Another one that seems obvious, but even if you don’t have a phone provider, an Android or iOS phone can be a valuable tool. How about using it as a Wi-Fi Camera? Projection Mapper for Android lets you turn it into a little projection mapping tool. There’s also TouchOSC. If you have a good one, you can use the photos and videos to document you and all of your awesomeness.
USB Power bank is not just for your phone, but can also power a raspberry pi, an HDMI splitter, HDMI to SDI converter, other 5V media player, etc. They can come in handy and there’s even a few that will power your Mac Laptop!
14. External mouse or Touchpad
Similar to the keyboard, these can help. I take a silent-click mouse with me so when I’m on a plane or train, I’m not annoying people with all the clicking.
15. In Ear Monitors or headphones.
I prefer the Shure 215 SE in ear monitors with the memory foam caps. These double as ear plugs in a pinch, sound great when you want to listen to your music, are compact, and if you’re doing any sort of mixing, you can keep one in your ear and disconnect the other one and save it in the carrying pouch they give you. I picked this trick up from a DJ friend who ditched the over the ear headphones that sometimes have to sit awkwardly on your head when mixing. While you might “just be a VJ” I’ve had to manually sync visuals for artists’ performances and variably adjust the rate and speed of visual playback all because the DJ who hit their audio cue didn’t realize that they had their auto-tempo set faster than the original track. And if you’re mixing in music videos, this will happen all the time (for many in-depth reasons such as videos at 48kHz and MP3s at 44.1kHz) or if the DJ wants to up the BPMs to match the next thing in their cue.
Bluetooth headphones or ear buds are fun too, but don’t always count on them working loud enough when you're in a large club (or a bass trap!)

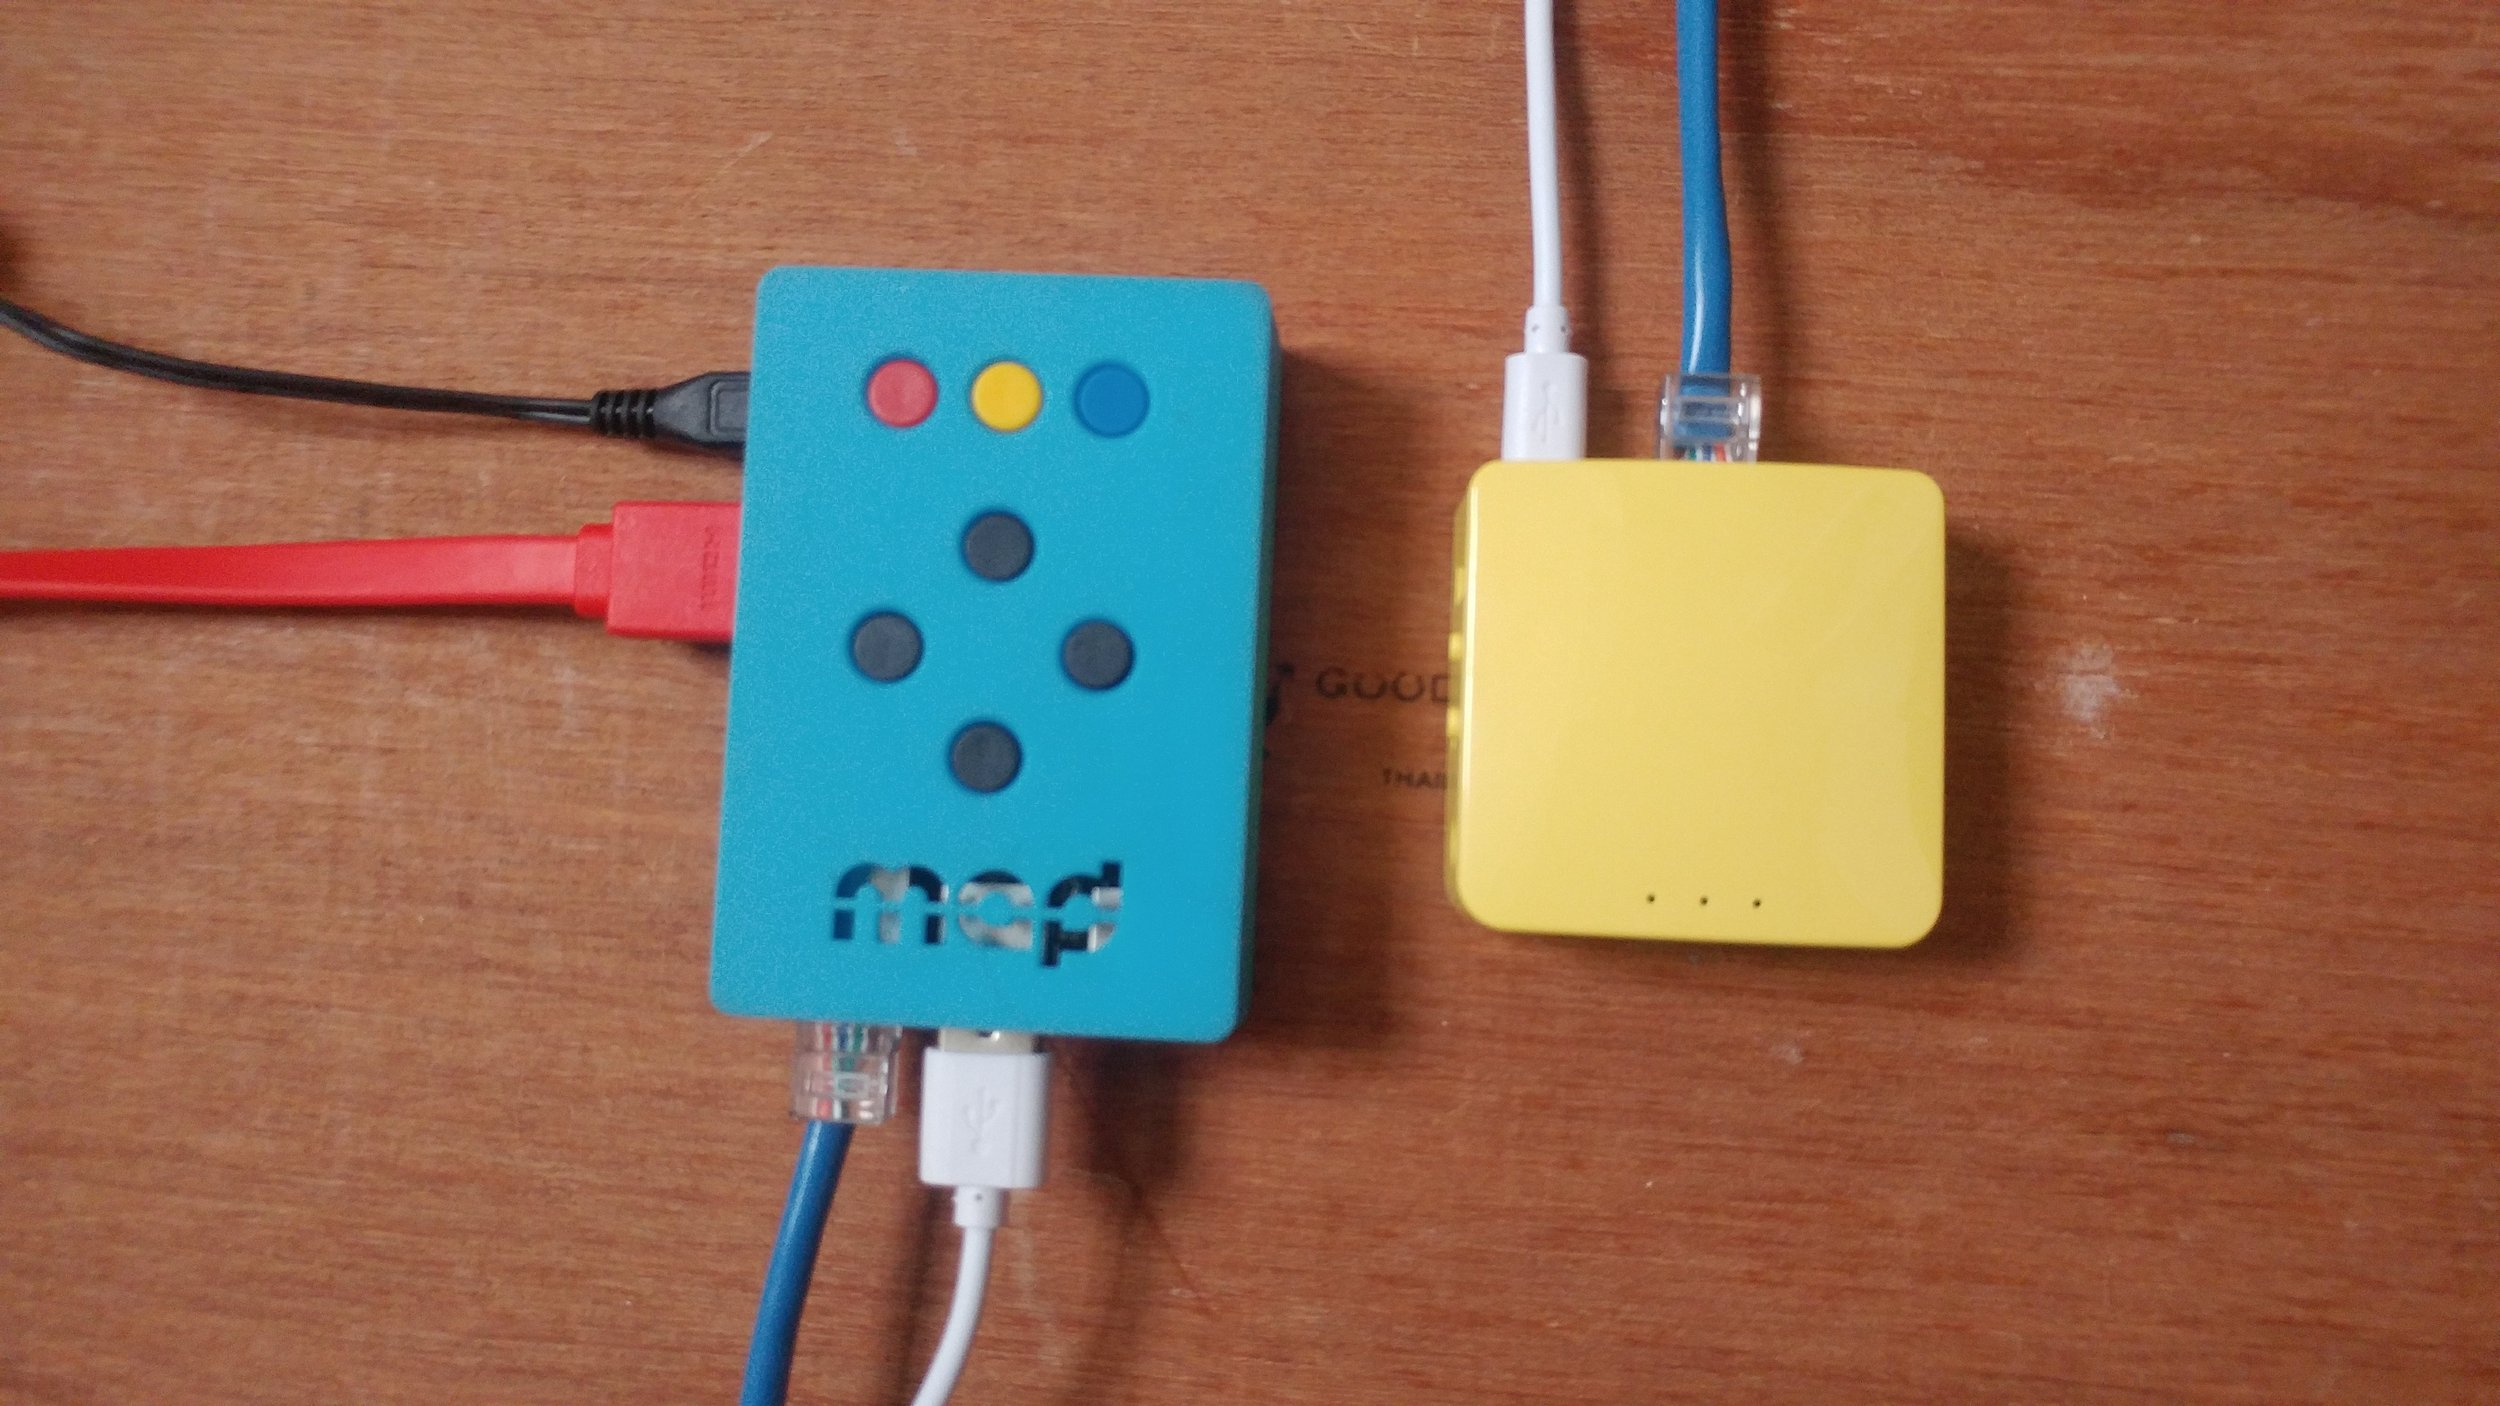
16. Gigabit Travel Router / Ethernet cables
NDI is a great tool for sharing video over network. Between machines, or over long runs. A 2 or 3 port Gigabit travel router can replace an HDMI mixer sometimes. It’s also great for file sharing, Midi and Timecode sync / cues. Ableton link, etc. Make sure you bring some ethernet cables! You can also setup a Raspberry Pi to work as a little network device in a pinch. A plug in play travel router is a great tool to have.
17. Hard drives and SSDs (Crucial 4TB, Crucial 8TB)
Your optimized media (whether that’s DXV for Resolume, HAP or MP4s) should be on a fast drive separate from your internal operating system. SSDs have come down in costs over the years, and VJing with MP4s has become better (encode your MP4s with every frame as a keyframe to ease the load on your computer). External hard drives have also come a long way, 4TB for $100, not bad! Just make sure you check the read / write speeds of your drive with something like the BlackMagic Disk Speed test. I feel comfortable with drives in the 200 Mb/s+ read and write speeds for almost any project. That being said, if you’re just mixing two channels of video, even 100 Mb/s read and write was fine. Back in the day, we were lucky if we could pull in 80 Mb/s over Firewire 800 or even USB 2.0 speeds. Just consider yourselves lucky that USB 3.0 is the base standard now. Oh, and test your drives. It’s hard to say which drive is the best / most reliable. I’ve had every brand / manufacturer’s drive fail on me at one point or another. For that I keep backups and travel with redundancies. Hey if all else fails, you can run a music visualizer application :) (see more in the software section).
18. Make a checklist and don’t forget your power supply!
It happens. A checklist helps.

19. USB UVC Capture device. (Elgato CamLink 4K Plus)
There are a few write-ups on these, but anything that lets you pull HDMI into your computer with low latency is a great tool to have. You can even use it with the raspberry pi and skip an external screen.

20. Dr. HDMI or EDID troubleshooting device.
I’ve only used this twice, but in both cases we needed it. When your computer connects to a projector or media player, they connect, and the EDID communicates what resolutions and information the projector will accept. Well! sometimes this craps out (I mean literally, I have an old ViewSonic projector that stopped sharing EDID all together). Since the Mac likes to “auto-connect” there are a few cases where HDMI to SDI converters and odd or defective projectors will screw up the EDID and continuously keep disconnecting. This is where I’ve used a Dr. HDMI to force a specific EDID out. My mac connects to the Dr. HDMI and sends a signal, and the Dr. HDMI sends out a standard signal that you pre-set over HDMI. It can take a bit of fiddling to get it right, but it has saved my butt the two times I needed it!
21. Blank thumb drives.
At some point someones going to want to give you files. Give them a thumb drive and don’t always expect to get it back. Having a couple of cheap 32GB thumb drives in your bag will come in handy.
22. Multi-card reader.
Some Thunderbolt or USB-C hubs have these built in, but if they don’t carry one. Someone might give you a Micro SD card from their camera or phone at some point.
23. Laptop stand / Midi Controller Stand
This is a preference, but can also be a wrist saver. I recommend something that’s collapsible and adjustable. I’d avoid using a soft stand like the MOFT (I was a Kickstarter backer and it failed me in less than a year). My favorite is the AVIIQ aluminum laptop stand, but they no longer make it, so find one that fits your preference. Stands are also great for your Midi controller!
24. MIDI CONTROLLER! (Check out this write up about MIDI Controllers!)
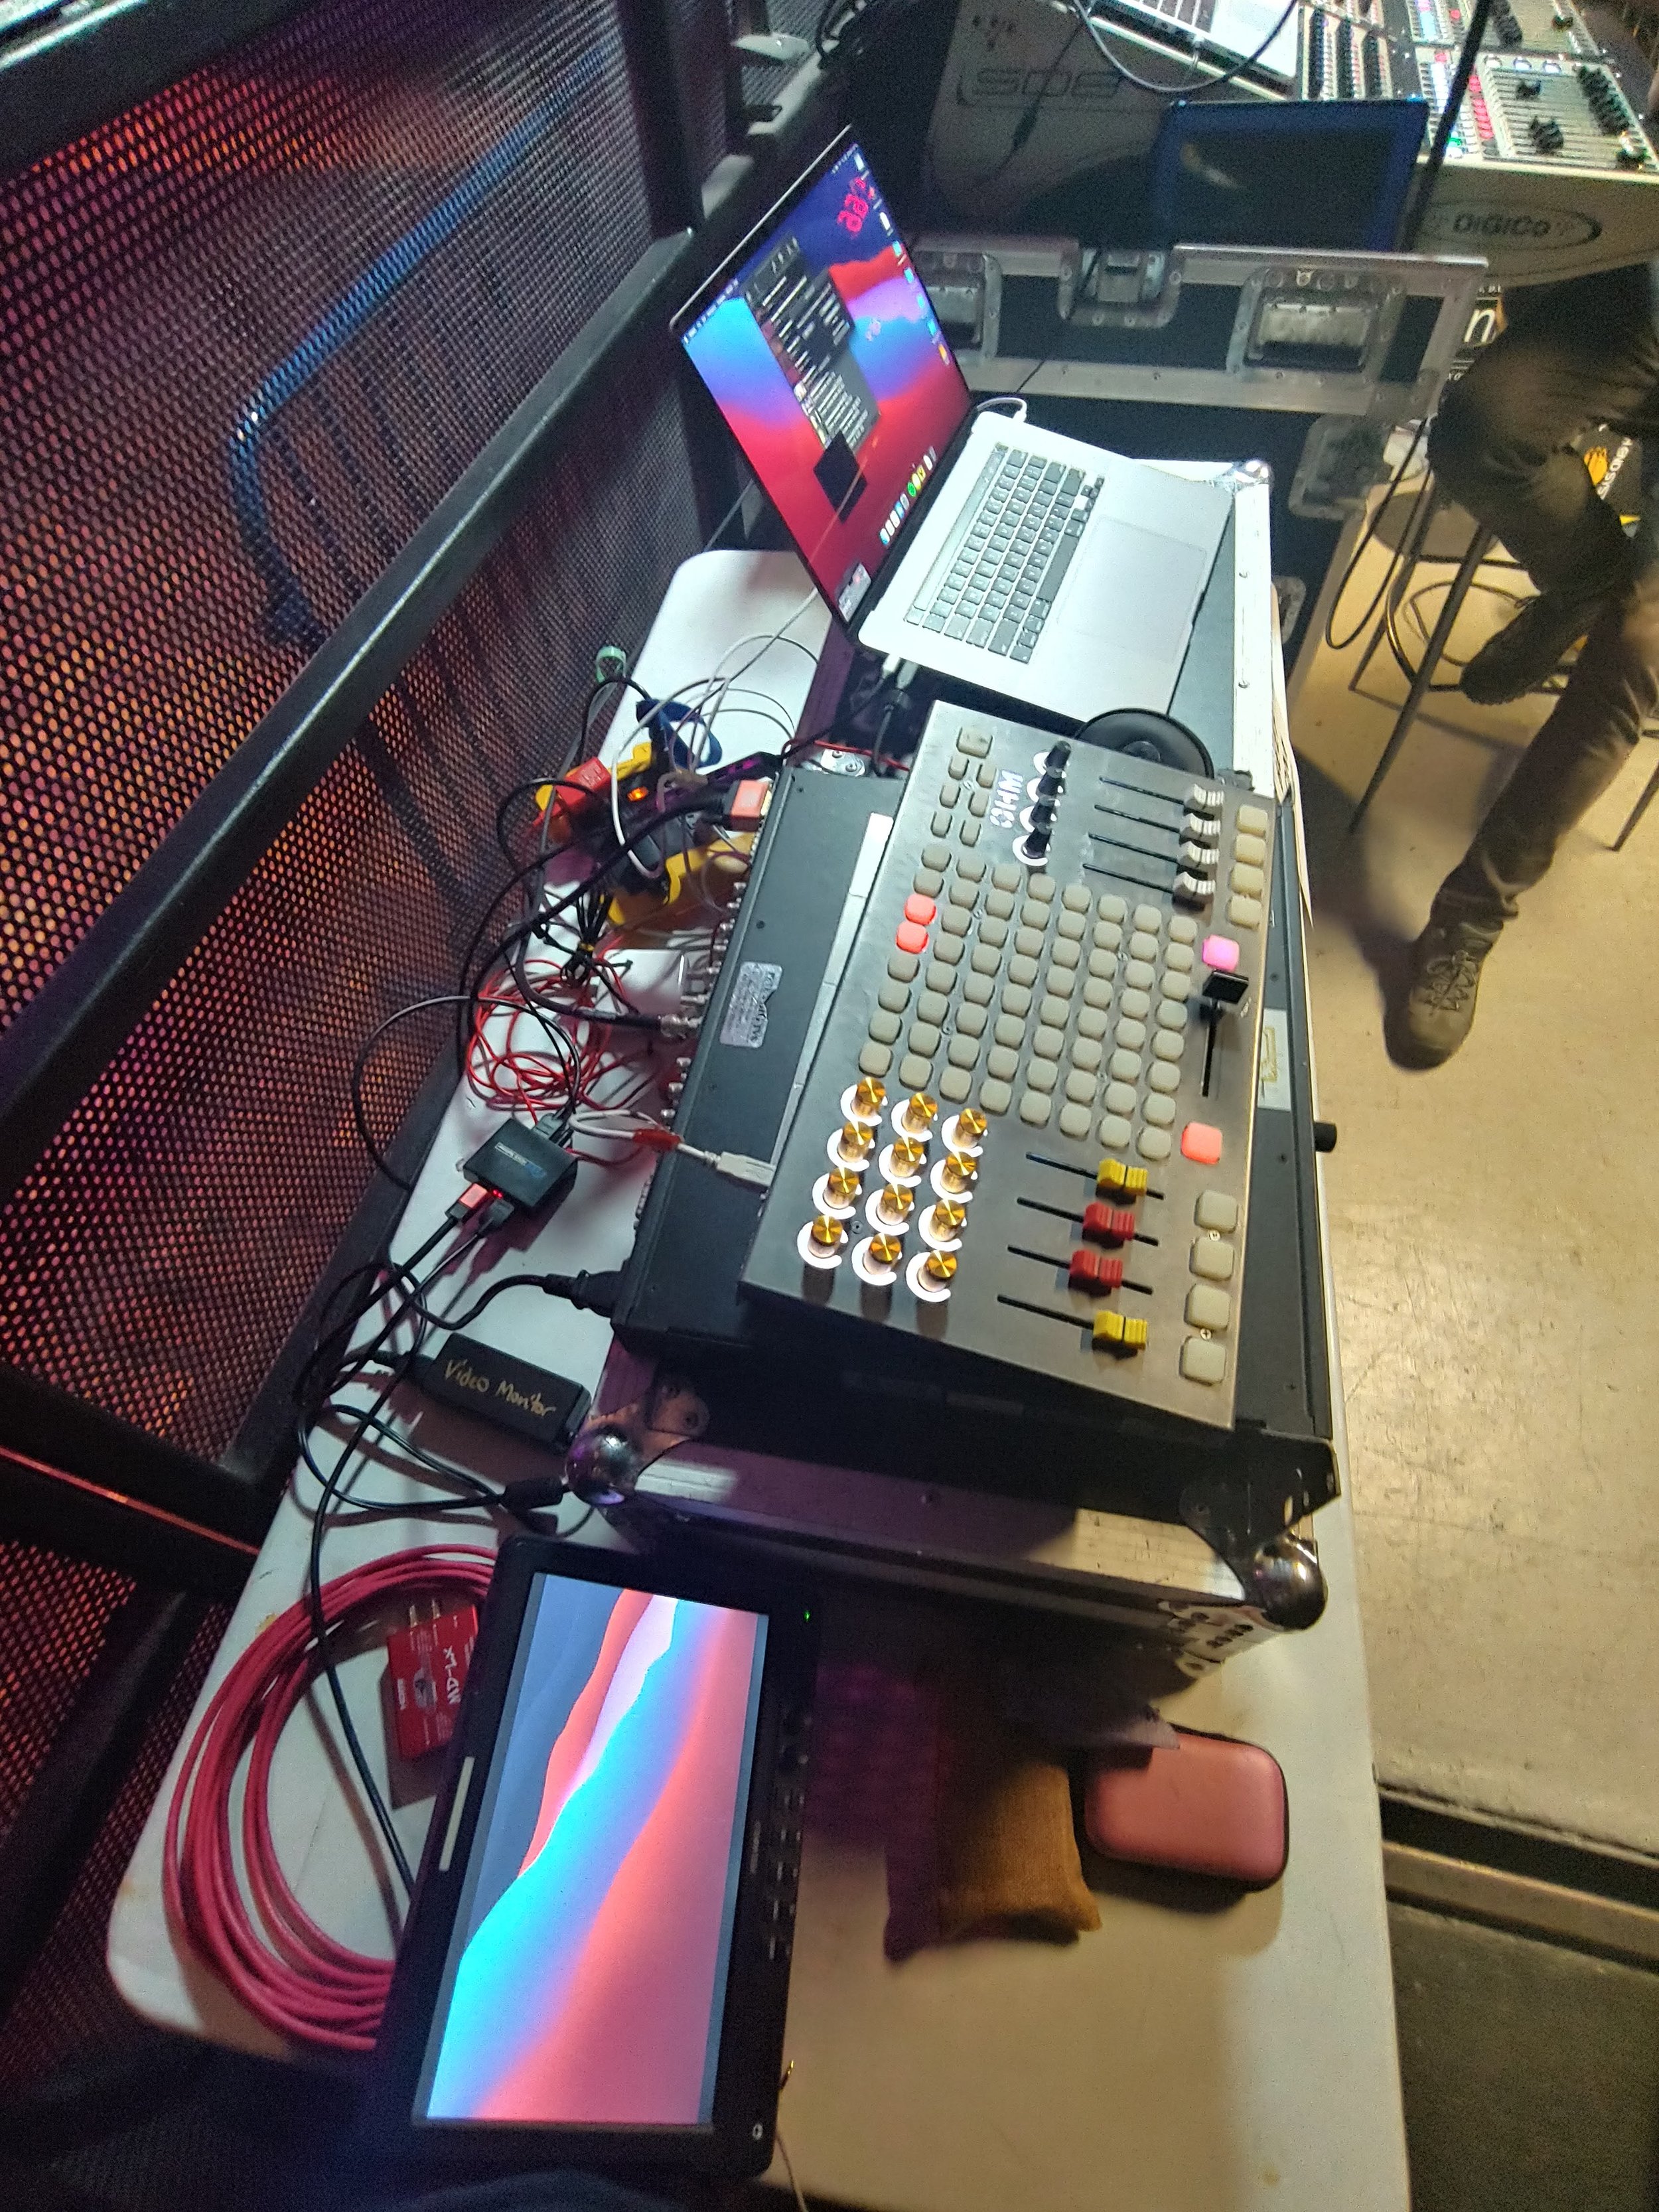
Can’t forget one of the most valuable VJ tools there is — your controller. Once again, there’s a lot of preference that goes into this. I’m a long time Livid Ohm owner and user, but since they’ve been discontinued, I go back and forth between repairing one of the two that I have or breaking out into something smaller like the Korg Nano Kontrol, Electrix Tweaker (also discontinued), and newly entered the world of the Akai APC40 MK II which is another fantastic controller (and now has a VDMX template for it!).
25. Travel Surge Protector / Power Strip / Extension cord.
Something to give you more plugs when you need them, and maybe an extension cord to reach those ports when they’re further away!?


9:30 Club D.C.
Software:
Please note that many of these tools will change over time. Some may be incompatible with apple silicone macs.
1. VDMX (or Alternative)
Yes, obviously you should have some sort of VJ software installed on your computer, but I’d also recommend you install these other freebees from VIDVOX.
2. SwitchResX or Alternative
Sometimes you’ll plug your mac into a Projector, HDMI converter, or setup that only accepts specific resolutions and frame rates, and sometimes the user-friendly Apple Display preferences get it wrong. It’s good to have an app installed that will give you more advanced display output features.
You may have something else that you prefer, but it’s good to have a network scanner when you’re trying to pull or send data over a network. This JAVA based app is free and works great.
4. OSCulator
If you need it, it’s there. I don’t do as much OSC re-routing these days, but OSCulator has come in handy in the past, especially if you use a WiiMote for your VJ setup.
5. AVF Batch Encoder / ff.works / Adobe Media Encoder / FFMpeg, or other encoder
Your visuals should be in an optimized codec for best performance. Adobe Media Encoder works great, but if you’re not an Adobe user and need something a little more comprehensive than AVF Batch Encoder (which is free from VIDVOX and also works), then maybe look into FF Works which has a easy-to-use GUI for FFMpeg. If you’re using MP4’s encode with every frame as a key-frame!
6. NTFS for Mac / ExFat for Mac
Macs are great, but what happens if someone hands you an NTFS formatted drive that they want you to write to?
For downloading videos in a pinch! (Just encode them before VJing).
8. Audio HiJack or Black Hole
Audio re-routing applications can be useful.
9. OBS Studio
The live streaming standard, also great for previewing USB capture cards and web cameras.
10. BlackMagic Disk Speed Test
Speed isn’t everything, but if your drive is dragging you down, check the speed of it.
11. CamTwist
A fun freebee with some additional features.
12. DeltaWalker
My favorite file / folder comparison. Helps with verifying video files and managing drive backups.
13. NeoFinder (CDWinder is the PC version)
Make and offline catalog of all your drives and easily search to find what and where you are looking for.
14. Disk Inventory X
See what’s taking up too much space and move it. Remember, keep your SSDs as free as possible to reduce slowing down their performance.
15. DiskMaker X (6,7,8,9)
This is for making bootable Mac OSX thumb drives.
16. EtreCheck
This is a mac hardware / software diagnostic tool that does a great job identifying hardware or software issues on your mac.
17. KodeLife
Live coding VJ? This one has syphon out for sharing with other applications.
18. TouchOSC
Another Hexler app (similar to KodeLife), this is great for making your own OSC interfaces (Mac/PC, Android, iOS). You can also import an older TouchOSC layout directly into VDMX to make some custom UIs with the Control Surface plugin.
19. Lumen
Lumen is a fun video synth you share with VDMX or run the app standalone.
20. MadMapper or VPT
If you’re looking for more advanced projection mapping configurations, MadMapper is the best you can get (imho). Resolume Arena is great if you’re a Resolume user, but if you prefer VDMX or Modul8, then MadMapper is great. (If you’re also curious, VPT is free, HeavyM, QLab, Mapio, and Millumin all have projection mapping features).
21. Shazam for Mac
Every show I hear a song I’ve never heard before. It helps to identify what that is and remember it for next time.
22. Veźer
I like Veźer for visual or timeline based OSC commands. You can do a lot with VDMXs built-in data looper or LFO, but sometimes you just want to create in a longer timeline with layers. Once again, something to look into.
23. VLCSyphon
This free app has helped get visuals from some odd codecs into VDMX.
Software Tip: If it’s not broke, don’t fix it an hour before your show.
This tip sounds obvious, but it happens all the time. A new app or OS update is released with a ton of features hours, days, or even a week before your big show. DON’T UPDATE. Unless this update promises to fix something that is already broken for you, I highly recommend you avoid new things unless you have ample time to test and troubleshoot your setup. Over the years, this lens of paranoia has saved me a countless number of times. Especially with operating system updates. Every company is going to tell you what they fixed, not what they broke — that will be up to you to find out and hopefully you have enough time to do so.

Misc:
1. Organized pouches.
I recommend clear rip stop pouches and a label maker so you’re not searching all over the place.

2. Leatherman / Multi-tool
3. Zip ties, Velcro straps, Elastic Hair ties (better cable management).
4. Gaffers Tape
5. Pen, Sharpie, Notebook, a few blank labels.
6. COVID, extra masks, hand sanitizer.
7. Screen wipes
8. WATER (Stay hydrated)
9. Sunglasses (for the morning! Or if the Lighting Designer puts a bunch of blinders on the stage!)
10. Don’t forget the clear garbage bag! (also mentioned in the Hardware section: #1)
11. Rope or ratchet straps. (Things to tie things down or together, maybe you can VJ through a hurricane?)
12. Little screw drivers (electrical, pry tools, hex keys, etc.).


QLab and VDMX: Introduction Tutorials
Introductory tutorial explaining how to link VDMX and QLab for live performances and shows.
Read More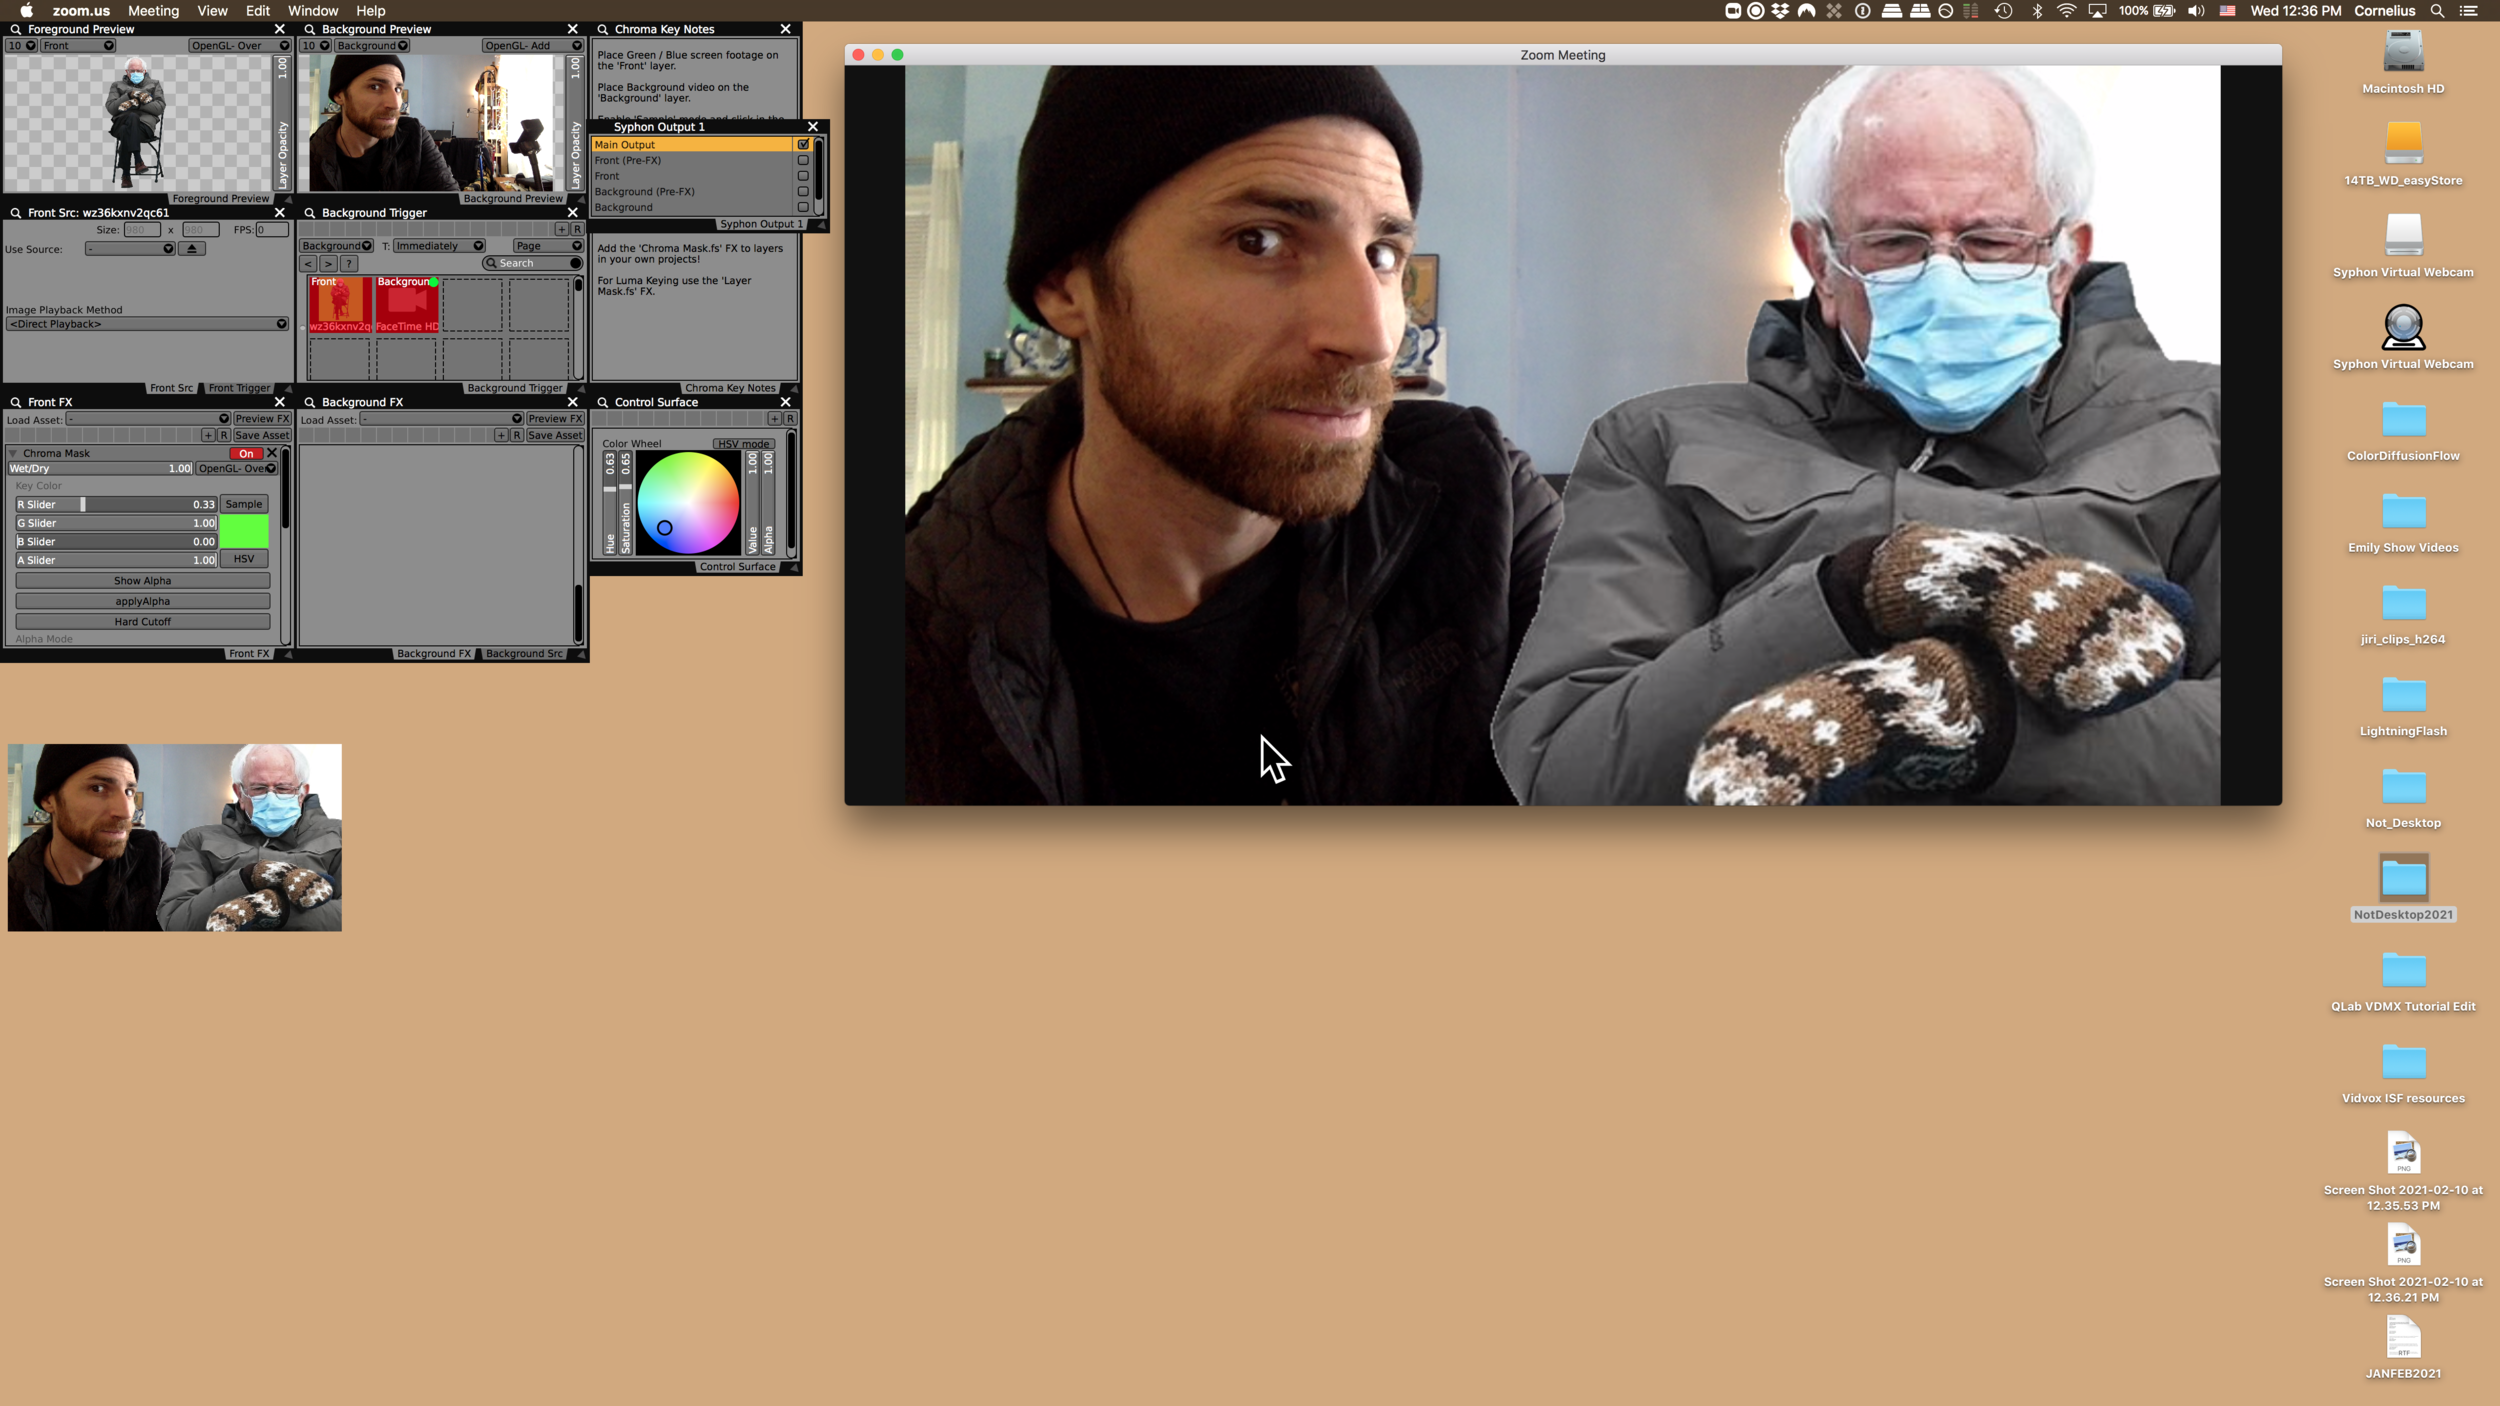
Add custom visuals to Zoom Meetings, Skype, OBS, Whereby, Google Duo, VJing in Zoom
How to use VDMX to add custom effects, visuals, and videos to a Zoom Meeting.
Read MoreProject in Apple Motion using ISF generators and effects from VDMX
Using ISF for Motion to create video loops for VDMX and other VJ software
For VJs and other visual performers, one of the biggest parts of the job is creating your own original materials for your shows. If you like the workflow of compositing layers, applying effects, and automating values found in VDMX, the interface of Apple Motion offers a similar approach for creating visuals with the intention of exporting as movie files, at an affordable price.
Last month we introduced ISF for Motion, a new plug-in that makes it possible to use the same GLSL shaders supported in VDMX as generators and effects inside of Motion and FCP X. This includes our 200+ standard set of assets, as well as all of the creations shared on https://www.interactiveshaderformat.com/
In this tutorial we will take a look at using these ISF generators and effects in Motion to create short video loops to use in VDMX or other VJ software.
Before beginning, make sure to install both Apple Motion and ISF for Motion from the Mac App Store.
Read More
The technique of using a blurry / zoomed version of an image in the background was popularized by the LiveLeak app and is now commonly used as a solution for working with mixed aspect ratio footage. Photo credit: fish2000
Creating a “LiveLeak” Background Fill FX in VDMX
A question that comes up for modern live visualists is how to best work with footage that doesn’t match the aspect ratio that is being used for the final display. Two particularly common situations are when you may be working with older format video that is 4:3 and in other cases it could be camera phone footage captured in vertical mode. In some cases it is okay to use the basic “fill” option within the composition mode settings so that the imagery is scaled to fill the entire output area when needed, but another useful technique is the “LiveLeak” style effect where a blurry version of the image appears blown up in the background.
Read MoreCompleted project file for mixing between RGB->XYZ displacement images for the v002 Rutt Etra generator
Advanced v002 Rutt Etra Techniques in VDMX
Download the completed project file and media files for this tutorial.
One of the most fun visual effects used in live visuals and VJing dates back to the analog Rutt Etra video synthesizer which had many capabilities that have over the years been translated into digital form. Most notable among the digital versions is the v002 Rutt Etra Quartz Composer plugin which was developed by vade along with Bill Etra, one of the original creators of the Rutt Etra system. We’ve included this plugin as an FX, along with several other v002 creations with VDMX for a while now and, over the years we’ve seen a lot of projects that have made use of them… and in this video tutorial we’re hoping to teach you a few new tricks…
Before beginning this tutorial, make sure to use the v002 installer on the VDMX disk image in the Extra folder.
For this demonstration, instead of using the Rutt Etra as an FX, we have a Quartz Composer composition that generates video based on two input video streams. In this case we will create sets of hidden layers that will be used for these inputs: the Video Input will provide the colors for each particle and the Displacement Mask will provide RGB color gradients.
The main technique used here will be using an RGB to XYZ displacement map instead of a luma based displacement map. This means that we both have more flexibility for changing the positions of individual pixels, but we are now also responsible for creating the basic gradients that are needed to draw the basic image in a non-distorted way.
To accomplish this, we included special ISF compositions that are RGB color gradient generators. Each of these sketches includes three different gradients that are combined into a single output. One special feature of the gradient generators is the ability to pass in another video feed as a ‘look up table’ for one of the curves, making it possible to use waveforms and FFTs from audio analysis plugins, or any other image, as data that can modulate the output.
Once the basic setup is complete we can group the layers and add a Two Channel Mixer plugin to mix between different gradient outputs to fade the Rutt Etra generator between shapes and apply FX to the gradient images can create all kinds of different variations in the output. Here we use the VVMotionBlur effect to apply temporal smoothing to images and the Bad TV FX to create ripples.
Tips and Notes:
Audio analysis, camera inputs and other images can also be used as lookup tables for the gradients.

The Video Input will provide the colors for each particle and the Displacement Mask will provide RGB color gradients.
Use basic gradients to create outputs without distortion.
Using the OSCQuery Helper tool with Processing
In our introduction tutorial for working with Processing and VDMX we examined how to manually configure sending OSC messages from VDMX interface items to control properties of a Processing sketch running in the background. For this follow up lesson we will look at how the OSCQuery Helper tool can be used to publish the OSC address space for a sketch so that they can be remotely accessed by other software like VDMX or the OSCQuery Browser tool.
Read MoreCreating a GLSL based “Random Squares Mask” FX using the ISF Editor
Making Custom Masking FX for VDMX with ISF / GLSL
Download the completed ISF FX from this tutorial
Update [Sept 28, 2019]: The custom masking effects created in this tutorial can also be used in Motion and Final Cut Pro X using ISF for Motion.
Image masking is one of the most powerful tools for digital visual artists when compositing multiple layers together. Masking makes it possible to partially or completely “remove” parts of an image so that it shows through to layers behind it. Though some media files contain embedded alpha channels for each pixel, this process is often accomplished by applying an FX that adjusts the alpha channel based on some parameters. Some of the more common masks that are used in VDMX for live visuals are:
Luma Key (Layer Mask): Adjusts the alpha channel based on the brightness level of pixels. Can use an optional external stream to provide values and includes controls for adjusting the brightness / contrast of the masking image before it is applied.
Chroma Key (Chroma Mask): Adjusts the alpha channel based on how similar the pixel color is to a specified masking color.
Shape Mask: Masks the image using patterns made from basic shapes such as triangles, rectangles, circles, diamonds.
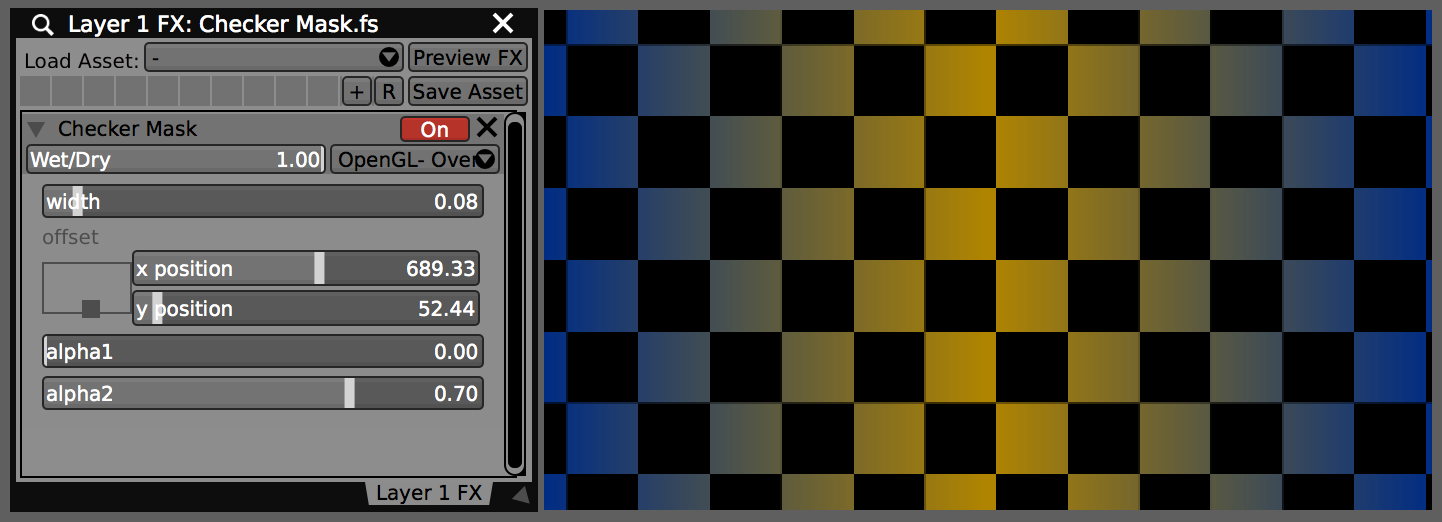
Completed Checker Mask.fs used as an FX in VDMX
The Layer Mask FX in particular is extremely powerful because it can use a secondary layer as its input. This makes it possible to change the mask between source material, such as still images, movies, live cameras and video generators, as well as apply custom FX to the mask before it is applied.
As all of these FX themselves are written in GLSL in the ISF specification, they can also be easily remixed or used as starting points for creating new masking FX that adjust alpha channels based on different parameters. In this tutorial we’ll look at creating two custom masks: Checker Mask and Random Squares Mask.
Checker Mask
Download the completed ISF FX from this tutorial
We’ll start by using the ISF Editor to create a new shader and saving it. Next, since this is very similar to the Checkerboard.fs generator, we can use that as a starting point – the code portion from this can be copied and pasted into the Checker Mask.fs, along with some of the input variables.
Only a few basic modifications to the code are needed. Here instead of using colors for the different sections of the pattern we’ll include sliders that map to the amount of alpha adjustment. The color information will come from an input of type ‘Image’ which is called ‘inputImage’ to match the FX protocol. Finally, make sure to set the category of the composition to Masking so that it is included with the other similar FX.
Once the FX is completed we can use it in VDMX; it shows up in the list under the Masking category and each of the parameters appears as the appropriate UI element that can be automated with control plugins or sync’d to MIDI / OSC / DMX inputs.
Random Squares Mask
Download the completed ISF FX from this tutorial
For the next masking example we will begin is very much the same way. Our new FX is very similar to the Checker Mask we just created and it can be used as the starting point here. The main difference is that we will adjust the logic behind deciding which sections are masked and which are not by using some randomization.
Random value generator functions are not built into GLSL, but we can find an example of a fast pseudo-random function in the Noise.fs example that can be copied and pasted into our new FX. Other types of noise functions can be found in other shaders if you’d prefer to use those instead. Pseudo-random functions are useful here because we can get a unique output by providing the same seed value to the function. This makes it possible for a grouping of pixels that have different coordinates to access the same randomized number.
When including randomized values in shaders there are often two useful parameters to include for them that can be adjusted during live performance: (1) Random Seed (for changing the randomize pattern) and (2) Threshold (for controlling how much of the image is masked).
Here instead of using the checker pattern we will determine the index coordinates of square that contains each pixel, and use that as to generate a pseudo-random value; this value will be the same for every pixel in the same region. If this number is above our threshold, we apply our mask, otherwise, we leave the pixel alone.
Other Masking FX Tips
One of the usual options you can include when making custom masking FX is a setting for how the alpha channel adjustment is applied. Consider these possibilities:
Additive: Adds the new alpha to the existing alpha value of the incoming pixel.
Multiply: Multiplies the new alpha with the existing alpha of the incoming pixel.
Replace: Overwrites the existing alpha of the incoming pixel.
Show Alpha: Useful for creating images that can be used as luma keys, this option sets the RGB of the pixel to the alpha level.
Examples of how these three different modes can be set up can be found in the Layer Mask, Chroma Mask and Basic Shape Mask FX mentioned above.
Another useful input parameter here can be an option to invert the behavior of the mask before it is applied.
Notes:
Install custom FX to the “~/Library/Graphics/ISF” directory

Installed FX appear in their specified categories in VDMX
Visit the ISF sharing site for more starting points for custom masking FX
Minimalist design setup in VDMX
Creating Minimalist Live Visuals in VDMX
In this technique tutorial we’ll be looking at minimalism, one of the most popular styles used by live visual performers and VJs. Like the minimalist movement in painting and photography that was developed in the 1960s, this form is marked by its usage of geometric abstractions, negative space and mostly monochromatic color spaces. For live visuals, particularly when accompanying music, these ideas are often further extended into the dimension of time.
Read MoreUsing the OSCQuery Helper and MIDI OSCQuery Helper tools with Max
One of the most powerful tools for working with MIDI and OSC control data is Max, which is widely known for its easy to use interface for “patching” and working with data streams. While Max does not yet support OSCQuery natively, it is a great example of how the free OSCQuery Helper and MIDI OSCQuery Helper tools can be used to publish OSC and MIDI parameters from Max patches so that they can be remotely accessed by other software like VDMX and the OSCQuery Browser.
In this set of tutorials we’ll look at the process for adding basic MIDI and OSC inputs in a simple Max patch and then creating a JSON file that describes the routings. Once those are prepared we can see how to access these parameters using other software in the OSCQuery ecosystem.
Read MoreHow to control an Ableton Live project from a web browser (and other software) in about a minute
The OSCQuery Protocol is a new specification that allows live performance tools to automatically communicate its parameters for rapid setup and improvisation between performers. Along with native support within VDMX here at VIDVOX we have developed several useful utilities that make it possible for people to take advantage of these new capabilities with software that support MIDI and OSC.
In this introduction tutorial we’ll be looking at how to use the free (and open source!) MIDI OSCQuery Helper utility to publish parameters from an Ableton Live project so that they can be accessed as browsable OSC parameters from other software such as VDMX. The MIDI OSCQuery Helper also includes its own built in Interactive Web Interface which can be loaded in web browsers on desktops, laptops, smart phones and tablets to remotely control any published controls.
Read MoreReceiving NDI® Audio/Video Streams in VDMX
The NDI® protocol from NewTek is a way to publish and receive audio / video streams over a network as a way to share live feeds between systems. From within VDMX, any number of video streams can be both output to the network and input from other applications.
In this tutorial we'll looking at capturing NDI® video streams that are published from other applications on the network and use them as the source for a layer. More information can be found in the VDMX manual in the section on video inputs.
Read MoreIntroduction To Using OSCQuery Protocol in VDMX
The OSCQuery Protocol is an extension to the OSC specification designed to make setup of communication between applications easier. Within VDMX this new protocol can be used in severals ways that we'll be covering in this tutorial. You can also read more about OSCQuery in the blog post announcing its official release.
Read More