How to Make This:

Photo credit: David Lublin circa 2007. Troy, NY
Feel Like This:

Photo: Sam Wiehl in Holand @ Fuzz Club
It’s happened before. You make video art. You have a projector. Your friend just asked you to do visuals at their house party or for their band. You have no idea where to get started.
Most people who work with live visuals didn’t get their start at the big clubs or touring with the biggest-name musicians. They have a story like this: We got our start with an old projector, running demo software, at a house party for a friend who was DJing, or in a small café on open mic night with a local band nobody had yet heard of. In this tutorial, we are going to look at some tips and tricks to help make your first time pushing pixels go great.
So what is VJing? Here’s a throwback video that covers the term VideoJockey (VJ):
Like all crafts, time put into your process will show in person. If you only have 24 hours to prepare for a show, fear not! There are plenty of things you can do, but you might have to curb some expectations.
How much time do you have before your show? It’s good to know so you can plot out how you’ll spend that time leading up to it. The four major parts of this post dive into:
Pre-setup / Play / Learn
Teardown
Packing
Setup
Getting Ready:
In the book ‘How Music Works’ by David Byrne, the first chapter includes a section about different spaces for performing in; how sound fills a small space differently than a large space. The same is true for video and lighting. A single low-lumen projector can fill a small, dark room.
“Try to ignore the lovely décor and think of the size and shape of the space. Next to that is a band performing.” – David Byrne
Make sure you’ve got the right gear.
Correct cables, including adapters, power cords, and a power strip, ensuring they are long enough for the situation.
Use a USB webcam or iPhone as a live video input for crowd shots and live sampling.
Relevant tutorial: VJ Travel Kit: What's in our bag
Relevant tutorial: Multi-Channel Live Camera Video Sampler
Make sure your software is installed and runs as expected. (And if you have working software, DO NOT (highly recommended) update your operating system before the show. Big changes to your OS can lead to unexpected problems.)
Use a simple template with 2-4 layers as a starting point.
In VDMX go to Templates > Simple Video Mixer or 4-way VJ Starter
Relevant tutorial: Making a 4 channel video mixer in VDMX
Consider the space.
Figure out where you will set up your computer, the projector, and the projection surface.
While having a real projector screen is ideal, for your first gig, you might be hanging up a white sheet or getting creative with the surface you are projecting onto (such as the ceiling).
Relevant tutorial: Mastering Projector Rigging
Prep your content!
Download video clips for remixing (VDMX Sample Media).
Medium/longer-form videos (e.g., from archive.org) can also be useful footage; in/out points can be set on the fly to create impromptu loops.
Cut up and organize short loops based on themes that can be used for different songs/tracks.
Encode movies to HAP (or PhotoJPEG) instead of H.264, especially if you plan to scratch/scrub on movie time.
Install ProjectMilkSyphon as a backup app (ProjectMilkSyphon Documentation).
Live coding
If you have programming skills, some people use ‘live coding’ as part of their performances along with pre-made content.
Live coding can be an entire performance or one element of a larger setup.
Lots of different tools available for different programming languages.
Use Syphon or Window Capture to route visuals between apps.
Relevant tutorial: Guest Tutorial with Sarah GHP
Buy or borrow a MIDI controller if you can.
Live visuals are often best performed like an instrument.
An HID-supported gaming controller that can connect to a computer over Bluetooth or USB is a great alternative.
Relevant tutorial: Selecting the Ideal MIDI Controller for Visual Performances
DMX Lights
Nice if you can get them.
DMX lights can be expensive (here are some cheap alternatives: (RGBW 30W COB, Artnet adapter, RGBW Strobe) , but one or two basic lights are more than enough to fill a small space with color and easy to make part of your performance without spending too much time thinking about lighting design. The goal here is just for creating a basic accent color/strobe for high-intensity moments.
Keep in mind that bright lights in a small space can overwhelm your projection, so use lighting sparingly during your performance.
Relevant tutorial: Sending DMX Values from a VDMX Color Picker
Hide the privacy dot on external screens!
Apple shows an orange/green privacy dot on all screens when the microphone/camera are being used by apps. This is a fantastic privacy feature but is awful when projecting visuals using a second screen.
Fortunately, there is an official way from Apple to disable the privacy dot on external screens.
Relevant tutorial: Hiding the Orange Dot
Change your desktop picture.
It is usually a good idea to set your desktop picture for external screens to a solid black. (This way if you crash your visual app, the projector doesn’t show all of your embarrasing desktop icons and pictures of your cats).
Questions? Ask online! There are plenty of visualist communities happy to help newcomers get started. One of those places is the VIDVOX forums.
Show Design:
Got a fun idea? Run with it!
Don’t be afraid to tap into your friends and community and see who all is interested in helping build a set.
This is an example of how two projectors, painted cardboard, and frost shower curtains can craft them. No one is complaining about the cardboard when the lasers kick on and the dance party roars.
Pro Tip! An inexpensive frost shower curtain can act as a “rear projector screen.” It might have some wrinkles, but hey! that’s what all the packing tape is for! :) Plus they have grommets for easy hanging!
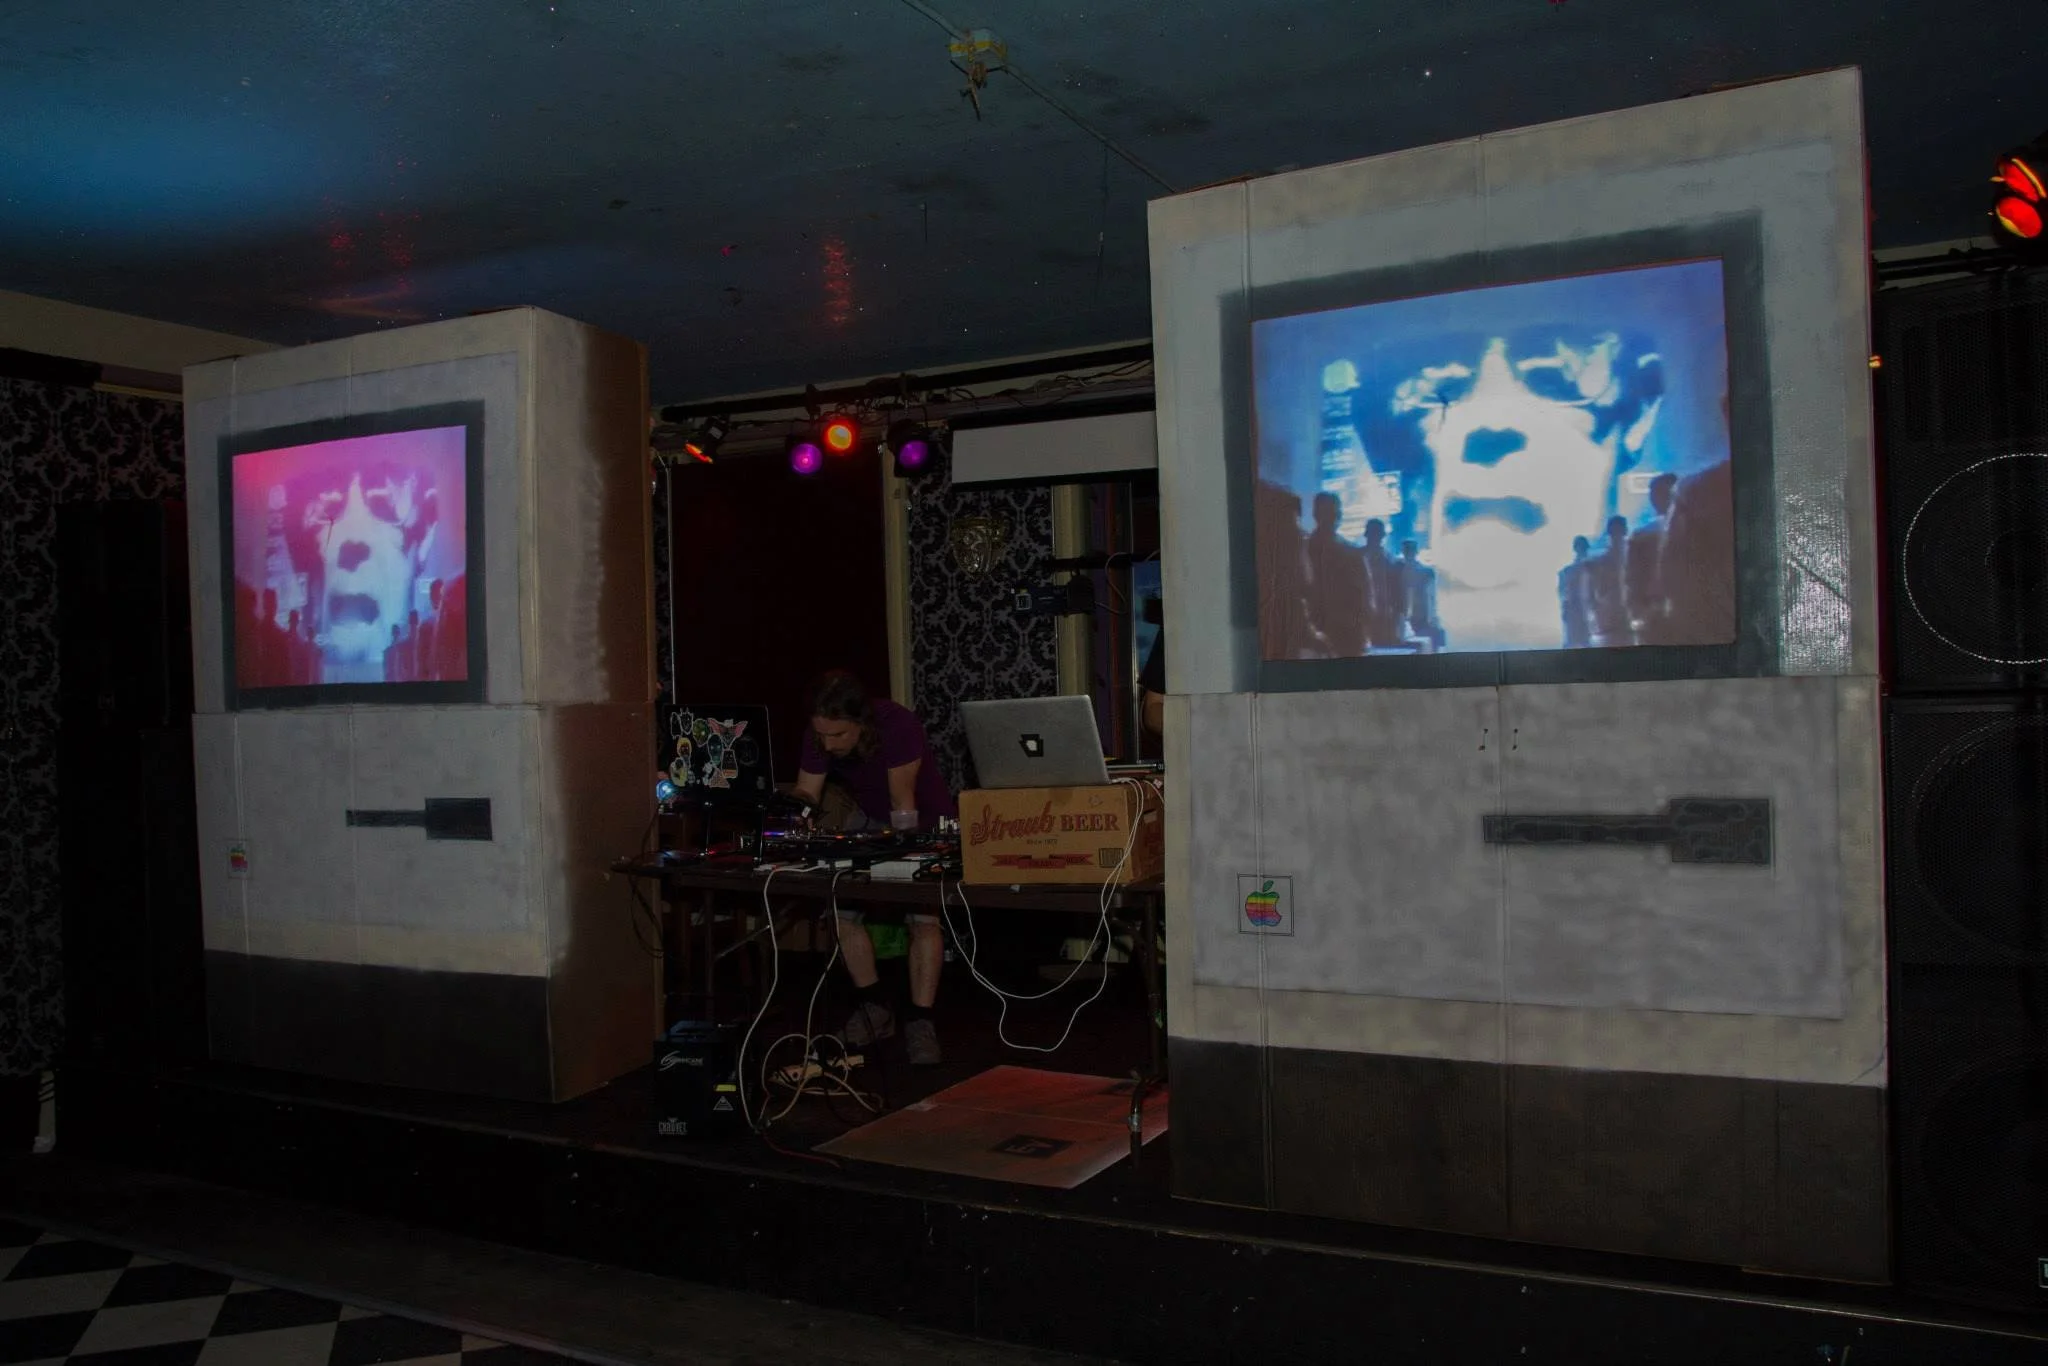
Photo: ProjectileObjects “LazerCrunk Computer Party” with Cutups & Keebs. Brillobox. Pittsburgh, PA 2013

Performing:
Pro tip: Don’t go through your content too quickly!
Remember that your visuals are often the background for the music; you are making a music video. While you are hyper-focused on the exact number of times the same clip has looped, the audience is often paying more attention to the entire scene.
Have generative content available as a backup.
Use ProjectMilkSyphon in playlist mode.
Use audio-reactive ISF shaders and other generators.
Create a "pre-edited" video!
Create a long, pre-edited video that you can play and walk away from. Put some music on while you are experimenting at home and hit record on the movie recorder. Jam for an hour or so, keep the content cuts more consistent, less strobe-y, and now you’ve got a breather during your set.
Get the right brightness level for the space.
Edge detection FX
Difference blend modes
Masking FX (e.g., Remove Background, Layer Mask, Shape Mask)
Relevant tutorial: Masking techniques in VDMX
Be ready to ‘fade out’ the visuals.
In between songs.
During quiet/slow parts, so you can come back in heavy, e.g., the way the drums or other instruments do.
At the end of the show.
If you have a MIDI controller, sync a slider to the main output level in the Workspace Inspector > Layers.
Be ready to make things ‘go crazy.’
Effects such as Convergence or Strobe can add energy to the visuals at moments of high intensity, e.g., when the beat drops or the crowd is cheering.
Adjusting playback rate/scrubbing on movies.
Use audio analysis to drive FX parameters.
Relevant tutorial: More fun audio analysis techniques
Don’t be afraid to be silly.
Wear a funny costume.
Use memes and animated GIFs.
Try to match the mood and energy of the music.
Having a variety of styles and clips in your media library makes it easier to react to changes in mood and energy when performing with a DJ.
Relevant tutorial: Minimalism in VDMX
Relevant tutorial: Creating Video Feedback Loops on a Mac with VDMX

Next Steps:
Check our free ‘Live Visuals 101’ course materials (Live Visuals 101) that includes a combination of technical walkthroughs, case studies, and art theory to help you dive deeper into the world of VJing.

David Lublin and Steve Nalepa “Mild Meld” circa 2008