Download the ISF Shaders from this post
As Pi Day approaches this year we've found ourselves Pi-nspired to examine the usage of Pi in some of the more commonly used GLSL generators and FX that people are familiar with and, just for fun, some new shaders that are designed to see what happens when you use a bad estimates for Pi.
What is Pi exactly? If it has been a while since your last geometry class, we've got a very quick explainer for you.
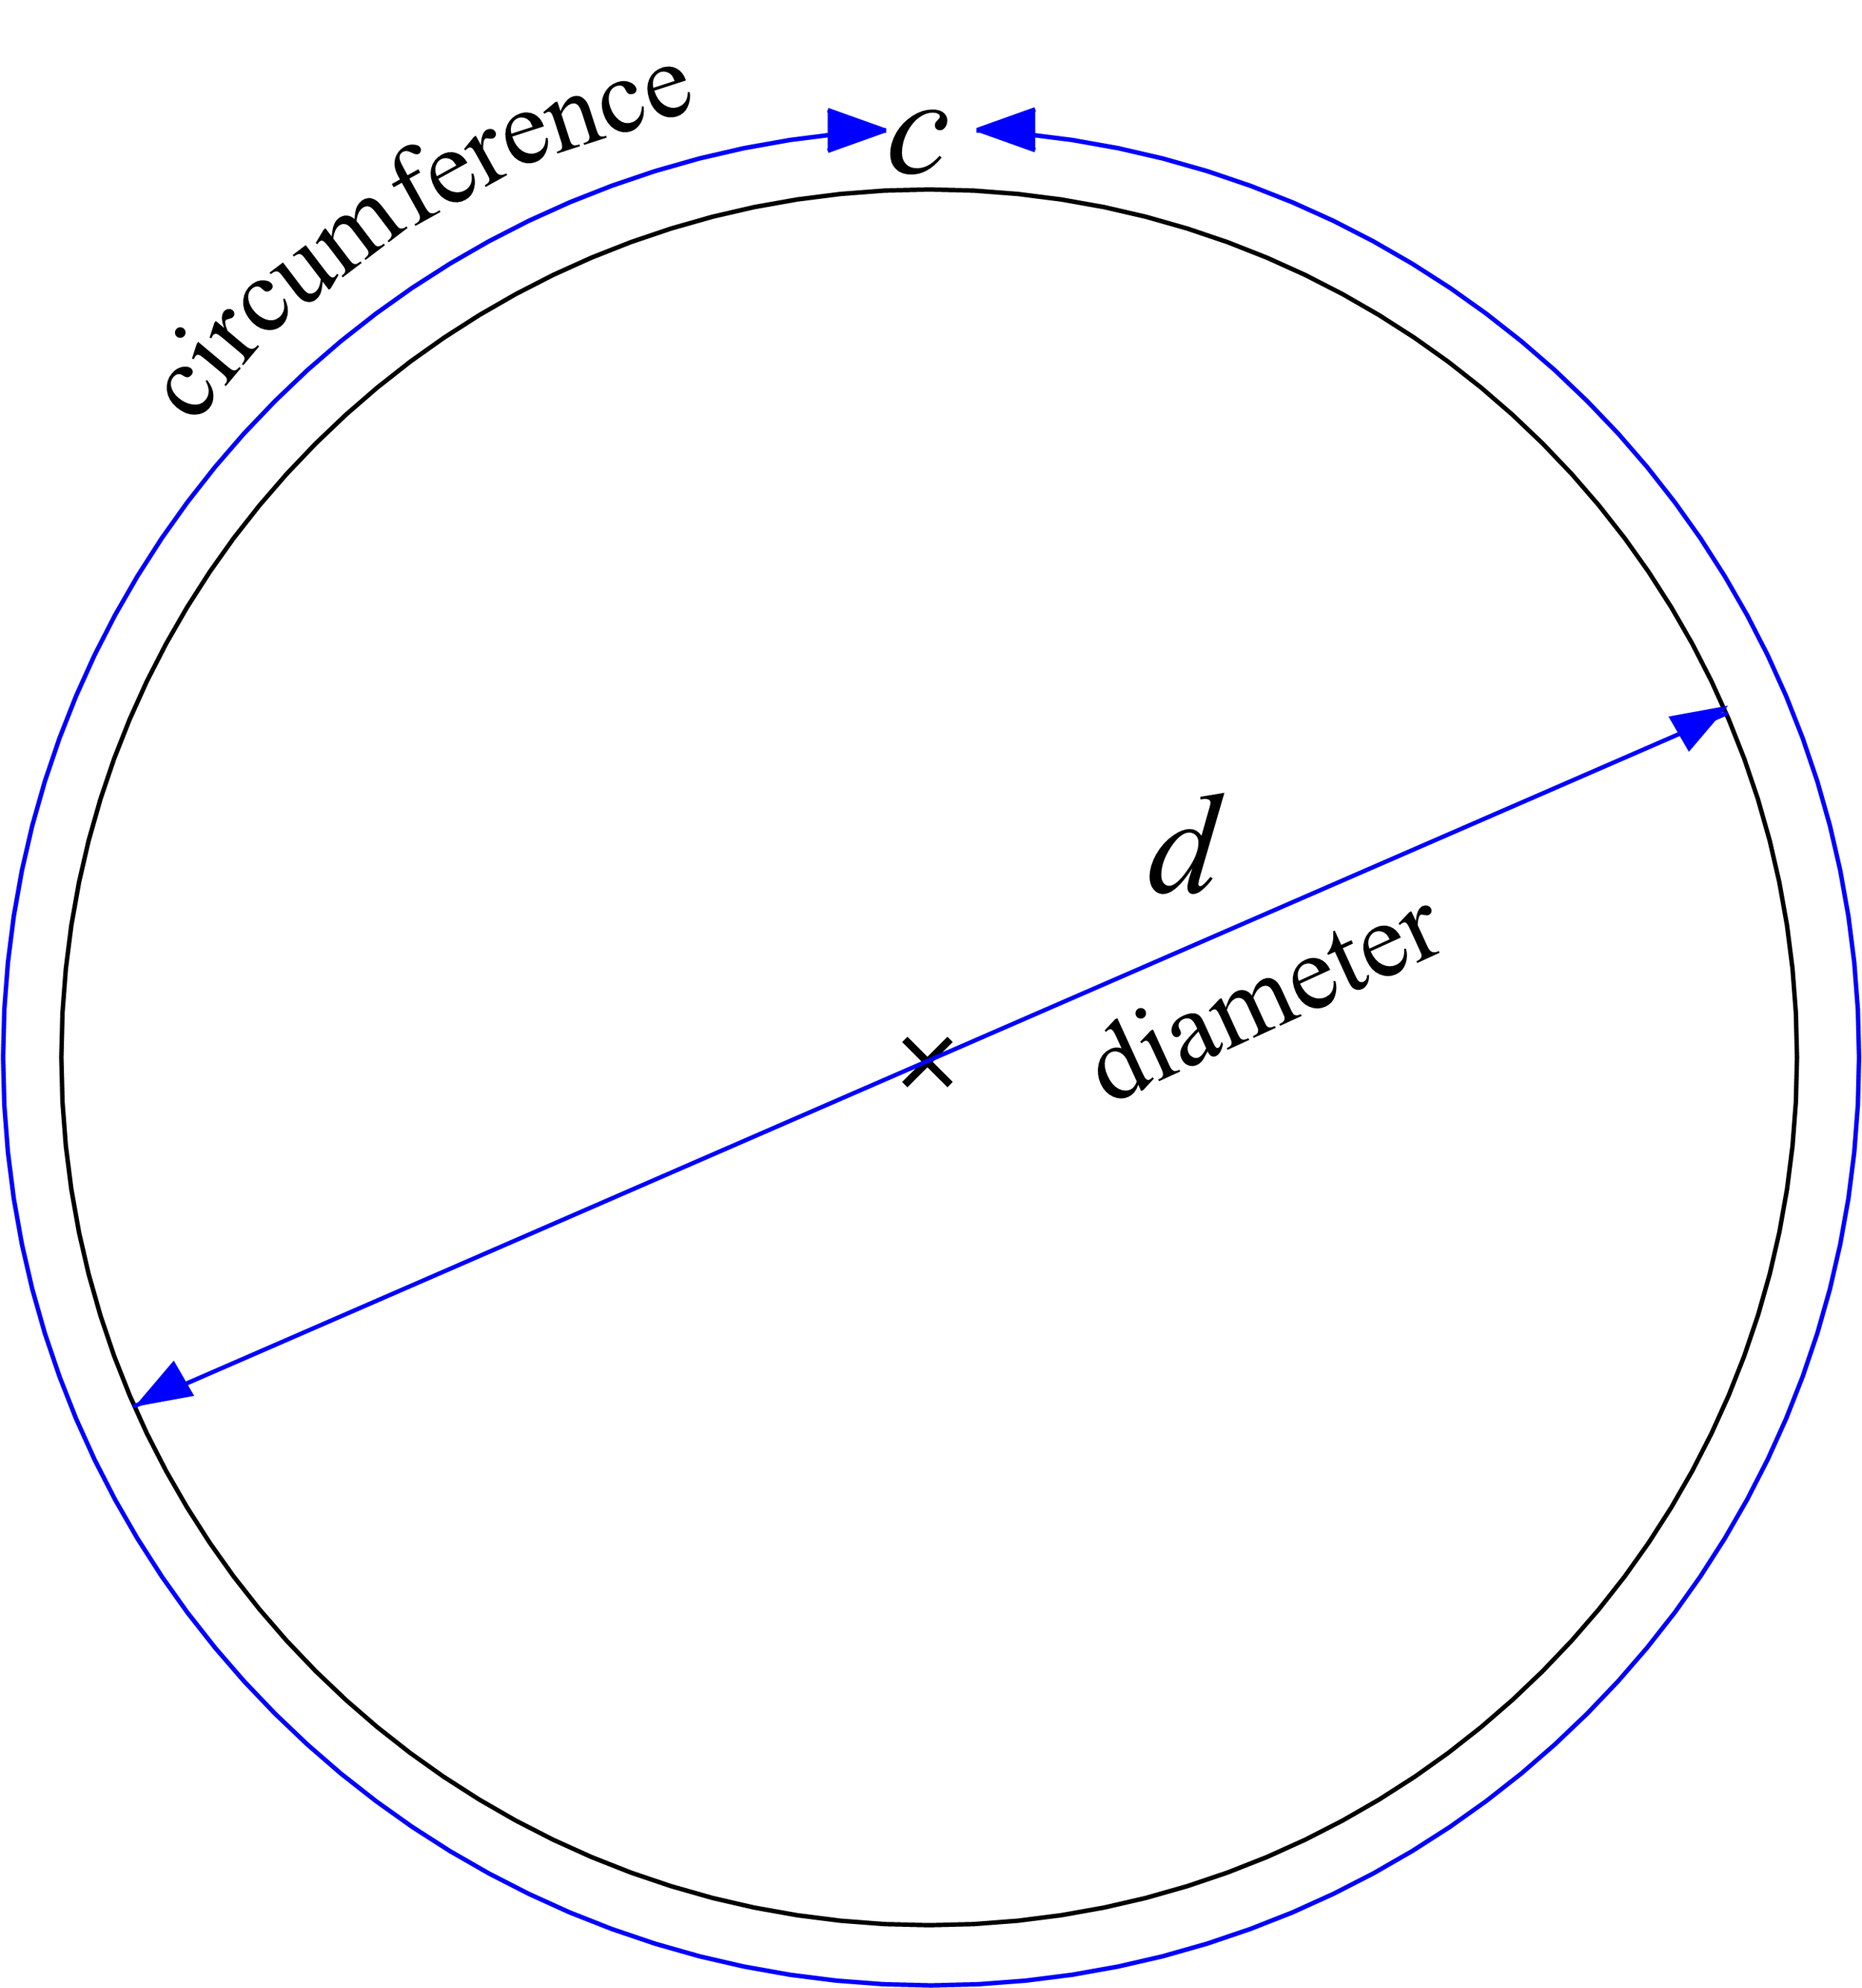
Pi, also written as π (opt-p on your Mac keyboard!) is the number that you get when you have a circle and divide the diameter (the distance from one side of the circle to the other, passing through the center) and the circumference (the distance it takes to travel all the way around the circle). No matter how big or small of a circle, you get the same number, π, when you divide C/d. Sometimes instead of using the diameter this ratio is described by using the distance from the center to any point on the circle, which is called the radius. The radius is always half of the diameter.
The Wikipedia page for Pi has a nice gif that shows this visually, with a circle being rolled out along a ruler.
What makes π a bit tricky to fully understand is that it is what is known in mathematics as as irrational number, which means that it can not be represented by a fraction. When trying to write Pi as a decimal number, it goes on forever. When it comes to performing calculations that rely on Pi, we can only approximate its value. As such, this special number needs its own symbol, π.
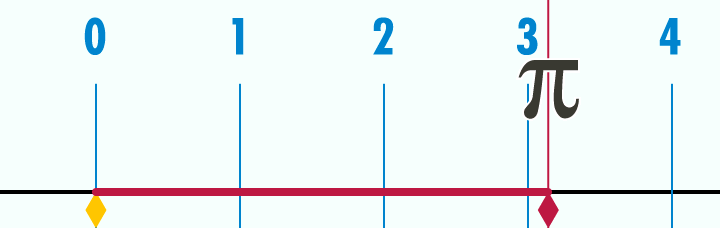
π to 100 digits is: 3.1415926535 8979323846 2643383279 5028841971 6939937510 5820974944 5923078164 0628620899 8628034825 3421170679
Since the discovery of π as a numerical constant there have been countless efforts to not just find better approximations of π, but to find algorithms that can calculate those approximations even faster. So, what happens when you have a bad approximation of π, to what degree of accuracy is needed when performing math operations in GLSL, and exactly how long does it take for some of these algorithms to calculate a good approximation of π? These seem like some fun questions to explore by ... writing some shaders!
Before we get into our examples for creating approximations of π, lets take a quick look at a few examples of three very common geometric / distortion filters that make use of it,
Bump Distortion: Converts the pixel xy to polar coordinates, adjusts the radius, and then reverses back to the Cartesian coordinate system to read the source pixel.
Rotate: Converts to polar coordinates, adjusts angle, then back to Cartesian coordinates
Twirl: Converts to polar coordinates, adjusts the radius and angle, and then back to Cartesian coordinates
π is also often used for shaders that draw curves that make use of trigonometric functions like sine and cosine.
We can also visualize how having a bad estimate of Pi can throw off calculations and comparing them to a good known estimate of Pi. One way of doing this is by computing cosine curves using our estimates and observing how the error compounds as the input value increases.
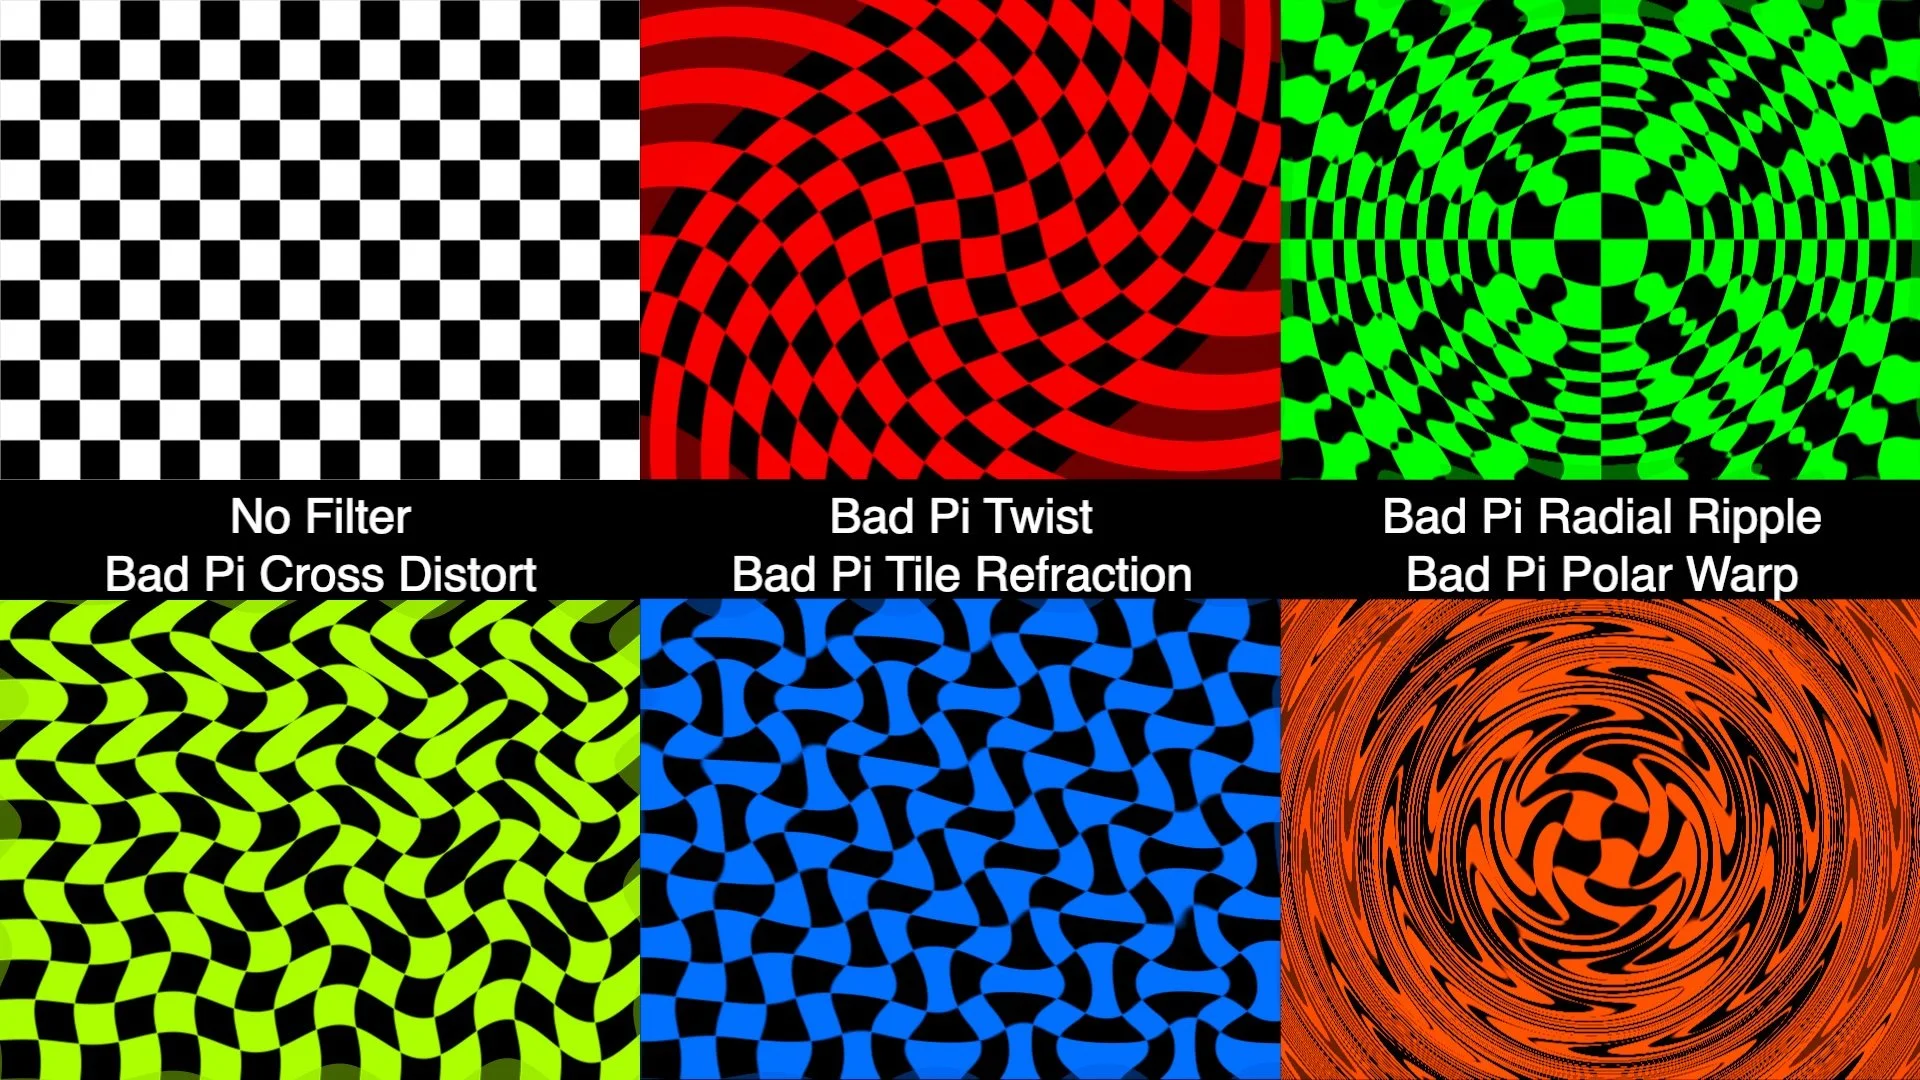
In the set of "Bad Pi.fs" examples we have a few demonstrations of shaders that generate various shapes and patterns using both π and a bad approximation of π. The amount of error added / subtracted can be adjusted using the 'pierror' input for these ISFs. The default range for the 'pierror' input is +/- 0.25, but you can go and edit these values to experiment with seeing what happens with even more error.
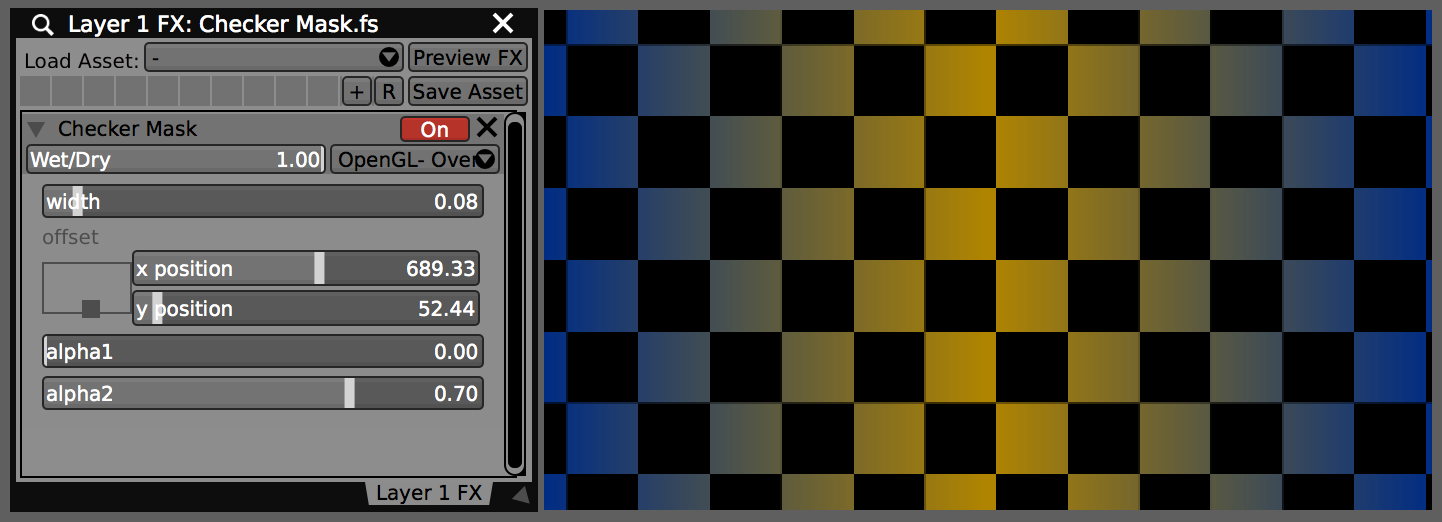
The 'Bad Pi Checkerboard.fs' makes its pattern by thresholding sin(x pi gridSize) sin(y pi * gridSize) and makes for a particularly good visualizer with high values for the gridSize. In this video we can see the pi error moving from -0.25 to 0.25 with a gridSize of 24.
While these are some pretty basic demonstrations, the concept of having waveforms and patterns that are out of phase in interesting ways can be extremely powerful when making shaders that have semi-random behaviors. For starters, check out the "Bad Pi FX" examples which create various forms of distortions by using the difference between using good and bad π values in our shaders. When no error is added to π, these filters work as a simple pass through.
Now that we have an idea of what happens when π goes bad, let’s take a look at some of the ways that π itself can be estimated and how look it takes. Of course in typical usage for GLSL shaders, π is usually pre-defined as a fixed constant to at least 10 or 11 decimal places.
While there are several different approaches to estimating Pi, for this set of examples we will be using a method known as Alternating Series.
An alternating series is a summation which switches between adding and subtracting numbers on each iteration. As you approach a very large number of iterations some alternating series will eventually begin to converge around a fixed number. In some even more special cases, as you take a 'limit' towards an infinite number of iterations, the series may actually reach the value it is converging around.
For example, the infinite geometric series 1/2 − 1/4 + 1/8 − 1/16 + ⋯ eventually sums to 1/3.
The “Estimate Pi.fs” shader demonstrates how Pi can be recursively computed using alternating series, and how the design of the series can greatly change how quickly the series converges. Here we are comparing the Leibniz and the Nilakantha series for π. These are not the only two, there are other approaches, some of which converge even faster.
float estimatePiAdjustmentLeibniz(int n)	{
    float	floatN = float(n);
    float	adjustment = 4.0 / (2.0 * floatN + 1.0);
    //	flip the sign if needed
    adjustment = (mod(floatN,2.0) == 1.0) ? -1.0 * adjustment : adjustment;
    return adjustment;
}

float estimatePiAdjustmentNilakantha(int n)	{
    if (n == 0)	{
        return 3.0;
    }
    //	start this with an index of 1
    float	nPlusOne = float(n + 1);
    float	baseVal = 2.0 * nPlusOne;
    float	adjustment = 4.0 / (baseVal * (baseVal - 1.0) * (baseVal - 2.0));
    //	flip the sign if needed
    adjustment = (mod(nPlusOne,2.0) == 1.0) ? -1.0 * adjustment : adjustment;
    return adjustment;
}
In this case we can see that the Nilakantha for approximating Pi is significantly faster than the Leibniz series. This shader works be performing one iteration each time a new frame is rendered and then uses a second render pass to visualize the current estimates in the style of a seven segment display. The top line shows the Nilakantha approach and the middle line shows the Leibniz value at the same number of iterations.
Running the shader, we can see that the Nilakantha approach converges to 3.14159 very quickly, taking only about 42 iterations (less than a second and a half at 30 fps). By comparison, at this same point the Leibniz is still only at a single decimal point of accuracy. We would have to run the Leibniz for over 5000 iterations (over two and a half minutes at 30 fps) before it even starts to approach four decimal places of accuracy. It would take over an hour to reach 3.14159xxx, somewhere around 137500 iterations.
For its visualization stage the Estimate Pi.fs shader uses a technique for drawing numbers demonstrated in the Digital Clock.fs example.
Combining our initial visualizers with the "Estimate Pi.fs" example we can create a more complex demonstration, such as the 'Bad Pi Visualizer.fs' example included in this download, and render out a few variations to watch, or use as part of a live performance.
You might be asking yourself at this point – why do these estimations iteratively in GLSL? Surely there are better ways for doing this! And you'd be right, we are doing this for fun, for the challenge, and to inspire people to come up with their own variations on this idea.
Side note: The Estimate Pi and Bad Pi Visualizer shaders make use of 32-bit floating point textures for an intermediate render pass, unfortunately this means they only work in hosts that support 32-bit floating point texture ISF render passes. This means they do not work with the current web based version of ISF shader, so you'll need to download them to try them out for yourself.
Some more related links:
https://en.wikipedia.org/wiki/Leibniz_formula_for_π
https://observablehq.com/@galopin/an-infinite-series-that-converges-quickly-on-pi
https://www.tylar.io/programs/finished/piCalculator/index.html
https://editor.p5js.org/codingtrain/sketches/8nvCqk0-W