Download the completed ISF FX from this tutorial
Update [Sept 28, 2019]: The custom masking effects created in this tutorial can also be used in Motion and Final Cut Pro X using ISF for Motion.
Image masking is one of the most powerful tools for digital visual artists when compositing multiple layers together. Masking makes it possible to partially or completely “remove” parts of an image so that it shows through to layers behind it. Though some media files contain embedded alpha channels for each pixel, this process is often accomplished by applying an FX that adjusts the alpha channel based on some parameters. Some of the more common masks that are used in VDMX for live visuals are:
Luma Key (Layer Mask): Adjusts the alpha channel based on the brightness level of pixels. Can use an optional external stream to provide values and includes controls for adjusting the brightness / contrast of the masking image before it is applied.
Chroma Key (Chroma Mask): Adjusts the alpha channel based on how similar the pixel color is to a specified masking color.
Shape Mask: Masks the image using patterns made from basic shapes such as triangles, rectangles, circles, diamonds.
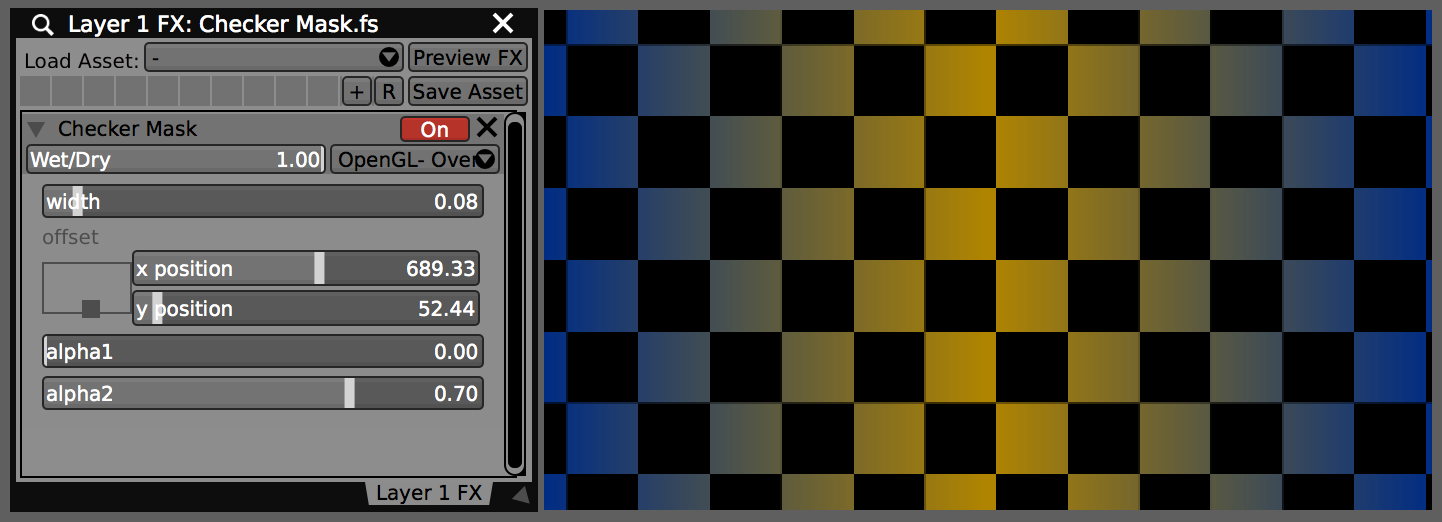
Completed Checker Mask.fs used as an FX in VDMX
The Layer Mask FX in particular is extremely powerful because it can use a secondary layer as its input. This makes it possible to change the mask between source material, such as still images, movies, live cameras and video generators, as well as apply custom FX to the mask before it is applied.
As all of these FX themselves are written in GLSL in the ISF specification, they can also be easily remixed or used as starting points for creating new masking FX that adjust alpha channels based on different parameters. In this tutorial we’ll look at creating two custom masks: Checker Mask and Random Squares Mask.
Checker Mask
Download the completed ISF FX from this tutorial
We’ll start by using the ISF Editor to create a new shader and saving it. Next, since this is very similar to the Checkerboard.fs generator, we can use that as a starting point – the code portion from this can be copied and pasted into the Checker Mask.fs, along with some of the input variables.
Only a few basic modifications to the code are needed. Here instead of using colors for the different sections of the pattern we’ll include sliders that map to the amount of alpha adjustment. The color information will come from an input of type ‘Image’ which is called ‘inputImage’ to match the FX protocol. Finally, make sure to set the category of the composition to Masking so that it is included with the other similar FX.
Once the FX is completed we can use it in VDMX; it shows up in the list under the Masking category and each of the parameters appears as the appropriate UI element that can be automated with control plugins or sync’d to MIDI / OSC / DMX inputs.
Random Squares Mask
Download the completed ISF FX from this tutorial
For the next masking example we will begin is very much the same way. Our new FX is very similar to the Checker Mask we just created and it can be used as the starting point here. The main difference is that we will adjust the logic behind deciding which sections are masked and which are not by using some randomization.
Random value generator functions are not built into GLSL, but we can find an example of a fast pseudo-random function in the Noise.fs example that can be copied and pasted into our new FX. Other types of noise functions can be found in other shaders if you’d prefer to use those instead. Pseudo-random functions are useful here because we can get a unique output by providing the same seed value to the function. This makes it possible for a grouping of pixels that have different coordinates to access the same randomized number.
When including randomized values in shaders there are often two useful parameters to include for them that can be adjusted during live performance: (1) Random Seed (for changing the randomize pattern) and (2) Threshold (for controlling how much of the image is masked).
Here instead of using the checker pattern we will determine the index coordinates of square that contains each pixel, and use that as to generate a pseudo-random value; this value will be the same for every pixel in the same region. If this number is above our threshold, we apply our mask, otherwise, we leave the pixel alone.
Other Masking FX Tips
One of the usual options you can include when making custom masking FX is a setting for how the alpha channel adjustment is applied. Consider these possibilities:
Additive: Adds the new alpha to the existing alpha value of the incoming pixel.
Multiply: Multiplies the new alpha with the existing alpha of the incoming pixel.
Replace: Overwrites the existing alpha of the incoming pixel.
Show Alpha: Useful for creating images that can be used as luma keys, this option sets the RGB of the pixel to the alpha level.
Examples of how these three different modes can be set up can be found in the Layer Mask, Chroma Mask and Basic Shape Mask FX mentioned above.
Another useful input parameter here can be an option to invert the behavior of the mask before it is applied.
Notes:
Install custom FX to the “~/Library/Graphics/ISF” directory
Installed FX appear in their specified categories in VDMX
Visit the ISF sharing site for more starting points for custom masking FX

