Templates are a great way to get started with VDMX and with this template you can take an out of the box APC40 MKII and jump right in!
A few things to note about the APC40 MK II before we get started.
The APC40 MK II has three internal MIDI mapping modes.
Generic Mode (Default)
Ableton Live Mode
Alternate Ableton Live Mode
To use this template correctly, you’ll need your APC40 MK II to be set to the default “stock” Generic Mode. More information about these modes can be found here (PDF) Bottom of Page 10.

When you first turn on the controller, it will default to the correct button mapping. To reset the template to all defaults, it is recommended that you hit this button when you start the template to eject all clips and set everything to its default.

This button ejects all media, clears all the FX and syncs the LFO view to the LFO slider. (Warning: You’ll lose FX in Layer A and B if you don’t save them as a new FX chain).
Not all buttons are RGB. When clips are ready to be triggered in your media bin, the 40 RGB button grid will light up blue, then yellow when the clip is selected. You can customize these colors yourself in the media bin options:

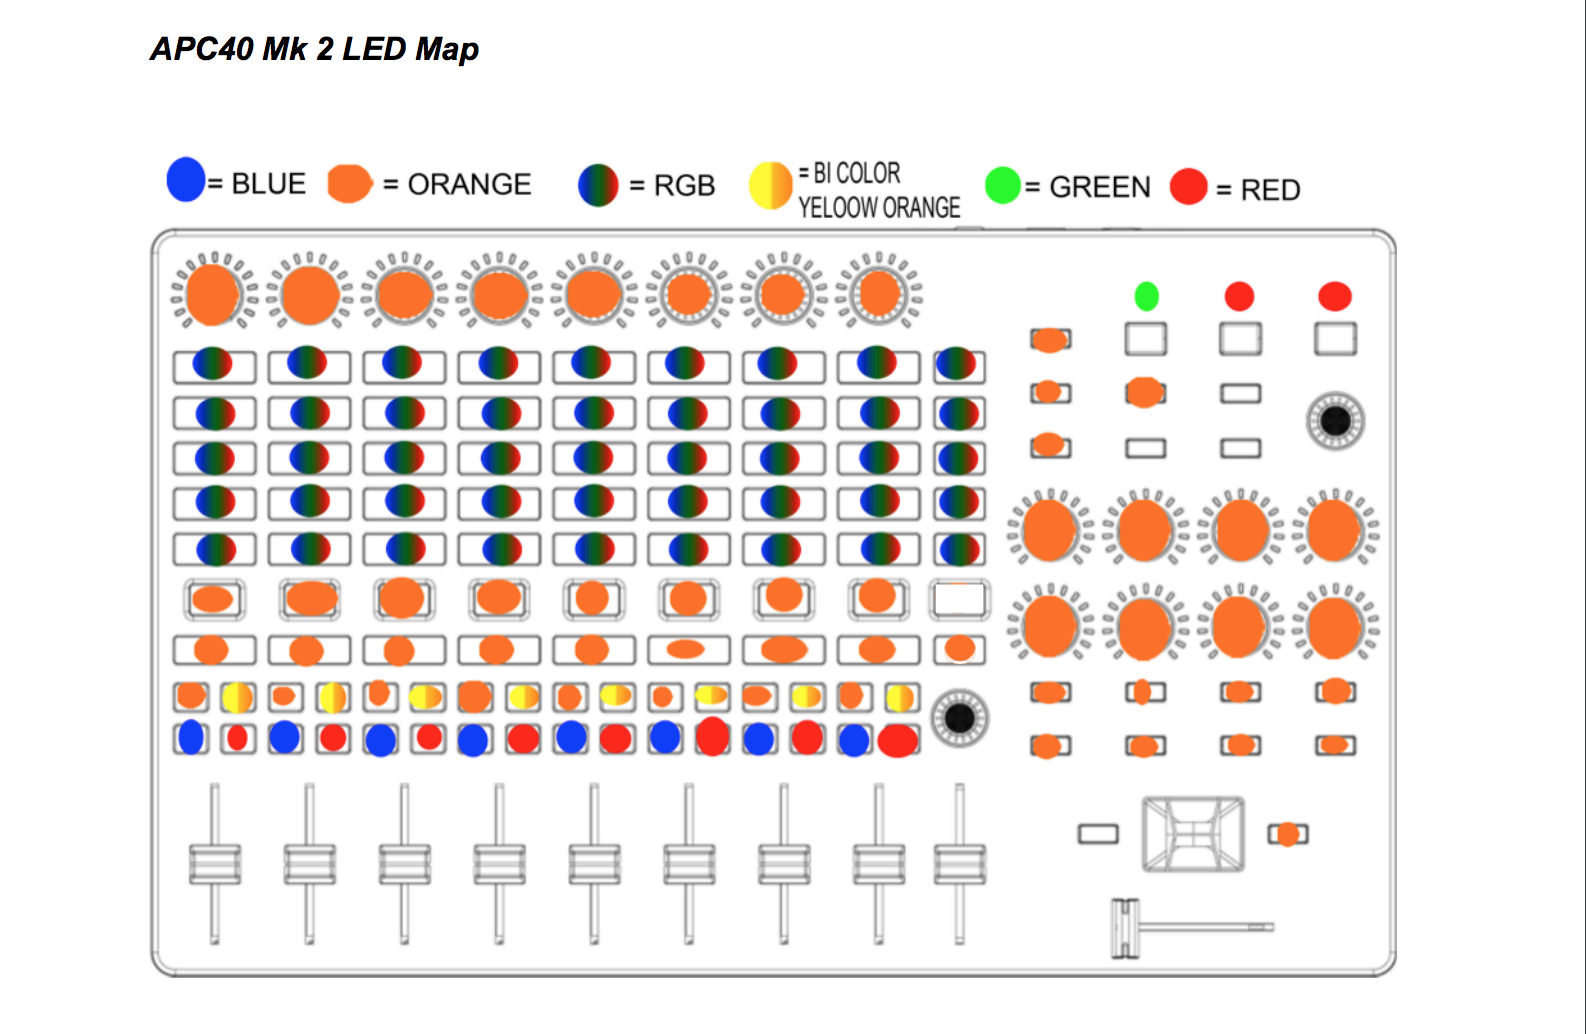
Image found on page 10, Akai communication protocol manual.
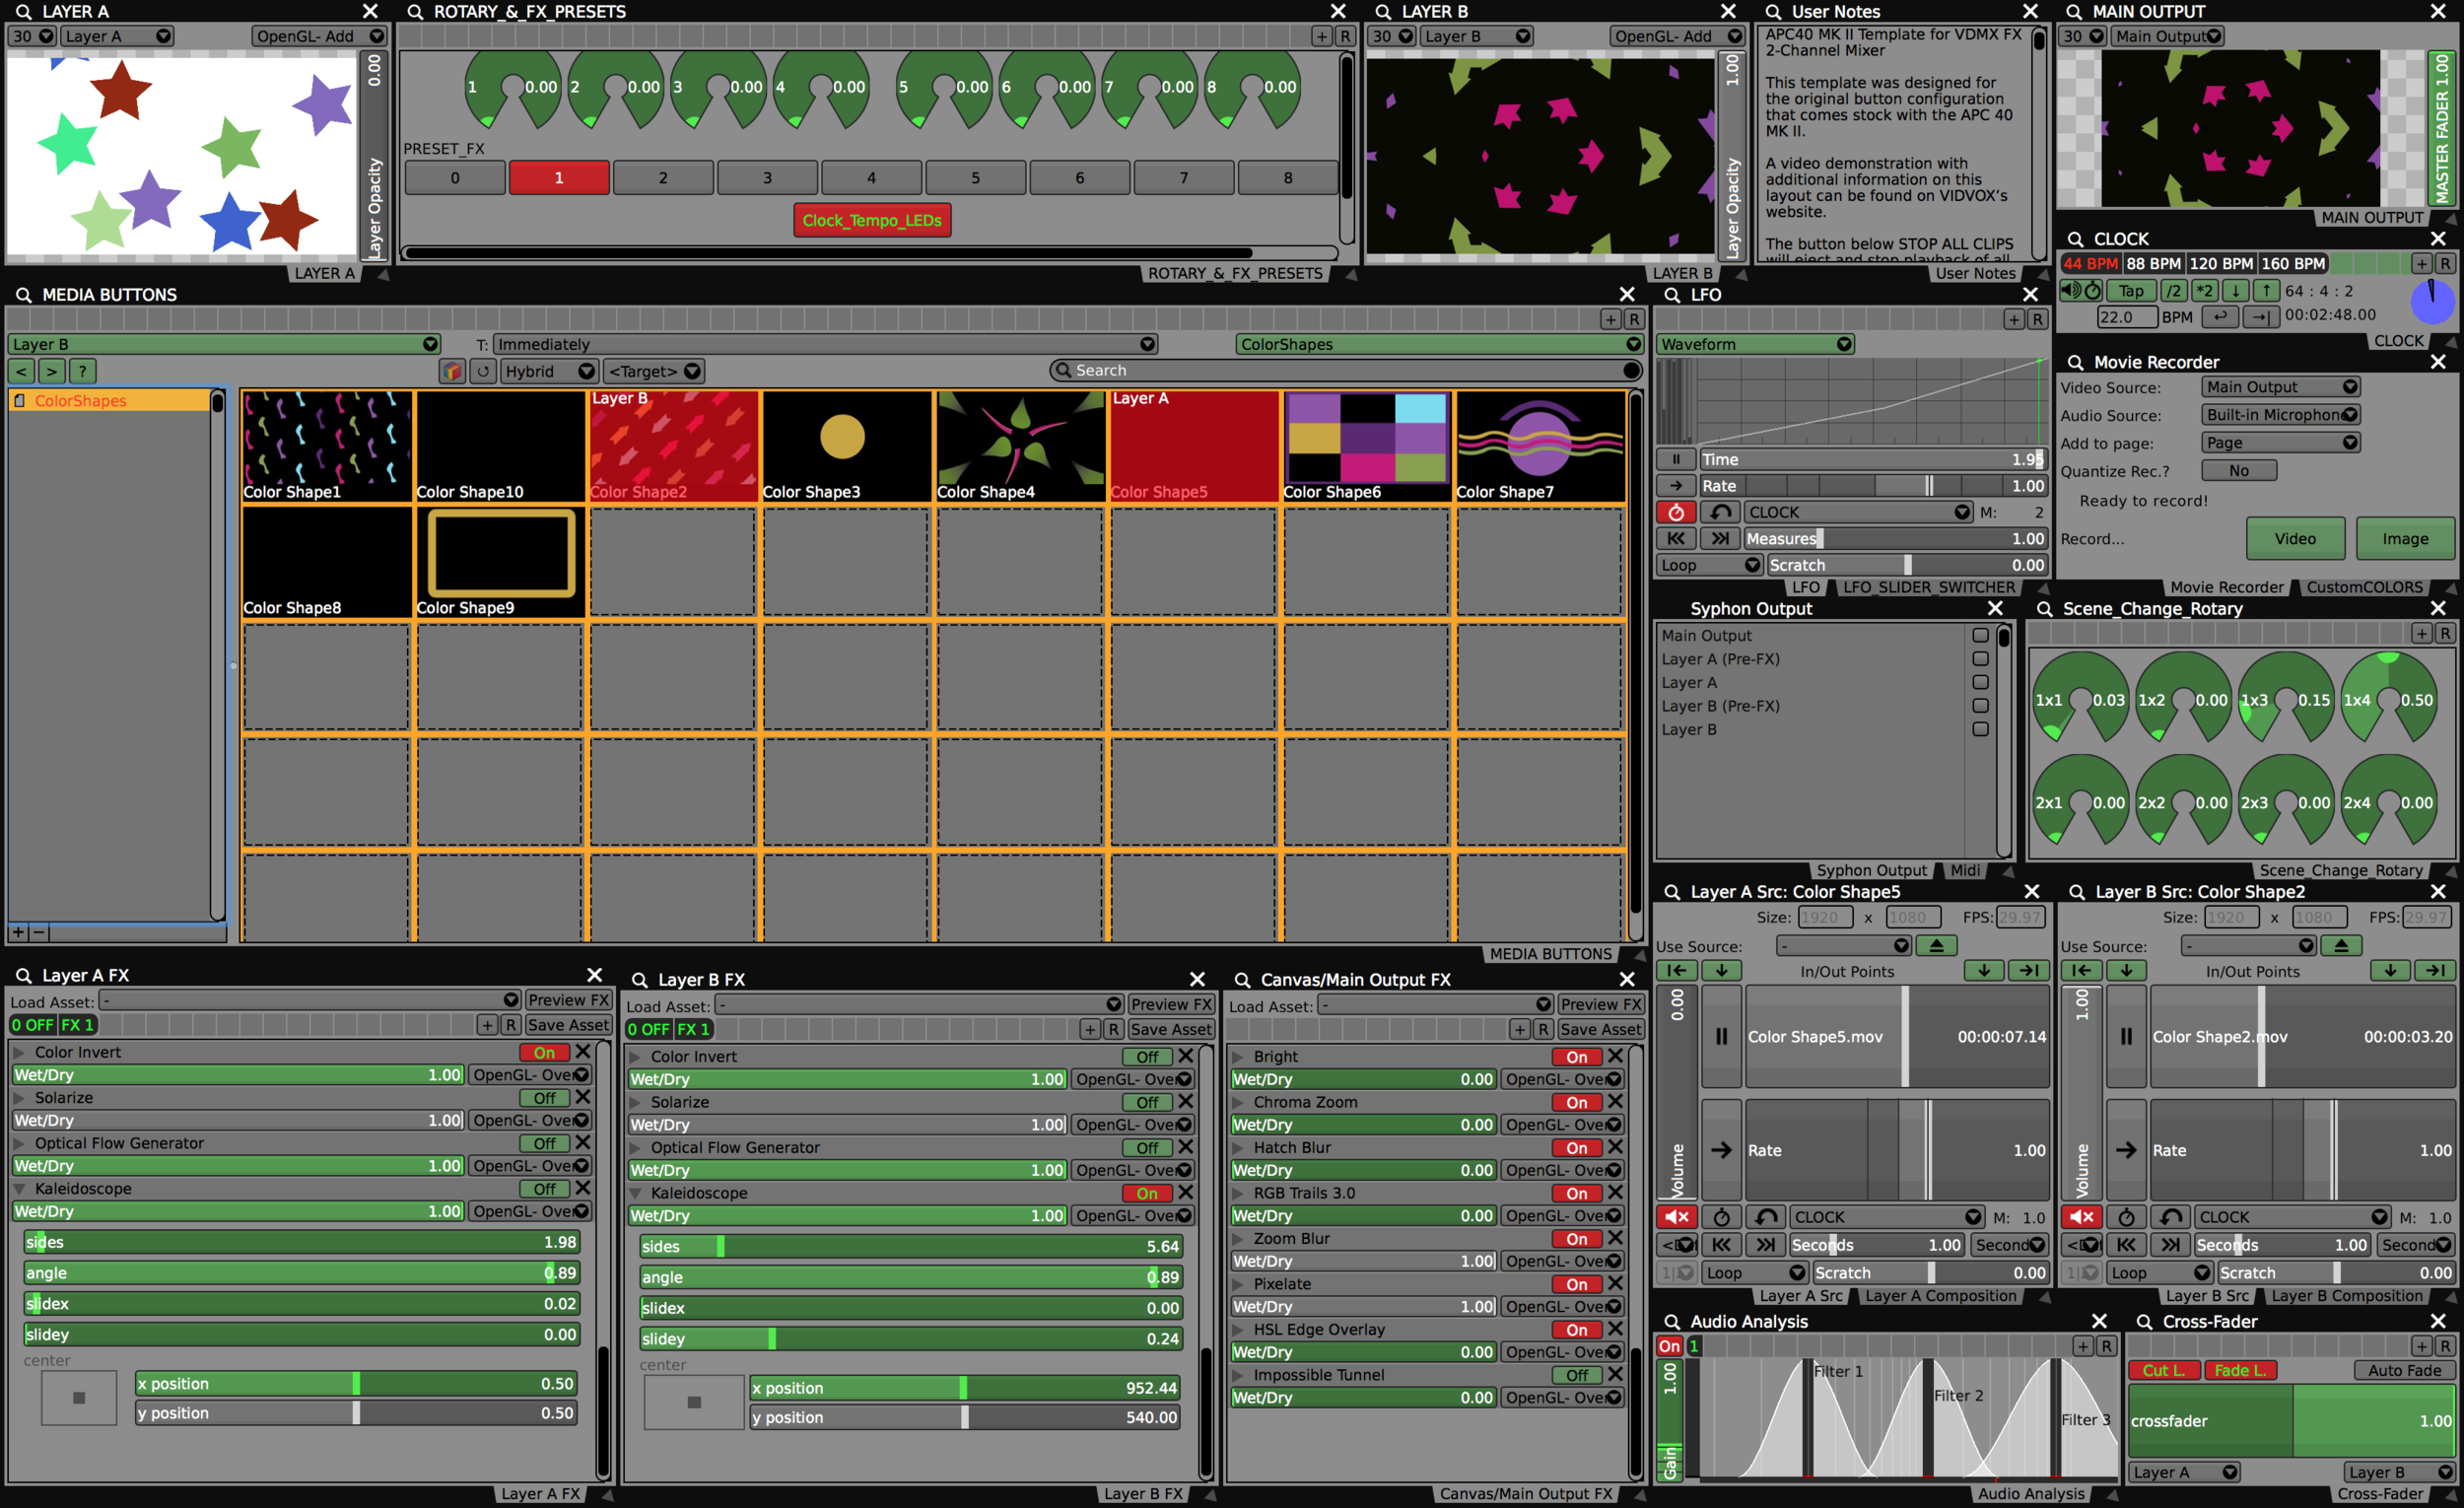
There are two versions of this template. A blank version without FX and a starter version with one layer of FX presets.
This template is structured to be a 2-channel video mixer. Both video layer A and B flow to a Master output (Projector, TV, etc.) The cross fader blends between both layers and each layer has its own FX chain presets.
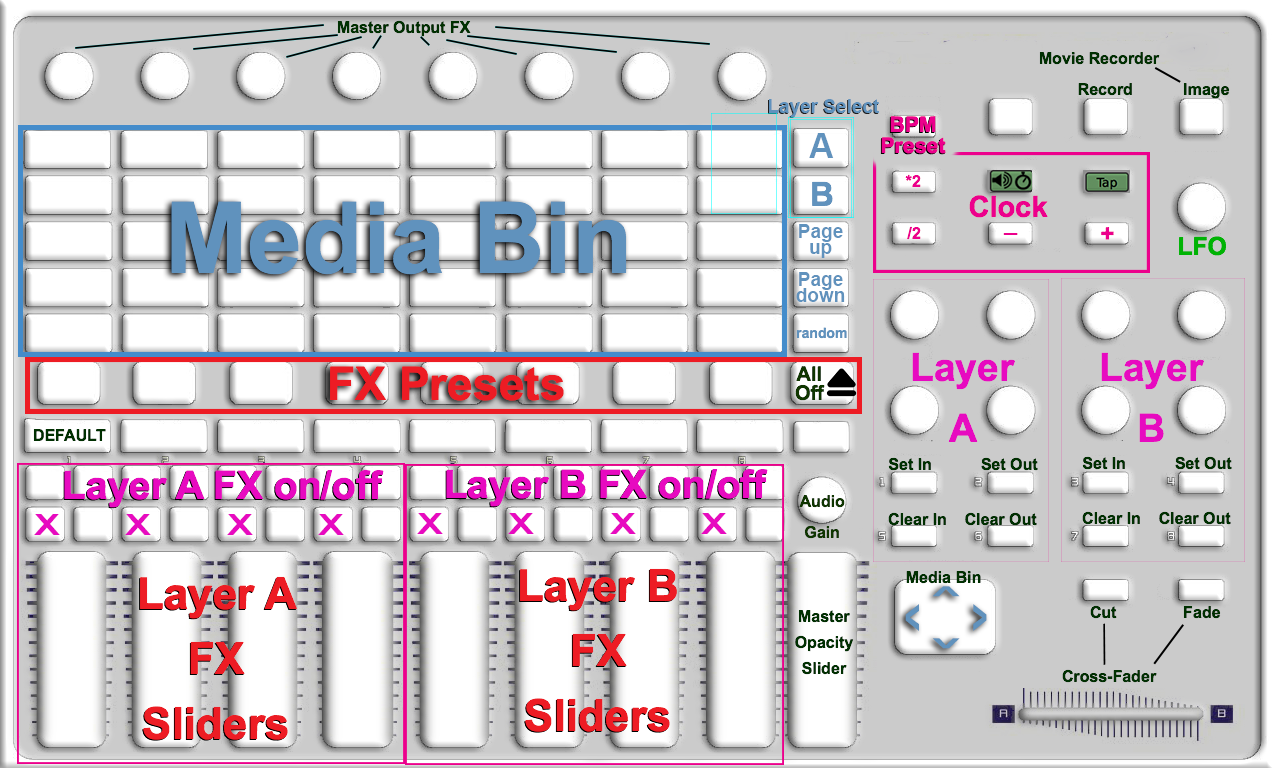
The Master output FX are turned on and off by the top 8 rotary knobs. The first vertical slider on the right side of the controller labeled “MASTER” controls the master opacity. If it is all the way down, your screen output will be black. You can change this later to preference or disable it entirely.
Selecting clips for both layers A and B:
Both layers use the same 40 RGB button grid to trigger clips. To switch between Layer A and B, when selecting clips — use the first two buttons on the top right side of the grid under the label “SCENE LAUNCH” They will light up when they are selected. Top goes sets destination for Layer A, bottom for Layer B. The two buttons beneath that (Green) are page up / page down buttons for moving through your media bin. They are also linked to your Audio Analysis Filter 3 and will flicker based on your computers mic peaking. Beneath that (Yellow) is a random clip trigger.
To trigger to the next clip in the media or move up and down the media bin, redirect your eyes to the “BANK SELECT” 4 button arrow keys.
The rest of the buttons should be self explanatory based on the image above, or you can read through the “User Notes” built into the template which explains all of this and more.
Template Tip!
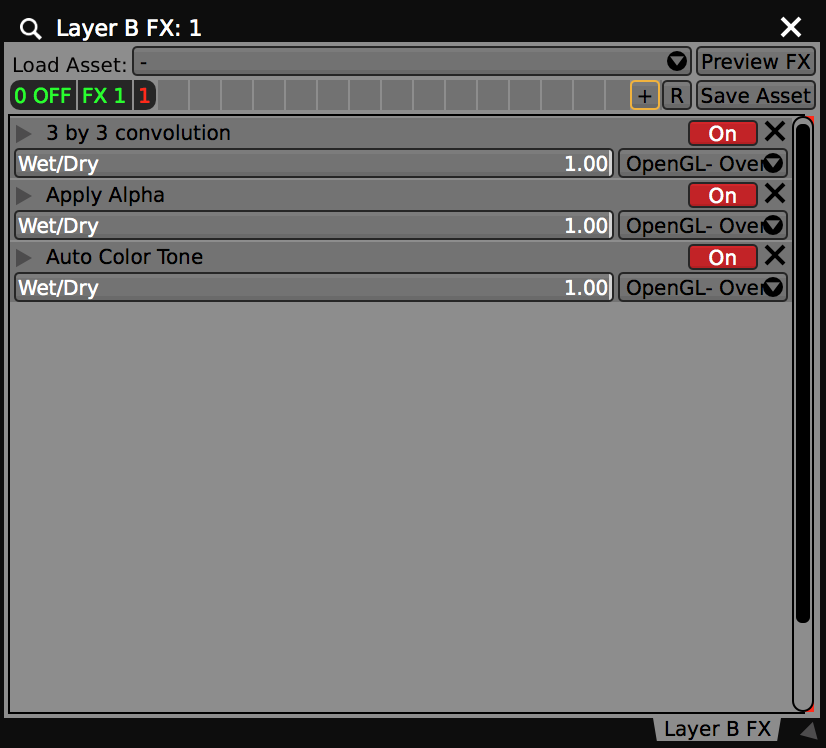
If you’re adding new FX to your A and B layer FX chains, make sure to save them as a preset by clicking the + in the top of the FX window. This will save your FX chain and you can assign it to a new FX preset button. You can always disable the FX layers MIDI triggers in your project until you build out the template more to your liking!
Here’s a brief overview video of this template: